Month: June 2024

New SSD Not Showing Up in Windows 10 – Quick Fixes

Having trouble getting your new SSD to show up in Windows 10? Here are some quick fixes to help resolve the issue.

July 2024: Enhance your computer’s performance and eliminate errors with this cutting-edge optimization software. Download it at this link

  1. Click here to download and install the optimization software.
  2. Initiate a comprehensive system scan.
  3. Allow the software to automatically fix and repair your system.

Proper Installation Check

To ensure that your new SSD is properly installed and recognized in Windows 10, start by checking the physical connections. Verify that the SSD is securely connected to the motherboard via SATA or M.2 connection. If necessary, double-check the power and data cables to ensure they are properly plugged in.

Next, access the BIOS to confirm that the SSD is detected by the system. Restart your computer and enter the BIOS menu by pressing the designated key (usually F2, F10, or Del). Look for the SSD in the list of connected drives. If it is not showing up, there may be an issue with the installation or compatibility.

If the SSD is properly connected and recognized in the BIOS but still not showing up in Windows 10, you may need to initialize and format the drive through Disk Management. Open Disk Management by right-clicking on the Start menu and selecting “Disk Management.” Locate the new SSD, right-click on it, and choose “Initialize Disk.” Then, right-click again and select “New Simple Volume” to format the drive.

After initializing and formatting the SSD, it should appear in File Explorer and be ready for use. If you encounter any errors or issues during this process, consider seeking further assistance from a professional or the manufacturer.

BIOS Configuration Adjustments

Adjustment Description
Check SATA Port Configuration Make sure the SATA port where the SSD is connected is enabled in the BIOS settings.
Update BIOS Firmware Check if there is a newer version of the BIOS firmware available for your motherboard and update it if necessary.
Reset BIOS Settings Reset the BIOS settings to default and then try detecting the SSD again.
Enable AHCI Mode Ensure that the SATA controller is set to AHCI mode in the BIOS settings for better compatibility with SSDs.

SSD Initialization Process

To initialize a new SSD that is not showing up in Windows 10, you can follow these quick fixes. First, make sure the SSD is properly connected to your computer. Then, open Disk Management by pressing Windows key + X and selecting Disk Management from the menu that pops up.

In Disk Management, you should see the new SSD listed as a drive without a drive letter. Right-click on the SSD and select Initialize Disk. Choose the appropriate partition style (either MBR or GPT) and click OK.

Next, right-click on the unallocated space on the SSD and select New Simple Volume. Follow the on-screen instructions to create a new partition and assign a drive letter to the SSD. Once the process is complete, the new SSD should now show up in Windows 10 File Explorer.

If the SSD still does not show up, try updating the SSD drivers or checking for any firmware updates from the manufacturer’s website. You can also try connecting the SSD to a different computer to see if it is recognized there.

Assigning or Changing Drive Letter

Drive letter assignment screen

To assign or change the drive letter of your new SSD in Windows 10:

First, right-click on the Windows icon in the bottom left corner of your screen and select “Disk Management.”

Locate your new SSD in the list of drives. Right-click on it and choose “Change Drive Letter and Paths.”

Click on “Change” and select a new drive letter from the dropdown menu.

Click “OK” to confirm the change. Your new SSD should now appear with the assigned drive letter in Windows 10.

If your new SSD is still not showing up, you may need to format the drive. Right-click on the SSD in Disk Management and select “Format.” Follow the on-screen instructions to format the drive and assign a drive letter.

After formatting, your new SSD should be visible in Windows 10 with the assigned drive letter.

Format the SSD

SSD formatting screen

  • Open Disk Management by right-clicking on the Start menu and selecting “Disk Management.”
  • Locate the SSD in the list of drives. It may show up as unallocated or without a drive letter.
  • Right-click on the SSD and select “Format.”
  • Choose a File System (NTFS is recommended) and assign a Drive Letter.
  • Click OK to format the SSD.

Update Disk Drivers

Update Disk Drivers: If your new SSD isn’t showing up in Windows 10, it may be due to outdated disk drivers. To fix this issue, you need to update your disk drivers. To do this, go to the Device Manager by right-clicking on the Windows icon and selecting “Device Manager. ” Look for the disk drives section and expand it. Right-click on your SSD and select “Update driver.

” Choose to search automatically for updated driver software. If Windows finds an updated driver, follow the on-screen instructions to install it. After updating the driver, restart your computer to see if the SSD is now recognized. If it still isn’t showing up, you may need to try other troubleshooting steps.

Troubleshoot Hardware and Device

If your new SSD is not showing up in Windows 10, there are a few quick fixes you can try. First, check the connections to ensure that the SSD is properly installed and connected to the motherboard. If everything looks good, you may need to initialize the SSD in Disk Management.

To do this, right-click on the Windows Start menu and select “Disk Management.” Look for the new SSD in the list of drives. If it appears as unallocated, right-click on it and select “Initialize Disk.” Follow the on-screen instructions to complete the process.

If the SSD still does not show up, you may need to update the device driver. Right-click on the Windows Start menu and select “Device Manager.” Look for the SSD under “Disk drives.” Right-click on it and select “Update driver.” Follow the prompts to search for updated drivers online.

If none of these steps work, there may be an issue with the SSD itself. You can try connecting the SSD to a different computer to see if it is recognized there. If not, you may need to contact the manufacturer for further assistance.

Data Recovery Solutions

If your new SSD is not showing up in Windows 10, there are a few quick fixes you can try. First, check if the drive is properly connected to your computer and ensure that it is powered on. Next, open Disk Management by right-clicking on the Windows Start button and selecting Disk Management.

In Disk Management, look for your SSD. If it is listed as unallocated space, you will need to initialize the disk and create a new volume. Right-click on the SSD and select “Initialize Disk,” then follow the prompts to create a new volume.

If your SSD is not showing up at all in Disk Management, try connecting it to a different SATA port or using a different SATA cable. It is also possible that the SSD is not compatible with your system or may be defective.

Lastly, check for any driver updates or firmware updates for your SSD. You can usually find these on the manufacturer’s website.

Avoiding Future SSD Detection Issues

To avoid future SSD detection issues in Windows 10, ensure that the SSD is properly connected to the computer. Check the cables and connections to make sure everything is secure. Update the SSD firmware to the latest version to ensure compatibility with Windows 10.

If the SSD is not showing up in Windows 10, check Disk Management to see if the drive is recognized but not assigned a drive letter. Assign a drive letter to the SSD if it is not already done.

Check the BIOS settings to make sure the SSD is detected by the system. If the SSD is not showing up, enable AHCI mode in the BIOS settings.

If the SSD is still not showing up, try connecting it to a different SATA port on the motherboard. Sometimes, a faulty SATA port can cause detection issues.

F.A.Qs

How do I get my PC to recognize a new SSD?

To get your PC to recognize a new SSD, you need to initialize the drive. This can be done by selecting Disk Management from the list after pressing Windows Key + X, and then locating the new drive. Look for it by the drive letter or capacity to find it.

Why is my new SSD not appearing?

Your new SSD may not be appearing because it needs to be initialized or formatted to a supported file system. Outdated SSD drivers can also cause the Windows operating system to not recognize the SSD.

How to activate SSD in BIOS?

To activate an SSD in BIOS, you need to access the boot order or boot priority settings. Look for a section labeled “Boot” or “Boot Order” and set your internal SSD as the first boot device. This will prompt the system to boot from the SSD before other sources.

How to enable a new SSD?

To enable a new SSD, you can use Disk Management in Windows 10. Simply right-click on the Start icon on your desktop, select “Disk Management”, and follow the prompts to initialize the SSD.

Samsung Galaxy Tab 2 not charging – How to fix it

Having trouble getting your Samsung Galaxy Tab 2 to charge? Here are some simple solutions to fix the issue.

July 2024: Enhance your computer’s performance and eliminate errors with this cutting-edge optimization software. Download it at this link

  1. Click here to download and install the optimization software.
  2. Initiate a comprehensive system scan.
  3. Allow the software to automatically fix and repair your system.

Restarting and Checking Connections

If your Samsung Galaxy Tab 2 is not charging, the first step is to restart the device. This can sometimes resolve any software glitches that may be causing the issue. Hold down the power button until you see the option to restart, then select restart.

Once you have restarted the device, it’s important to check the connections. Make sure the battery charger is properly plugged into both the wall outlet and the tablet. Try using a different USB cable or power adapter to see if that solves the problem.

If the connections appear to be fine, check for any signs of corrosion or moisture in the charging port. Even small amounts of moisture or corrosion can prevent the device from charging properly. Use a small brush or cotton swab to clean out the charging port.

It’s also a good idea to clear the cache on your Samsung Galaxy Tab 2. This can help to resolve any software issues that may be causing the charging problem. Go to Settings > Apps > All Apps, then select the app you want to clear the cache for.

If you have tried all of these steps and your Samsung Galaxy Tab 2 is still not charging, it may be time to contact Samsung for further assistance. They may be able to provide you with additional troubleshooting tips or recommend that you bring the device in for repair.

Inspecting and Cleaning the Charging Port

  • Check for debris or dust:
    • Use a flashlight to look inside the charging port for any visible dirt, lint, or debris.
    • Gently blow into the port or use a can of compressed air to remove any particles.
  • Use a cotton swab:
    • Dip a cotton swab in rubbing alcohol.
    • Gently clean the inside of the charging port, being careful not to damage the metal connectors.
    • Allow the port to dry completely before attempting to charge your device.
  • Inspect for physical damage:
    • Check for any bent or broken pins inside the charging port.
    • If you notice any damage, consider taking your device to a professional for repair.

Updating Software and Resetting

To fix the issue of a Samsung Galaxy Tab 2 not charging, try updating the software and resetting the device.

First, check for any available software updates for your tablet. Sometimes, outdated software can cause charging problems.

If updating the software doesn’t work, try resetting the device. This can help to resolve any software glitches that may be preventing the tablet from charging properly.

To reset your Samsung Galaxy Tab 2, press and hold the power button and the volume down button simultaneously for about 10 seconds. This will force the device to restart and may fix the charging issue.

If the problem persists, it may be worth checking the battery charger and USB cable for any damage. A faulty charger or cable could be the cause of the charging problem.

Additionally, clearing the cache on your device may help to resolve any charging issues. To do this, go to Settings, then Apps, and select the app you want to clear the cache for.

If none of these solutions work, it may be time to contact Samsung support or visit a repair center for further assistance. It’s possible that there could be a hardware issue causing the charging problem.

Seeking Professional Repair or Replacement

If you have tried all the troubleshooting steps and your Samsung Galaxy Tab 2 is still not charging, it may be time to seek professional repair or replacement options.

Contact Samsung Support: Reach out to Samsung customer support for guidance on repairing or replacing your device. They may be able to provide you with additional troubleshooting steps or offer a repair service.

Visit a Samsung Service Center: If your device is still under warranty, consider visiting a Samsung service center for repair. They will be able to diagnose the issue and provide you with a solution.

Consider a Professional Repair Service: If your device is no longer under warranty, you can look for professional repair services in your area. Make sure to choose a reputable service provider with experience in repairing Samsung devices.

F.A.Q.

How do I fix my Samsung Galaxy Tab 2 not charging?

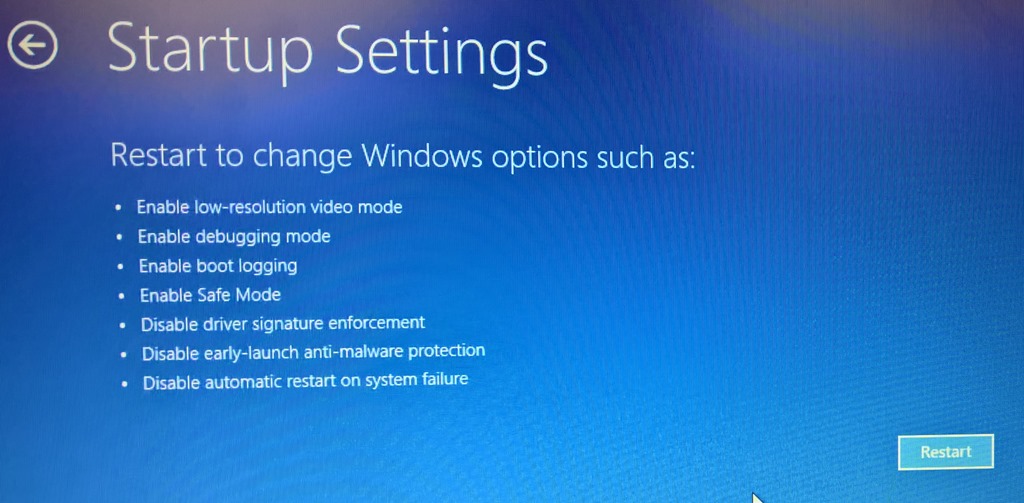
To fix your Samsung Galaxy Tab 2 not charging, try restarting the device, checking the outlet charger and USB cable, inspecting the tablet’s charging port, looking for water damage, checking for software updates, restarting the tablet in Safe Mode, and replacing the battery if necessary.

Why does my Galaxy Tab s2 not charge?

Your Galaxy Tab s2 may not be charging due to a faulty cable, charging block, charger cable, or adapter, dirt or debris in the charging port, or third-party apps interrupting the charging process.

How do I revive a dead Samsung tablet?

To revive a dead Samsung tablet, you can try restarting the device by pressing and holding the Power button and the Volume down button simultaneously for more than 7 seconds. If that doesn’t work, press and hold the Power button for up to two minutes to shut down the device.

Outlook 2016 Won’t Open: Fix Error in Windows 10

Having trouble opening Outlook 2016 on your Windows 10 computer? Learn how to fix this error in a few simple steps.

July 2024: Enhance your computer’s performance and eliminate errors with this cutting-edge optimization software. Download it at this link

  1. Click here to download and install the optimization software.
  2. Initiate a comprehensive system scan.
  3. Allow the software to automatically fix and repair your system.

Common Reasons for Startup Issues

Outlook error message

  1. Check for Windows Updates:

    • Open Settings by pressing Windows key + I.
    • Go to Update & Security and click on Check for updates.
    • Install any available updates and restart your computer.
  2. Disable Add-ins:

    • Open Outlook in Safe Mode by holding down Ctrl while opening the application.
    • Click on File > Options > Add-ins.
    • Disable all add-ins and restart Outlook normally.
  3. Repair Office Installation:

    • Open Control Panel and go to Programs > Programs and Features.
    • Find Microsoft Office in the list and click on Change.
    • Select Repair and follow the on-screen instructions.
  4. Create a New Outlook Profile:

    • Press Windows key + R to open the Run dialog box.
    • Type outlook.exe /profiles and click OK.
    • Create a new profile and set it as the default profile.
  5. Check for Corrupt Outlook Data Files:

    • Press Windows key + R to open the Run dialog box.
    • Type control.exe /name Microsoft.Mail and click OK.
    • Click on Data Files and check for any corrupt files. Repair or recreate them if necessary.

Fixing Outlook on Windows

If Outlook 2016 won’t open in Windows 10, there are a few steps you can take to fix the error. First, try restarting your computer to see if that resolves the issue. If not, you can repair the Outlook program by going to the Control Panel, selecting “Programs and Features,” then right-clicking on Microsoft Outlook and choosing “Repair.”

If repairing Outlook doesn’t work, you can try running Outlook in safe mode to see if a third-party plugin is causing the problem. To do this, hold down the Ctrl key while opening Outlook. If Outlook opens in safe mode, you can disable any plugins that may be causing the issue.

Another option is to create a new Outlook profile. To do this, go to the Control Panel, click on “Mail,” then click on “Show Profiles.” Click on “Add” to create a new profile and set it as the default.

If none of these solutions work, you may need to reinstall Outlook. Uninstall the program through the Control Panel, then download and reinstall it from the Microsoft website.

Fixing Outlook on Mac

If Outlook 2016 won’t open on Windows 10, try restarting your computer first to see if that resolves the issue. If that doesn’t work, try repairing the Outlook application through the Control Panel.

If the problem persists, check for Windows updates and ensure that your operating system is up to date. You can also try running a malware scan to rule out any potential security threats.

Another solution could be to recreate your Outlook profile by going to the Control Panel and setting up a new profile. This can sometimes resolve any underlying issues with the current profile.

If all else fails, you may need to reinstall Outlook 2016 to fix any corrupted files or settings causing the program to not open properly.

Diagnosing with Safe Mode

Safe Mode in Windows 10

To diagnose and fix errors in Outlook 2016 not opening on Windows 10, try starting the application in Safe Mode. This helps identify if any add-ins or extensions are causing the issue.

To open Outlook in Safe Mode:
1. Press the Windows key + R to open the Run dialog box.
2. Type “outlook.exe /safe” and press Enter.
3. If Outlook opens successfully in Safe Mode, the problem may be related to an add-in or extension.

To disable add-ins in Outlook:
1. Go to File in Outlook.
2. Click on Options, then Add-ins.
3. Select COM Add-ins from the dropdown menu and click Go.
4. Uncheck the boxes next to any add-ins you want to disable and click OK.

If Outlook still won’t open:
1. Check for any pending Windows updates and install them.
2. Run a full antivirus scan to rule out any malware issues.
3. Repair your Outlook data files using the Inbox Repair Tool (scanpst.exe).

Profile Adjustments for Access

Adjusting your profile settings can sometimes resolve issues with Outlook 2016 not opening on Windows 10. To do this, follow these steps:

First, open Control Panel by searching for it in the Start menu.

Next, locate and click on the “Mail” option.

In the Mail Setup window, click on “Show Profiles.”

Select your Outlook profile and click on “Properties.”

Navigate to the “General” tab and check the box that says “Always use this profile.”

Click “Apply” and then “OK” to save the changes.

After making these adjustments, try opening Outlook 2016 again to see if the error has been resolved.

If the issue persists, you may need to consider other troubleshooting steps or seek further assistance.

Repairing Outlook Data Files

If you are facing issues with Outlook 2016 not opening in Windows 10, it may be due to corrupted data files. To fix this error, you can repair the Outlook data files by following these steps:

Step 1: Close Outlook if it is open and go to the Control Panel on your Windows 10 computer.

Step 2: In the Control Panel, search for “Mail” and click on it to open the Mail Setup – Outlook window.

Step 3: In the Mail Setup window, click on the “Data Files” button.

Step 4: Select the Outlook data file that you want to repair and then click on the “Settings” button.

Step 5: In the Outlook Data File window, click on the “Compact Now” button to start the repair process.

Step 6: Once the repair process is complete, close all windows and restart Outlook to check if the error has been fixed.

Resolving Compatibility Mode Issues

Compatibility mode settings in Outlook 2016

To resolve compatibility mode issues in Outlook 2016 not opening on Windows 10, follow these steps:

1. Check the Compatibility Mode: Right-click on the Outlook shortcut icon on your desktop or in the Start menu. Go to Properties, then the Compatibility tab. Ensure that the “Run this program in compatibility mode for” checkbox is unchecked.

2. Update Windows: Make sure your Windows 10 operating system is up to date by running Windows Update. This can often fix compatibility issues with Outlook 2016.

3. Disable Compatibility Mode in Registry: Press Windows key + R to open the Run dialog box. Type “regedit” and hit Enter. Navigate to HKEY_CURRENT_USER\Software\Microsoft\Office\16.0\Outlook\Security. Look for a DWORD value called “EnableADAL” and set it to 0.

Make sure to restart your computer after making these changes to see if Outlook 2016 opens without any error. If the issue persists, consider seeking further troubleshooting assistance.

Managing Outlook App Data and Permissions

Outlook App permissions settings

To manage Outlook App data and permissions in Windows 10, you can start by checking if the Outlook app has the necessary permissions to access your data. Go to the Settings app, select Privacy, and then click on App permissions. Make sure that Outlook has permission to access your email, contacts, calendar, and other relevant data.

If Outlook 2016 won’t open, you may also need to repair the Outlook data file. Go to the Control Panel, select Programs and Features, then right-click on Microsoft Office 365 and choose Change. Select Quick Repair and follow the on-screen instructions to repair the Outlook data file.

Another option is to reset the Outlook app settings. Press the Windows key + R to open the Run dialog box, type outlook.exe /safe, and press Enter. This will open Outlook in Safe Mode, where you can reset the app settings.

If none of these solutions work, you may need to uninstall and reinstall Outlook. Go to the Control Panel, select Programs and Features, right-click on Microsoft Office 365, and choose Uninstall. Then, download and reinstall Outlook from the Microsoft website.

Preventing Future Access Problems

To prevent future access problems with Outlook 2016 in Windows 10, it’s important to regularly update both the operating system and the application itself. Make sure to regularly check for Windows updates in the Control Panel and install them promptly. This will help ensure that any compatibility issues or bugs are addressed to prevent future errors.

Additionally, if you are using Microsoft Exchange Server with Outlook, make sure that the server is up-to-date and running smoothly to prevent any disruptions in email access. Taking proactive measures to maintain the server can help prevent issues with accessing your email in the future.

It’s also important to regularly scan your computer for viruses and malware that could potentially cause errors in Outlook. Run a full system scan using your preferred antivirus software to ensure that your computer is clean and free from any malicious software. This will help prevent any future access problems related to computer viruses.

FAQ

How do I fix Outlook 2016 not opening?

To fix Outlook 2016 not opening, try restarting your computer, opening Outlook in Safe Mode, checking for Windows updates, scanning for malware, repairing Outlook, repairing your Outlook profile, repairing your Outlook data files, and resetting the navigation pane.

Why is Outlook 2016 not responding?

Outlook 2016 is not responding because the Outlook data files may have become corrupted or damaged, the installed antivirus software is outdated or conflicts with Outlook, the user profile has become corrupted, or another program is conflicting with Outlook.

How do I fix Outlook Office 2016?

To fix Outlook Office 2016, you can navigate to File, then Account Settings > Account Settings. From there, select your email account and choose Repair. Follow the prompts in the wizard and restart Outlook once completed.

Keyboard Missing Keystrokes on Laptop

Have you ever experienced missing keystrokes while typing on your laptop keyboard?

July 2024: Enhance your computer’s performance and eliminate errors with this cutting-edge optimization software. Download it at this link

  1. Click here to download and install the optimization software.
  2. Initiate a comprehensive system scan.
  3. Allow the software to automatically fix and repair your system.

Recognizing Software Vulnerabilities

Another possible reason for missing keystrokes is a faulty connection, such as a loose USB cable or a damaged PS/2 port. To troubleshoot this issue, try using a different port or cable to see if the problem persists. It’s also important to check for any driver updates that may address the missing keystrokes.

If the problem continues, it could be a software issue related to the operating system kernel. Check for any recent updates or patches that may have caused the problem. It’s also a good idea to scan for any malware that could be affecting the keyboard’s functionality.

Enhancing Security Measures

If the issue persists, consider using an external keyboard to see if the problem lies with the laptop’s hardware. This can help determine if the missing keystrokes are a result of a faulty keyboard or a deeper issue within the laptop itself. Additionally, running a diagnostic test on the keyboard using keyboard testing software can help identify any underlying problems.

Regularly maintaining and cleaning the keyboard can also prevent missing keystrokes. Dust and debris can accumulate over time, affecting the performance of the keys. Use compressed air to clean out any debris and ensure the keys are functioning correctly. By taking these steps, you can enhance the security measures on your laptop and ensure that all keystrokes are accurately registered.

Addressing Privacy Concerns

If your laptop keyboard is missing keystrokes, it may be due to privacy concerns. Make sure there are no foreign objects stuck under the keys that could be causing the issue. Check for any software updates or drivers that may need to be installed to fix the problem.

Additionally, try using an external keyboard to see if the issue persists. This can help determine if the problem lies with the laptop keyboard itself or with the software. If the external keyboard works fine, it may be time to consider replacing the laptop keyboard.

It’s also a good idea to check for any malware or viruses on your laptop that could be affecting the keyboard’s functionality. Run a full system scan using a trusted antivirus program to ensure your device is clean and secure.

If the problem continues, consider reaching out to the manufacturer or a professional technician for further assistance. They may be able to diagnose the issue and provide a solution to address the privacy concerns affecting your laptop’s keyboard.

F.A.Qs

Why is my keyboard missing strokes?

Your keyboard may be missing strokes if certain accessibility options, such as sticky keys, filter keys, or toggle keys, have been enabled. Make sure to check these settings and disable them if needed.

Why is my laptop keyboard not registering keystrokes sometimes?

Your laptop keyboard may not be registering keystrokes sometimes due to debris or crumbs that have gotten stuck under the keys. Try holding your laptop upside down and giving it a good shake to dislodge any obstructions.

Why do I keep missing keys on my keyboard?

It sounds like you may have a problem with the keyboard itself causing the missing keys. Try reseating the ribbon cable that connects the keyboard to the motherboard to see if that helps. If the issue persists, you may need to replace the keyboard.

How do you fix keystrokes?

To fix keystrokes, you can try setting up the on-screen keyboard, restarting your device, turning off power-saving settings, cleaning your physical keyboard, disabling filter and sticky keys, updating drivers, and disabling fast start-up if you are using Windows 10.

Logitech Driver Error Fix Windows 10 Pro MX Master Mouse Update

Having trouble fixing a Logitech driver error for your Windows 10 Pro MX Master Mouse update?

July 2024: Enhance your computer’s performance and eliminate errors with this cutting-edge optimization software. Download it at this link

  1. Click here to download and install the optimization software.
  2. Initiate a comprehensive system scan.
  3. Allow the software to automatically fix and repair your system.

Resetting Wireless Connection and Checking Power

Wireless router and power outlet

To reset the wireless connection on your Logitech MX Master Mouse in Windows 10 Pro, start by checking the power of your mouse. Ensure that the battery is charged or replace it with a fresh one. Next, make sure the dongle is securely plugged into a USB port on your computer.

Reset the wireless connection by following these steps:
1. Turn off the mouse.
2. Press and hold the connect button on the bottom of the mouse for a few seconds.
3. Turn the mouse back on.

If the issue persists, try restarting your computer and the mouse. Additionally, check for any Windows updates that may be available for your operating system.

Managing Device Drivers and Firmware Updates

Logitech device drivers and firmware updates

Device Driver/Firmware Update Steps to Manage
Logitech MX Master Mouse Logitech Options Software 1. Download Logitech Options Software from Logitech’s official website
2. Install the software on your Windows 10 Pro PC
3. Connect the MX Master Mouse to your PC
4. Open Logitech Options software and check for driver/firmware updates
5. Follow the on-screen prompts to update the device drivers and firmware

Diagnosing and Resolving Hardware Issues

To diagnose and resolve hardware issues with your Logitech MX Master Mouse on Windows 10 Pro, there are a few steps you can take. First, ensure that the mouse is properly connected to your computer via USB or wireless network. Check the battery levels and replace them if needed.

If the mouse is still not working, try updating the device driver through the Device Manager: Right-click on the Windows key and select Device Manager. Locate the Logitech MX Master Mouse under “Mice and other pointing devices,” right-click on it, and select “Update driver.”

If updating the driver does not solve the issue, you may need to uninstall the current driver and reinstall it. Right-click on the Logitech MX Master Mouse in Device Manager and select “Uninstall device.” Then, download the latest driver from the Logitech website and install it.

If the problem persists, try performing a hardware reset on the mouse. This can usually be done by pressing and holding down the reset button on the bottom of the mouse for a few seconds. This should reset the mouse to its default settings and may resolve any connectivity issues.

Utilizing Automatic Update Tools for Efficiency

To efficiently update the Logitech MX Master Mouse driver on Windows 10 Pro, utilize automatic update tools. These tools can streamline the process and ensure that your mouse is operating at its best.

First, ensure that your computer is connected to a stable wireless network to download the necessary updates.

Next, navigate to the device manager by pressing the Windows key + X and selecting Device Manager from the menu.

Locate the Logitech MX Master Mouse under the “Mice and other pointing devices” section, right-click on it, and select “Update driver.”

Choose the option to search automatically for updated driver software, and Windows will download and install the latest driver for your mouse.

By utilizing automatic update tools, you can easily fix any driver errors with your Logitech MX Master Mouse on Windows 10 Pro without the need for manual troubleshooting.

FAQs

How do I fix my Logitech mouse driver error?

To fix your Logitech mouse driver error, you can try turning the mouse on and off, accessing the Device Manager through the Windows key, locating the Logitech Mouse, and searching for drivers automatically. Be sure to close the Driver Update window once completed.

Why is there a driver error on my mouse?

There may be a driver error on your mouse if your computer’s drivers are out of date. Updating your drivers with quality software can help revive your mouse and fix any issues with your USB ports.

Why is my Logitech not working?

Your Logitech may not be working because the wireless receiver and batteries need to be removed and then reconnected. This can help resolve any issues with the mouse not working properly.

Why is my computer not recognizing my Logitech wireless keyboard?

Your computer may not be recognizing your Logitech wireless keyboard due to a variety of reasons. Some possible solutions include reconnecting the keyboard, updating your device’s Bluetooth drivers, and clearing unnecessary paired devices. If these steps don’t work, you can also try resetting the keyboard, checking for interference, and updating its firmware.

Why Facebook Not Working on Chrome: Fix Loading Issues

Have you been experiencing issues with Facebook not loading properly on Chrome? Let’s explore some possible solutions to fix this problem.

July 2024: Enhance your computer’s performance and eliminate errors with this cutting-edge optimization software. Download it at this link

  1. Click here to download and install the optimization software.
  2. Initiate a comprehensive system scan.
  3. Allow the software to automatically fix and repair your system.

Restart or Update Chrome and Device

To fix loading issues with Facebook on Chrome, try restarting or updating both the browser and your device. Sometimes a simple restart can solve the problem by clearing out any temporary glitches.

If that doesn’t work, make sure Chrome is up to date by checking for any available updates. This can help ensure compatibility with Facebook and improve performance.

If the issue persists, try clearing the cache and cookies in Chrome. This can help remove any stored data that may be causing conflicts with Facebook’s loading process.

If the problem continues, consider disabling any browser extensions that may be interfering with Facebook’s functionality.

Lastly, ensure your operating system is also up to date, as this can affect how Chrome interacts with Facebook.

Clear Cache and Check Internet Connection

To fix loading issues on Facebook not working on Chrome, start by clearing the cache on your browser. This will remove any stored data that may be causing the problem. Next, check your internet connection to ensure it is stable and working properly. If the issue persists, try disabling any browser extensions that could be interfering with Facebook’s functionality. Additionally, make sure your operating system is up to date as outdated software can cause compatibility issues.

If these steps do not resolve the problem, consider seeking feedback from other users or contacting Facebook support for further assistance.

Use Incognito Mode or Try a Different Browser

  • Open a new Incognito window in Chrome by pressing Ctrl+Shift+N.
  • Log in to Facebook in Incognito mode and see if it loads correctly.
  • If Facebook loads in Incognito mode, try clearing your browser cache and cookies in normal browsing mode.

Try a Different Browser

  • Download and install a different browser such as Firefox or Safari.
  • Log in to Facebook using the new browser and see if it loads without any issues.
  • If Facebook works in the new browser, there may be an issue with Chrome that needs to be resolved.

Disable Extensions or Reset Browser Settings

To fix loading issues on Facebook in Chrome, try disabling extensions or resetting browser settings.

If you suspect that an extension is causing the problem, you can disable them by going to the menu in Chrome and selecting “More tools” then “Extensions.” From there, you can toggle off each extension to see if that resolves the issue.

If disabling extensions doesn’t work, you can reset your browser settings by going to the Chrome menu, selecting “Settings,” scrolling down to “Advanced,” and then clicking on “Reset settings.” This will revert your browser back to its original state, potentially fixing any issues causing Facebook not to load properly.

After trying these steps, reload Facebook to see if the problem has been resolved. If not, consider clearing your browser’s cache or providing feedback to the Facebook team to report the issue.

Frequently Asked Questions

Why is my Facebook not working in Chrome?

Your Facebook may not be working in Chrome because your browser’s cache needs to be cleared. This simple step can often resolve connection issues with Facebook.

Why is Facebook not working?

Facebook is not working because there may be a technical issue with your current browser. Try refreshing the page, closing and reopening it, clearing your cache, or using a different browser to access Facebook.

Is there something wrong with Facebook right now?

Facebook does not currently have any reported issues according to user reports.

How do I open Facebook on Chrome?

To open Facebook on Chrome, you need to launch the Google Chrome web browser on your laptop or PC and enter facebook.com in the URL section at the top.

Samsung Gear S2 Keeps Rebooting Loop

I experienced the frustrating issue of my Samsung Gear S2 constantly rebooting and getting stuck in a loop.

July 2024: Enhance your computer’s performance and eliminate errors with this cutting-edge optimization software. Download it at this link

  1. Click here to download and install the optimization software.
  2. Initiate a comprehensive system scan.
  3. Allow the software to automatically fix and repair your system.

Removing the Battery

Samsung Gear S2 battery icon

To remove the battery on your Samsung Gear S2 to address the rebooting loop issue, follow these steps:

1. Turn off the device by pressing and holding the power button until the power off menu appears.

2. Once the device is powered off, locate the small groove on the back cover of the Gear S2.

3. Use a small tool, such as a SIM card ejector tool or a paperclip, to gently pry open the back cover of the device.

4. Carefully remove the back cover to reveal the battery inside the Gear S2.

5. Use a plastic spudger or a similar tool to disconnect the battery connector from the device.

6. After disconnecting the battery, wait for a few minutes before reconnecting it to the Gear S2.

7. Reattach the back cover of the device by gently pressing it back into place until it clicks securely.

8. Power on the Gear S2 and check if the rebooting loop issue has been resolved.

Initiating Safe Mode

To initiate Safe Mode on your Samsung Gear S2 to troubleshoot the rebooting loop issue, follow these steps:

1. Power off your smartwatch by pressing and holding the power button until the power menu appears.
2. Tap and hold the “Power off” option on the screen until the “Reboot to Safe mode” prompt appears.
3. Tap “OK” to confirm and boot your Gear S2 into Safe Mode.
4. In Safe Mode, your device will only run essential apps and functions, allowing you to diagnose any issues causing the rebooting loop.
5. Check for any recently installed apps or updates that may be causing the problem.
6. Remove any suspicious apps or perform a factory reset if necessary to resolve the issue.
7. To exit Safe Mode, simply restart your Gear S2 as you normally would.

Engaging Recovery Mode

Gear S2 recovery mode

  • Restart the Device: Turn off the Samsung Gear S2 and then turn it back on to see if that resolves the rebooting loop.
  • Update Software: Check for any software updates and install them to fix any bugs that may be causing the issue.
  • Reset to Factory Settings: If all else fails, reset the device to its original factory settings to see if that resolves the problem.
  • Contact Samsung Support: If the issue persists, reach out to Samsung customer support for further assistance and troubleshooting options.

Resetting to Factory Settings

Samsung Gear S2 factory reset option.

If your Samsung Gear S2 keeps getting stuck in a rebooting loop, performing a factory reset may help resolve the issue.

To reset your Gear S2 to factory settings, go to the Settings menu on the smartwatch. Look for the “Reset Gear” option and select it. Confirm that you want to reset the device to its original settings.

Keep in mind that this process will erase all data on your Gear S2, so make sure to back up any important information beforehand.

After the reset is complete, your Gear S2 should no longer be stuck in a rebooting loop. This should help resolve any software issues that may have been causing the problem.

If the rebooting loop persists even after performing a factory reset, it may be a hardware issue that requires professional assistance. Contact Samsung customer support or visit a service center for further help.

F.A.Q.

How do I get my Samsung watch out of a reboot loop?

To get your Samsung watch out of a reboot loop, you can try pressing and holding the Power key until “Rebooting” displays, then release the Power key and wait for the watch to reboot. Additionally, check for software updates and consider requesting service if the watch is damaged.

How do I stop my Samsung reboot loop?

To stop your Samsung reboot loop, try holding the phone’s combination button for 10 to 15 seconds until it vibrates or when you see the Samsung icon.

Why does my Galaxy Watch keep turning on and off?

Your Galaxy Watch may keep turning on and off due to a low battery, using the incorrect charger, outdated software, or corrupted third-party apps.

How to hard reset Galaxy Gear S2?

To hard reset a Galaxy Gear S2, press and hold the power button for a few seconds until the Samsung Galaxy Gear logo appears on the screen. Wait for the factory reset operation to be completed.

OBS Studio MSVCP140.dll missing fix

In my quest to resolve the OBS Studio MSVCP140.dll missing error, I discovered a simple fix that saved me a lot of time and frustration.

July 2024: Enhance your computer’s performance and eliminate errors with this cutting-edge optimization software. Download it at this link

  1. Click here to download and install the optimization software.
  2. Initiate a comprehensive system scan.
  3. Allow the software to automatically fix and repair your system.

Introduction to R1CH

To fix the MSVCP140. dll missing error in OBS Studio, you can try reinstalling the Visual C++ Redistributable package from Microsoft’s official website. First, download the package from Microsoft’s website. Then, run the installer and follow the on-screen instructions to complete the installation process.

This should replace any missing or corrupted system files, including the MSVCP140. dll file. After reinstalling the Visual C++ Redistributable package, restart your computer and launch OBS Studio to see if the issue has been resolved. If the problem persists, you may need to seek further assistance from OBS Studio forums or support resources.

Support with a One-Time Donation

  • Make a difference by supporting OBS Studio with a one-time donation.
  • Help sustain the development of OBS Studio.
  • Contribute to the ongoing improvement of OBS Studio.
  • Support the dedicated team behind OBS Studio.
  • Ensure that OBS Studio continues to provide high-quality streaming software.

Opt for Monthly Support

For a quick fix to the “MSVCP140. dll missing” error in OBS Studio, consider opting for monthly support. This can provide you with the necessary resources and expertise to resolve the issue efficiently. One option is to reach out to the OBS Studio community forums for assistance. By seeking help from experienced users and developers, you may be able to find a solution to the missing DLL problem.

Another option is to consult with a professional tech support service that specializes in troubleshooting software issues. With their guidance, you can quickly get OBS Studio up and running smoothly again.

Consider Yearly Contributions

Spreadsheet with columns for yearly contributions

Consider yearly contributions to support the ongoing development of OBS Studio, which can help ensure that issues like the MSVCP140. dll missing error are promptly addressed by the development team. By making a yearly contribution, you not only show your support for the software but also gain access to exclusive features and benefits. To fix the MSVCP140.

dll missing error, you can try re-installing the Microsoft Visual C++ Redistributable package or updating your Windows operating system to ensure all necessary files are present. Additionally, checking for updates to OBS Studio may also resolve the issue. Consider making a contribution today to help support the continued development of OBS Studio.

F.A.Q.

How to fix msvcp140.dll was not found?

To fix the error “msvcp140.dll was not found,” you can try repairing or reinstalling Microsoft Visual C++ 2015-2019 Redistributable from the Control Panel. If that doesn’t work, download and install the latest version from Microsoft’s website.

How to fix OBS.dll error?

To fix the OBS.dll error, you can try reinstalling the program. If that doesn’t work, you may need to contact your system administrator or the software vendor for further support.

What does code msvcp140.dll mean?

The code msvcp140.dll refers to a Microsoft C Dynamic Linked Library file that is essential for running certain Windows apps and games, particularly those developed using C++. If this file is missing, you may encounter an error message stating “the code execution cannot proceed because msvcp140.dll was not found.”

Windows 10 upgrade failed installation error fix

Having trouble with a failed Windows 10 upgrade installation error? Here’s how to fix it.

July 2024: Enhance your computer’s performance and eliminate errors with this cutting-edge optimization software. Download it at this link

  1. Click here to download and install the optimization software.
  2. Initiate a comprehensive system scan.
  3. Allow the software to automatically fix and repair your system.

Remove Peripheral Devices

USB cable unplugged

To fix a Windows 10 upgrade failed installation error, one common issue could be with peripheral devices connected to your computer. To troubleshoot this problem, remove all peripheral devices such as printers, scanners, headphones, and docking stations from your PC. Sometimes, conflicts with these devices can cause installation errors.

Once you have disconnected all external devices, try to reboot your computer in safe mode. This can help isolate the issue and allow you to proceed with the installation without any interference from third-party devices. To boot into safe mode, restart your computer and press the F8 key repeatedly until the Advanced Boot Options menu appears.

After entering safe mode, attempt to reinstall the Windows 10 upgrade. If the installation is successful, you can then reconnect your peripheral devices one by one to identify which one was causing the error. This process can help you pinpoint the specific device that was causing the installation problem.

If you continue to experience issues with the Windows 10 upgrade, you may need to update or reinstall the device drivers for your peripherals. Outdated or incompatible drivers can sometimes prevent new installations from completing successfully. You can update drivers through Device Manager in the Control Panel or by downloading the latest drivers from the manufacturer’s website.

Clear Attributes of Installation Folder

When troubleshooting a failed Windows 10 upgrade installation error, it is important to pay attention to the attributes of the installation folder. The installation folder is where all the necessary files are stored during the installation process and any issues within this folder can lead to errors.

Check the Attributes: Start by navigating to the installation folder using File Explorer. Right-click on the folder and select “Properties” from the context menu. Look for any attributes that might be causing the installation error, such as read-only status or permission restrictions.

Modify Attributes: If you find that the installation folder has the read-only attribute enabled, you will need to change it. Click on the checkbox next to “Read-only” to uncheck it and apply the changes. Make sure that all necessary permissions are granted to the folder to avoid any further errors.

Verify Contents: Double-check the contents of the installation folder to ensure that all the required files are present. If any files are missing or corrupted, you may need to re-download the installation files or use a different source to complete the upgrade process.

It is essential to keep the installation folder clean and free from any unnecessary files or folders that could interfere with the installation process.

Uninstall Language Packs

  • Press Windows key + I to open Settings
  • Click on Time & Language
  • Select Language from the left pane
  • Click on a language you want to remove
  • Click on Remove
  • Click on Yes to confirm
  • Repeat the process for other languages if needed

Rebuild Boot Configuration Data

If your Windows 10 upgrade installation has failed due to an error, one possible solution is to rebuild the Boot Configuration Data (BCD). This can help fix any issues related to booting up your system.

To rebuild the BCD, you’ll need to access the Command Prompt. You can do this by pressing the Windows key + X and selecting “Command Prompt (Admin)” from the menu.

Once in the Command Prompt, type the following command and press Enter: bootrec /rebuildbcd. This command will scan your system for installations compatible with Windows and add them to the BCD.

After running the command, restart your computer to see if the issue has been resolved. If the Windows 10 upgrade installation error persists, you may need to try other troubleshooting steps or seek further assistance from Microsoft support.

Perform a Clean Boot Installation

To fix a Windows 10 upgrade failed installation error, you can try performing a clean boot installation. This process helps eliminate software conflicts that may be causing the installation issue.

Here’s how to do it:

1. Press the Windows key + R to open the Run dialog box.
2. Type “msconfig” and press Enter to open the System Configuration window.
3. In the System Configuration window, go to the Services tab.
4. Check the box next to “Hide all Microsoft services” to hide the Microsoft services.
5. Click on “Disable all” to disable all non-Microsoft services.
6. Next, go to the Startup tab.
7. Click on “Open Task Manager.”
8. In the Task Manager window, disable all the startup programs by right-clicking on each one and selecting “Disable.”
9. Close the Task Manager and go back to the System Configuration window.
10. Click on “OK” and then select “Restart” to restart your computer in a clean boot state.

Performing a clean boot installation can help you identify the software that may be causing the installation error. Once you have successfully installed Windows 10 in the clean boot state, you can gradually enable the services and startup programs to pinpoint the culprit.

Repair Corrupted System Files

First, open Command Prompt with administrative privileges by searching for “cmd” in the Start menu, right-clicking on Command Prompt, and selecting “Run as administrator.”

Next, type the following command and press Enter: sfc /scannow. This will scan your system for corrupted files and attempt to repair them automatically.

The System File Checker tool may prompt you to restart your computer to complete the repair process. If so, go ahead and restart your computer.

After the repair process is complete, check if the Windows 10 upgrade installation error has been fixed. If not, you may need to consider other troubleshooting steps or seek further assistance.

Remember to regularly run the System File Checker tool to ensure that your system files are in good condition and prevent future issues with your Windows 10 installation.

Understanding Result Codes

  • Check error message: Look at the error message displayed when the installation failed.
  • Research error code: Search online for the specific error code to understand what it means.
  • Consult Microsoft Support: Reach out to Microsoft Support for assistance in troubleshooting the error.

Deciphering Extend Codes

To decipher extend codes related to a Windows 10 upgrade failed installation error, you can follow these steps:

First, check the error message displayed on your screen. This will provide you with the extend code that needs to be decoded.

Next, refer to Microsoft’s official documentation or support forums to understand what the extend code means in the context of the upgrade failure.

If you are unable to find a solution, try running the Windows Update troubleshooter to identify and fix any issues with the update process.

If the issue persists, you may need to manually uninstall the failed update and try reinstalling it.

In some cases, updating device drivers or performing a clean boot may help resolve the installation error.

Make sure to backup your important files before attempting any troubleshooting steps to avoid data loss.

If you are still facing issues, consider seeking help from Microsoft support or a professional technician for further assistance.

Methodical Data Collection

Step Description
1 Identify the error message displayed during the failed installation
2 Check for known issues and solutions related to the specific error message on Microsoft’s official support website
3 Run the Windows Update Troubleshooter tool to automatically detect and fix common update errors
4 Disable antivirus software temporarily to ensure it is not blocking the update process
5 Clear the Windows Update cache by stopping the Windows Update service, deleting temporary update files, and restarting the service
6 Manually download and install the Windows 10 update from the official Microsoft Update Catalog website
7 Contact Microsoft Support for further assistance if the issue persists

Keeping Your PC in Top Condition

PC maintenance tools

To keep your PC in top condition after a failed Windows 10 upgrade installation error, follow these steps:

1. Run a full system scan with Microsoft Defender Antivirus to check for any potential malware or viruses that may be causing the installation error.

2. Check for any missing or outdated device drivers that could be hindering the upgrade process. Update them as needed.

3. Use the Control Panel to uninstall any conflicting applications that may be causing the installation error. Make sure to restart your PC after uninstalling.

4. Clear up disk space on your hard drive to ensure there is enough room for the installation process to complete successfully.

5. Disable any third-party antivirus software temporarily to prevent any conflicts during the upgrade process. Remember to re-enable it afterwards.

6. Create a backup of your important files and data before attempting the upgrade process again to avoid any potential data loss in case of another failed installation.

F.A.Qs

Why does Windows 10 version 20H2 keep failing to install?

Windows 10 version 20H2 may fail to install due to corrupted Windows Update components, preventing the installation of the latest updates on your PC. Resetting Windows Update components can help resolve this issue.