August 2025: Enhance your computer’s performance and eliminate errors with this cutting-edge optimization software. Download it at this link
- Click here to download and install the optimization software.
- Initiate a comprehensive system scan.
- Allow the software to automatically fix and repair your system.
Reasons for Messenger Error
Messenger errors can be frustrating, but they’re not uncommon. There are several reasons why you might be experiencing one. It could be due to a problem with your internet connection or a glitch in the Messenger software. Sometimes, it’s simply a corrupt file or a temporary issue with the Messenger servers.
One common reason why people experience errors on Messenger is because of outdated software. If you’re having trouble, try updating your iOS or Android device to the latest version. Another quick fix is to force-close the app and reopen it.
If none of these solutions work, try clearing the app cache or uninstalling and reinstalling the Messenger app. If you’re still having trouble, you can try more advanced troubleshooting methods, such as resetting your network settings or checking your Messenger status on Facebook.
Remember, most Messenger errors have a simple solution. Don’t let them get in the way of connecting with your loved ones on this popular messaging platform.
Restarting Messenger App and Device
If you’re experiencing an error message on Messenger, one of the quickest solutions is to restart both the app and your device. This can help fix any glitches that may be causing the issue.
To restart the Messenger app on an iPhone:
1. Swipe up from the bottom of the screen to access the app switcher.
2. Swipe left or right to locate the Messenger app card.
3. Swipe up on the card to force-close the app.
4. Tap on the Messenger app icon to relaunch it.
For Android users, follow these steps:
1. Go to the menu on your device.
2. Tap on Settings.
3. Select Apps & notifications.
4. Locate and select the Messenger app.
5. Tap on Storage & cache.
6. Tap on Clear cache.
7. Tap on Clear storage.
Make sure to also check your internet connection and Messenger status. If the problem persists, try other troubleshooting methods or contact Messenger support for further assistance.
Checking Internet and Network Connection
To check your internet and network connection when encountering an error message on Messenger, follow these steps:
1. Check if your device is connected to a stable network or Wi-Fi.
2. Make sure other apps that require internet connection are working.
3. Restart your device and try again.
4. Clear the app cache by going to Settings > Apps > Messenger > Storage > Clear Cache.
5. Force-close the app by going to the app switcher and swiping up on the Messenger screen.
6. Check for any available updates for Messenger in your app store.
7. If all else fails, uninstall and reinstall the app.
By following these troubleshooting methods, you can fix Messenger errors and get back to messaging your loved ones. Note that these solutions can also be applied to other messaging platforms like WhatsApp. Don’t let a network glitch that says “something went wrong” stop you from staying connected with the world.
Enabling Mobile Data and Disabling Data Saver Mode
If you’re experiencing problems with your Messenger app, the solution may be as simple as enabling mobile data and disabling data saver mode.
To enable mobile data, go to your phone’s settings and toggle the switch to turn it on.
To disable data saver mode, open your Messenger app and tap on your profile picture in the top left corner. Then, tap on “Data Saver” in the menu and toggle the switch to turn it off.
These simple fixes can solve most Messenger issues caused by connectivity problems. If the problem persists, try force-closing the app or restarting your phone.
Remember, Messenger is a popular messaging platform used by people all over the world, so glitches can happen from time to time. But with these quick tips and troubleshooting methods, you can get back to messaging with friends and family in no time.
It can also address issues such as freezing programs or slowdowns caused by a damaged registry, missing files, or excessive junk. While it cannot fix every issue, Fortect is a valuable tool for ensuring the smooth functioning of Windows and other programs.

Temporarily Disabling VPN Connection
If you’re experiencing issues with Messenger, temporarily disabling your VPN connection may be a quick fix. To do this on an iPhone, go to Settings > VPN and toggle the switch off. On Android, go to Settings > Network & internet > VPN and turn it off.
If this doesn’t work, try force-closing the app by swiping it away from your recent apps. You can also try troubleshooting methods like clearing the cache or reinstalling the app. If the issue persists, it may be a glitch that requires a fix from Facebook’s servers.
Checking Messenger Servers Status
| Messenger Server | Status |
|---|---|
| Facebook Messenger | Online |
| WhatsApp Messenger | Online |
| Telegram Messenger | Online |
| Signal Messenger | Online |
| WeChat Messenger | Online |
| Viber Messenger | Online |
Updating Messenger App and Device
To fix Messenger errors, try updating both the Messenger app and your device. First, check for updates in your app store or Google Play Store. Next, make sure your device is running the latest operating system.
If updating doesn’t work, try clearing your cache or reinstalling Messenger. This can solve many common issues that cause errors.
If the problem persists, try troubleshooting methods like checking your internet connection or restarting your device. You can also try contacting Messenger support or checking online forums for fixes suggested by other users.
Remember, Messenger offers many helpful features like calls, files, and video, so it’s important to fix issues quickly to ensure a good user experience. Don’t let something like a Messenger error stop you from staying in touch with friends and family!
Clearing Messenger Cache Files
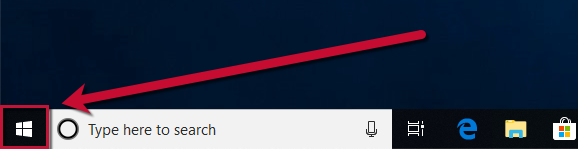
- Open the Start menu on your desktop.
- Type “Run” in the search bar and click on the “Run” app that appears.
- Type “%LocalAppData%\Microsoft\Messenger” in the “Run” dialog box and hit Enter.
- You will see a list of folders with email addresses as their names. Delete all the folders.
- Restart the Messenger app and try logging in again.
Reinstalling Messenger App
If you’re experiencing issues with Messenger, one quick solution is to reinstall the app. First, delete the app from your device by pressing and holding the app icon until the option to delete appears. Then, head to the app store and redownload the Messenger app. This method can help fix any corrupt files or bugs that may be causing errors. After reinstalling, log back in to your account and check if the issue has been resolved. If you’re still encountering problems, try other troubleshooting methods such as clearing the app cache or updating your device’s software. Remember to check for updates regularly to ensure you’re using the latest version of the app with all its features, including Messenger video calls and Messenger Kids. Don’t let Messenger errors stop you from staying connected with friends and family!
If the messenger app displays a notification stating “something went wrong,” try restarting your device and reinstalling the app to resolve the issue. Download this tool to run a scan