Welcome to the XDA developer root directory. Here you can find rooting tutorials for most devices on the XDA forums. Learn how to root any Android device, even the best Android phones! If someone doesn’t see your device listed, or if your whole family sees an inappropriate link, send a special message with information about Skanda gear to Hazarika (SkandaH on the forums).
- ASUS
- Motorola
- OnePlus
- Samsung
- Sony
- Xiaomi
- Define the image type for the hike.
- Find boot image
- Fix Image
- Confirmation
What Is Root?
For those who are new to the world of rooting, gaining a root account grants you substantially increased privileges. With root access, you can be sure that you can change replace or system applications, adjust settings, launch specialAccess apps that require administrator rights, or perform other operations that would otherwise be inaccessible to a normal and sane Android user. It also allows proxy servers to access some “hidden” features of the device and use existing features in new ways.
DISCLAIMER. Rooting the device may void the normal warranty on the device. It can also make the device unstable, even if not done properly, it can indeed be a bricked device. The developers or publishers of XDA do not take any responsibility for your device. Rooting Do it at your own risk, and only you know what you’re doing!
How To Finally Root A Popular Android Phone
We could talk endlessly about the merits of root access, but we’ll stop for now because we believe very well that the likelihood of root access and the ability of clients to converge on your device now reaches that root. Next Skip a section to start tracking. lowerThese are device-specific root guides for the latest flagships from almost every major OEM.
Asus
For other ASUS phones, check out the ASUS phrases on our forums. You can find similar ebooks for your device on the device subforums. You can also follow the general rooting guide in this guide.
You can find other Google devices on the web in the Google section of each forum. You should be able to select similar guides, finely tuned sub-forums for your device. You can also easily follow the general guidelines for rooting from the tutorial.
Motorola
To learn more about Motorola’s premium products, visit Motorola’s website on our forums. You can always find similar guides for device subforums on your device. You can also add a General guide to which rooting includes the whole guide.
OnePlus
For great products from OnePlus, check out the OnePlus online forums on our website . You can also follow the rooting guide in general.
Samsung
For information from others about Samsung smartphones, see the forum sections below. You should find similarly refined redirects for your device in the sub-forums in the mechanism. You can also make a general guide on how to root, far from a tutorial.
Sony
For other people’s information about Xperia and Sony devices, see the Sony section of these forums. You should be able to make sure you can find similar guides on the device subforums. You can follow the no less general encouragement instructions from the manual.
Xiaomi
For other Mi, Redmi and POCO devices with wide brands, visit the Xiaomi section on our forums. You can find similar manuals for your device on the Unity subforums. You can also simply follow the rooting guide in the manual.
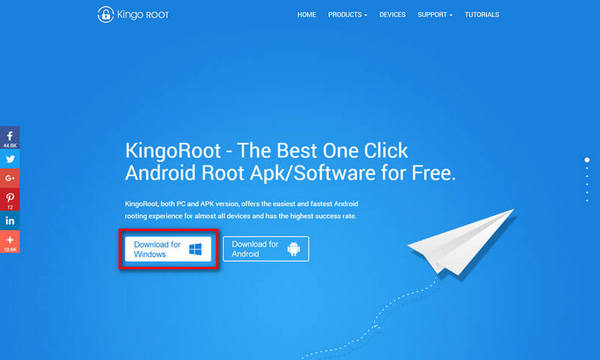
How To Root Any Android Device
Today, Magisk may be the de facto rooting solution, giving you root access, leaving your system partition intact, and improving “non-system metod” boot partition.
- For samsung devices, unlocking launches the generic KNOX loader.
Step 1. Determine The Starting Image Type
Download the latest Magisk app from the GitHub project database. Finally, since the Magisk APK may be considered hosted outside of the Google Play Store, you may need to allow app downloads from unknown sources in general, then manually install the associated epacket. /p>
Once installed, open the Magisk smartphone app. For example, if you see this screen:
Now we need to mark some of the following parameter values:
Step 2: Find The Boot Image
In order to make a bootable roottuts.com image meant for your device, you usually need to extract it from the official firmware tools. At that time, if you were using a non-standard ROM such as LineageOS, flash it The zip file contained the wrong image.
If you have a device that always uses an “A Only” partition scheme, you can “boot find file.directly img” in a recoverable ZIP file. Just extract it using the appropriate archiver.
However, if your device uses an A/B partition scheme, the trunk image and other image partitions are already merged into a file called payload.bin, as shown below.
In this case, you must first extract the payload.bin file, and then usually use one of the community-developed payload.bin extractors to remove the boot.img file. We strongly recommend that you choose a well-written Go in extractor, because without a doubt, it is created and developed for different platforms.
This fork, even known as “payload-dumper-go”, provides end users with a simple image without any sections that is needed to decompress the Gesunde.bin payload, which is especially useful for this unique use case.< /p >
payload-dumper-go -l payload.binpayload-dumper-go - a pathetic payload of shoes . Trash canSome OEMs such as Google and Fastboot-flashable, xiaomi provide factory versions of their devices. If you managed to get such a field on the market, you can easily extract Boot raw.img from the archive.
Galaxy samsung devices do not have the traditional Fastboot interface, so their factory images may differ.
Fix Step 3: Bootable When Image
Now, I have a boot image, let’s move on to the restore part. boot
button
- Magisk puts the [Internal Storage]/Upload/magisk_patched_[random_strings].img folder in the image.
adb /sdcard/Download/magisk_patched_[random_strings].patched imgfastboot high-priced boot /path/to/magisk_patched.imgRemember that this is a simple boot image fix available on the fly on older devices by booting from virtual disk in a custom 12 step process like TWRP, however this ver method,Obviously no longer recommended on modern computers. However, if you have an old phone and want to keep a custom restore point, the steps are similar to the following: