Having trouble with Microsoft Outlook? Look no further. Let’s dive into troubleshooting techniques to fix those pesky issues.
September 2025: Enhance your computer’s performance and eliminate errors with this cutting-edge optimization software. Download it at this link
- Click here to download and install the optimization software.
- Initiate a comprehensive system scan.
- Allow the software to automatically fix and repair your system.
Start Outlook in safe mode to troubleshoot “Processing” screen
If you’re experiencing the “Processing” screen issue in Microsoft Outlook, starting the application in safe mode can help troubleshoot the problem. Safe mode allows you to open Outlook with minimal settings and can help identify any conflicts or issues with add-ins or customization.
To start Outlook in safe mode, follow these steps:
1. Close Outlook if it’s currently open.
2. Press the Windows key + R on your keyboard to open the Run dialog box.
3. Type “outlook.exe /safe” in the Run dialog box and click OK.
4. Outlook will now open in safe mode, indicated by the words “Safe Mode” displayed in the title bar.
In safe mode, you may notice that some features or add-ins are disabled. This is normal and can help isolate the cause of the “Processing” screen issue. If Outlook functions properly in safe mode, it indicates that the problem may be related to an add-in or customization.
To further troubleshoot the issue, you can try the following steps:
1. Disable add-ins: Go to the File menu in Outlook and click on Options. In the Options dialog box, select Add-ins. From there, you can manage your add-ins and disable any that may be causing the problem.
2. Repair Office installation: Open the Control Panel on your Windows computer and navigate to Programs > Programs and Features. Find Microsoft Office in the list, right-click on it, and select Change. Choose the Repair option and follow the on-screen instructions to repair your Office installation.
3. Check for Windows updates: Keeping your Windows operating system up to date is important for the smooth functioning of Outlook. Check for any pending Windows updates and install them if available.
4. Scan for malware: Sometimes, malware or viruses can interfere with Outlook’s performance. Use a reputable antivirus software to scan your computer for any malicious programs and remove them if found.
Check for open dialog boxes in Outlook
If you are experiencing issues with Microsoft Outlook not working properly, it is important to check for any open dialog boxes in the program. These dialog boxes may be hidden behind other windows or minimized, causing Outlook to appear unresponsive.
To check for open dialog boxes in Outlook, follow these steps:
1. Make sure Outlook is the active window by clicking on its icon in the taskbar or using Alt-Tab to switch to it.
2. Look for any dialog boxes that may be open. These can include error messages, prompts for user input, or confirmation dialogs.
3. If you see any open dialog boxes, click on them to bring them to the front.
4. If you cannot locate any open dialog boxes, try minimizing or closing any other open windows or applications to see if the dialog box is hidden behind them.
5. Additionally, check the status bar at the bottom of the Outlook window for any messages or notifications that may require attention.
By ensuring that all dialog boxes are properly addressed and closed, you can help resolve any issues with Microsoft Outlook not working correctly. This simple troubleshooting step can help identify and resolve any problems related to open dialog boxes that may be affecting the functionality of the application.
Remember, if you continue to experience problems with Microsoft Outlook, it may be helpful to update your Windows operating system, as well as any Microsoft Office or Outlook-specific updates available through Windows Update. You can also try restarting your computer or reinstalling the application if necessary.
For further assistance or more in-depth troubleshooting, consider consulting Microsoft’s official support resources or the Outlook user community for additional guidance.
Ensure Outlook is not busy with large or long processes
If you are experiencing issues with Microsoft Outlook not working, one possible cause could be that Outlook is busy with large or long processes. This can slow down the program and make it unresponsive. Thankfully, there are a few steps you can take to ensure Outlook is not overwhelmed with these processes.
First, check if there are any large files or attachments in your Outlook mailbox. These can take up a lot of space and cause Outlook to slow down. To free up space, you can delete or archive old emails with large attachments. Simply select the email, right-click, and choose “Delete” or “Archive” from the context menu.
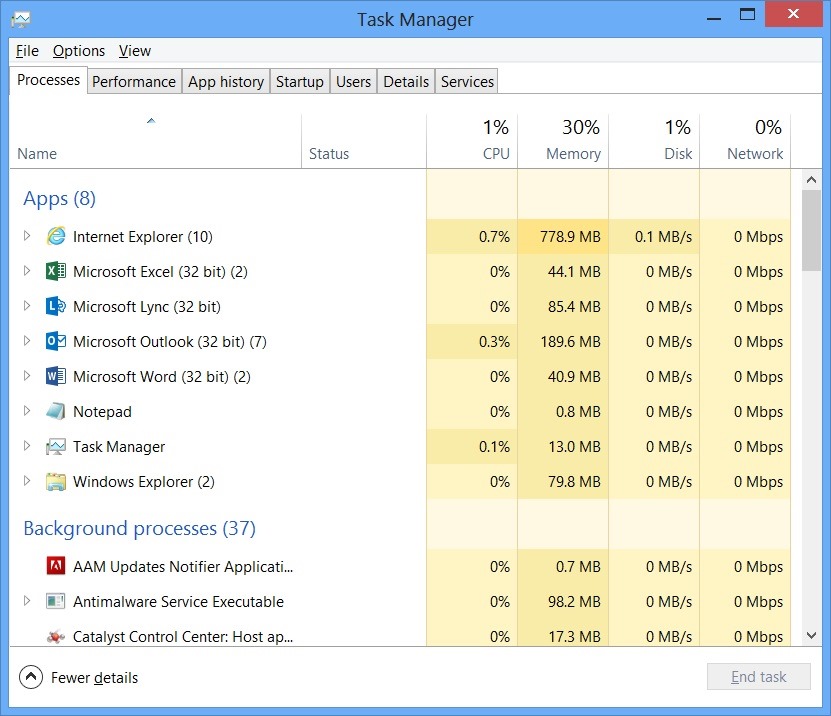
Next, you should also check if there are any running processes or tasks in Outlook that are taking up too much resources. To do this, go to the Task Manager by pressing Ctrl + Shift + Esc. In the Task Manager, switch to the “Processes” or “Details” tab and look for any Outlook-related processes. If you find any that are using a lot of CPU or memory, you can end them by right-clicking and selecting “End Task” or “End Process” from the context menu.
It’s also important to make sure that your computer is up to date with the latest Windows updates. These updates often include bug fixes and performance improvements that can help resolve issues with Outlook. To check for updates, go to the Control Panel and click on “Windows Update” or search for “Windows Update” in the Start menu.
If you are using Microsoft 365 or Microsoft Office 2013, you can also try repairing the installation. To do this, go to the Control Panel, click on “Programs” or “Programs and Features,” and find Microsoft Office in the list. Right-click on it and select “Repair” or “Change” from the context menu. Follow the on-screen instructions to repair the installation.
Lastly, it’s worth checking if there are any third-party add-ins or plugins that may be causing issues with Outlook. These add-ins can sometimes conflict with Outlook and lead to performance problems. To disable add-ins, open Outlook and go to the “File” tab. Click on “Options” and then select “Add-Ins.” From there, you can manage and disable any add-ins that you suspect may be causing problems.
python

import socket
def is_internet_available():
try:
# Check if internet is accessible by connecting to Google DNS server
socket.create_connection(("8.8.8.8", 53), timeout=5)
return True
except socket.error:
return False
def is_mail_server_reachable(server, port):
try:
# Check if mail server is reachable
socket.create_connection((server, port), timeout=5)
return True
except socket.error:
return False
# Usage example
if not is_internet_available():
print("No internet connection.")
else:
mail_server = "smtp.example.com"
mail_port = 587
if is_mail_server_reachable(mail_server, mail_port):
print("Mail server is reachable.")
else:
print("Mail server is not reachable.")
Update Windows and Office to the latest versions
1. Update Windows:
– Press the Windows key on your keyboard or click on the Start menu in the bottom-left corner of your desktop.
– Type “Windows Update” and click on the Windows Update settings from the search results.
– In the Windows Update settings window, click on Check for updates.
– Windows will now check for available updates. If there are any updates available, click on Install now to download and install them.
– Once the updates are installed, restart your computer if prompted.
2. Update Office:
– Launch any Office application, such as Outlook or Word.
– Click on the File tab in the top-left corner of the application window.
– Select Account or Office Account from the menu.
– Click on the Update Options button and then choose Update Now.
– Office will now check for updates and download them if available.
– Once the updates are installed, restart your Office applications.
By updating Windows and Office to the latest versions, you can resolve many issues and ensure that your software is running smoothly.
Repair Office programs
If you are experiencing issues with Microsoft Outlook not working, there are a few troubleshooting steps you can take to repair the program. First, try restarting your computer and opening Outlook again. This simple step can often resolve minor issues.
If that doesn’t work, you can try repairing the Office programs using the Control Panel in Windows. To do this, follow these steps:
1. Close Outlook and any other Office programs you have open.
2. Press the Windows key + R to open the Run dialog box.
3. Type “control” and press Enter to open the Control Panel.
4. In the Control Panel, click on “Programs” and then “Programs and Features.”
5. Look for your version of Microsoft Office in the list of installed programs and select it.
6. Click on “Change” or “Repair” and follow the prompts to repair the Office programs.
If repairing the Office programs doesn’t solve the issue, you can also try running Outlook in Safe Mode. This will disable any add-ins or extensions that may be causing conflicts. To open Outlook in Safe Mode, follow these steps:
1. Press the Windows key + R to open the Run dialog box.
2. Type “outlook.exe /safe” and press Enter.
3. If prompted, select your Outlook profile and click OK.
4. Check if Outlook is working properly in Safe Mode. If it is, the issue may be caused by an add-in or extension.
If none of the above steps resolve the issue, you can also try creating a new Outlook profile. This can help if the problem is related to your current profile. To create a new Outlook profile, follow these steps:
1. Close Outlook.
2. Press the Windows key + R to open the Run dialog box.
3. Type “control” and press Enter to open the Control Panel.
4. In the Control Panel, click on “Mail” or “Mail (32-bit).”
5. Click on “Show Profiles” and then “Add” to create a new profile.
6. Follow the prompts to set up the new profile and then open Outlook with the new profile.
Updated: September 2025
If you’re experiencing issues with Microsoft Outlook not working,
Fortect may be able to help.
Fortect can repair damaged system files and faulty settings that may be causing the problem. It can also address freezing programs and slow computer performance by fixing registry issues, missing files, or excessive junk.
Additionally, Fortect can automatically fix damaged or missing DLL files, which are crucial for program functionality. However, if the issue is related to compatibility, drivers, or hardware, Fortect can help identify and repair those causes as well.
Fix Outlook data file issues
If you are experiencing issues with your Outlook data file, there are a few troubleshooting steps you can take to resolve the problem. First, make sure you have the latest updates installed for Microsoft Outlook and your operating system, whether it’s Microsoft Windows 7, Windows 8, or Windows 10. These updates often include patches and bug fixes that can address common issues.
To fix Outlook data file issues, you can try repairing your data file using the built-in Outlook repair tool. To do this, first close Outlook and open the Control Panel on your computer. From there, navigate to the “Programs” or “Programs and Features” section and find Microsoft Office 2013 or the version you have installed. Right-click on it and select “Change” or “Repair” from the menu.
Follow the prompts to repair your Office installation, which will include repairing your Outlook data file. This process may take some time, so be patient. Once it’s done, reopen Outlook and see if the issue is resolved.
If repairing the data file doesn’t fix the problem, you can try creating a new Outlook profile. This will create a fresh profile with a new data file, which can often resolve issues related to corrupted or damaged data files. To do this, open the Control Panel again and search for “Mail” or “Mail (32-bit)”.
In the Mail Setup window, click on “Show Profiles” and then “Add” to create a new profile. Follow the prompts to set up the new profile and configure your email account. Once the new profile is set up, open Outlook and see if the issue persists.
If the issue still persists, you may want to consider seeking further assistance from Microsoft support or consulting online forums for additional troubleshooting steps. It’s also a good idea to keep your Outlook and operating system up to date, as updates often include fixes for known issues.
Create a new user profile in Outlook
1. Open Outlook and click on the “File” tab in the top left corner of the screen.
2. In the File menu, select “Account Settings” and then click on “Manage Profiles.”
3. In the Manage Profiles window, click on “Show Profiles.”
4. Click on the “Add” button to create a new profile.
5. Enter a name for the new profile and click “OK.”
6. In the “Add Account” window, enter the email address associated with the new profile and click “Connect.”
7. Follow the prompts to enter your password and complete the setup process.
8. Once the new profile is created, you can switch between profiles by opening Outlook and selecting the profile you want to use from the drop-down menu on the login screen.
Remember to close and reopen Outlook for the changes to take effect.
If you encounter any issues while creating a new profile, make sure you have the latest updates for Microsoft Outlook and Windows by checking for patches or updates in the Control Panel. Additionally, ensure that your antivirus software is up to date as it can sometimes interfere with Outlook’s functionality.
If you are still experiencing problems, you can try restarting your computer or even reinstalling Microsoft Office. If none of these steps resolve the issue, it may be a software bug or a more complex problem that requires further troubleshooting.
For more detailed assistance, refer to the Microsoft 365 support website or seek help from the Outlook community forums.
Troubleshoot Outlook issues after connecting to Outlook.com

If you are experiencing issues with Microsoft Outlook after connecting to Outlook.com, here are some troubleshooting steps to resolve the problem:
1. Check your internet connection: Ensure that you have a stable internet connection before troubleshooting any Outlook issues. A weak or intermittent connection can cause problems with Outlook’s functionality.
2. Restart Outlook: Sometimes, simply restarting the application can resolve minor glitches or temporary issues. Close Outlook completely and then reopen it to see if the problem persists.
3. Clear your Outlook cache: Cached data can sometimes interfere with Outlook’s performance. To clear the cache, follow these steps:
– Click on the File tab in Outlook.
– Select Options, then click on Advanced.
– Scroll down to the Outlook start and exit section and click on the “Empty Auto-Complete List” button.
– Restart Outlook to see if the issue is resolved.
4. Disable add-ins: Add-ins can sometimes conflict with Outlook and cause it to stop working. To disable add-ins, follow these steps:
– Click on the File tab in Outlook.
– Select Options, then click on Add-ins.
– In the Manage box, select COM Add-ins and click Go.
– Clear the check boxes for any add-ins you want to disable and click OK.
– Restart Outlook to see if the issue is resolved.
5. Repair Outlook: If the above steps didn’t resolve the problem, you can try repairing Outlook using Microsoft’s built-in repair tool. To do this, follow these steps:
– Close Outlook and any other Office applications.
– Open the Control Panel and navigate to Programs > Programs and Features (or Add/Remove Programs).
– Find Microsoft Office in the list of installed programs and select it.
– Click on the Change button at the top and select Repair.
– Follow the on-screen instructions to complete the repair process.
– Restart your computer and check if Outlook is working properly.
Repair a profile in Outlook 2010, Outlook 2013, or Outlook 2016

To repair a profile in Outlook 2010, 2013, or 2016, follow these simple steps:
1. Close Outlook completely by clicking on the “X” in the top-right corner.
2. Press the Windows key on your keyboard and type “Control Panel” to open the Control Panel application.
3. In the Control Panel, search for “Mail” and click on it.
4. In the Mail Setup window, click on “Show Profiles”.
5. Select the profile that you want to repair and click on “Remove”.
6. Confirm the removal of the profile by clicking “Yes”.
7. Once the profile is removed, click on “Add” to create a new profile.
8. Enter a name for the new profile and click “OK”.
9. Follow the on-screen prompts to set up the email account associated with the profile.
10. After setting up the account, open Outlook again and see if the issue is resolved.
If the problem persists, you can try repairing the Outlook installation by following these steps:
1. Close Outlook and any other Office applications.
2. Press the Windows key and type “Control Panel” to open the Control Panel.
3. In the Control Panel, click on “Programs” and then “Programs and Features”.
4. Locate Microsoft Office in the list of installed programs and select it.
5. Click on “Change” or “Modify” at the top of the window.
6. In the Office setup wizard, select “Repair” and click “Next”.
7. Follow the on-screen instructions to complete the repair process.
Once the repair is finished, open Outlook again and check if the issue is resolved.
Access additional help resources
- Check for updates
- Open Microsoft Outlook
- Click on the “File” tab
- Select “Office Account” or “Account” (depending on the version of Outlook)
- Click on “Update Options”
- Select “Update Now”
- Follow the prompts to install any available updates
- Restart Outlook in Safe Mode
- Close Microsoft Outlook if it’s open
- Press the “Windows” key + “R” to open the “Run” dialog box
- Type “outlook.exe /safe” and press Enter
- If prompted, select the Outlook profile you want to use
- Check if Outlook is working properly in Safe Mode
- Repair the Outlook data files
- Close Microsoft Outlook
- Open the “Control Panel”
- Click on “Programs” or “Programs and Features”
- Select “Microsoft Office” or “Office”
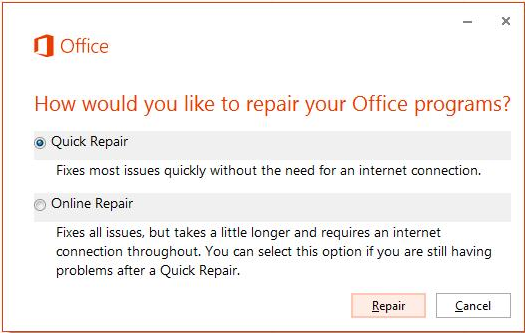
- Click on “Change” or “Repair”
- Choose the “Quick Repair” option and click “Repair”
- Wait for the repair process to complete
- Restart your computer and check if Outlook is working
- Create a new Outlook profile
- Close Microsoft Outlook
- Open the “Control Panel”
- Click on “Mail” or “Mail (32-bit)”
- In the “Mail Setup” dialog box, click on “Show Profiles”
- Click on “Add” to create a new profile
- Enter a name for the new profile and click “OK”
- Follow the prompts to set up the email account(s) in the new profile
- Open Outlook and select the new profile
- Disable add-ins
- Close Microsoft Outlook
- Open Outlook in Safe Mode (refer to step 2)
- Click on the “File” tab
- Select “Options”
- Click on “Add-Ins”
- Disable any add-ins that are enabled
- Restart Outlook normally and check if the issue is resolved
- Reinstall Microsoft Outlook
- Close Microsoft Outlook
- Open the “Control Panel”
- Click on “Programs” or “Programs and Features”
- Select “Microsoft Office” or “Office”
- Click on “Uninstall” or “Change”
- Follow the prompts to uninstall Microsoft Office
- Restart your computer
- Insert your Microsoft Office installation media (CD or USB)
- Follow the prompts to reinstall Microsoft Office
Explore Microsoft 365 account compatibility

- Supported versions: Microsoft Outlook is compatible with Microsoft 365 accounts on various versions such as Outlook 2019, Outlook 2016, Outlook 2013, and Outlook for Microsoft 365.
- Compatibility with operating systems: Microsoft Outlook is compatible with different operating systems including Windows 10, Windows 8/8.1, and Windows 7.
- Mobile compatibility: Microsoft 365 accounts can be accessed and synced with Microsoft Outlook mobile app available for iOS and Android devices.
- Email server compatibility: Microsoft Outlook is compatible with Microsoft Exchange Server, Office 365, and other email servers that support IMAP or POP protocols.
- Minimum system requirements: Ensure your system meets the minimum hardware and software requirements to ensure a smooth experience with Microsoft Outlook and Microsoft 365 accounts.
- Compatibility with add-ins: Microsoft Outlook supports various add-ins, extensions, and plugins that enhance its functionality and integration with other applications.
- Third-party integration: Explore the compatibility of Microsoft 365 accounts with other third-party applications and services to streamline your workflow.
- Web browser compatibility: Microsoft Outlook can be accessed through popular web browsers like Chrome, Firefox, Safari, and Edge, ensuring flexibility and accessibility.
Request features or find more options for assistance
If you are experiencing issues with Microsoft Outlook not working, there are a few steps you can take to troubleshoot and find a solution. Here are some options to consider:
1. Check for software updates: It’s important to ensure that you have the latest version of Microsoft Outlook installed on your computer. To do this, open Outlook and click on the “File” tab in the top left corner. Then, select “Office Account” and click on “Update Options”. Choose “Update Now” to check for and install any available updates.
2. Restart Outlook: Sometimes, simply closing and reopening Outlook can resolve minor issues. Close the application completely and then relaunch it to see if the problem persists.
3. Disable add-ins: Add-ins can sometimes cause conflicts and prevent Outlook from functioning properly. To disable add-ins, go to the “File” tab, select “Options” and click on “Add-Ins”. From there, you can manage and disable any add-ins that may be causing problems. Restart Outlook after disabling each add-in to determine if any specific add-in is causing the issue.
4. Repair Office installation: If Outlook continues to have problems, you can try repairing the Office installation. Go to the “Control Panel” in Microsoft Windows and search for “Programs and Features” or “Add or Remove Programs”. Locate Microsoft Office in the list of installed programs and select “Change”. Choose the “Repair” option and follow the on-screen instructions to repair the installation.
5. Create a new Outlook profile: If the above steps do not resolve the issue, you can try creating a new Outlook profile. This can help if there is a problem with the existing profile. To create a new profile, open the “Control Panel” and search for “Mail” or “Mail (32-bit)”. Click on “Mail” to open the Mail Setup dialog box and then click on “Show Profiles”. Select “Add” to create a new profile and follow the prompts to set it up. Once the new profile is created, open Outlook and see if the problem persists.
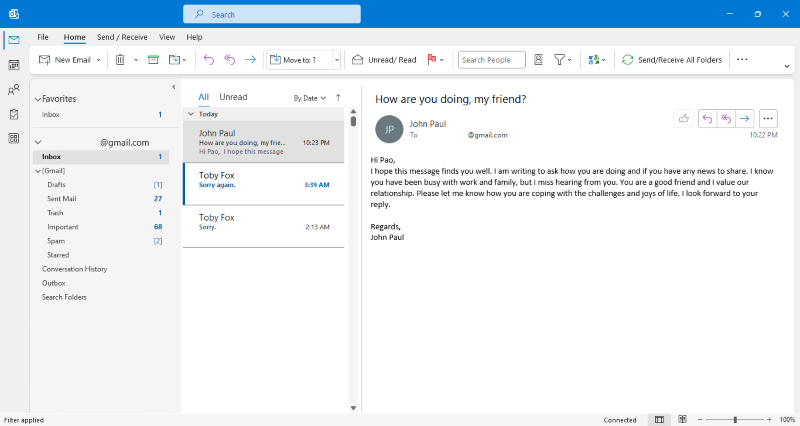
Example Message
?
Microsoft Outlook may not be working due to various reasons such as internet connectivity issues, incorrect email account settings, software conflicts, or outdated software versions. Download this tool to run a scan