Unveiling the Path of Windows System32 Logfiles: SrtTrail.txt Download
September 2025: Enhance your computer’s performance and eliminate errors with this cutting-edge optimization software. Download it at this link
- Click here to download and install the optimization software.
- Initiate a comprehensive system scan.
- Allow the software to automatically fix and repair your system.
Ensure you have a reliable antivirus software installed and updated regularly to prevent any malware or virus infections that may corrupt or damage the system32 logfiles.
Understanding the Significance of Srttrail.txt in Windows
Srttrail.txt is a log file in the Windows System32 Logfiles directory that is created when Windows encounters a startup issue. It is commonly associated with the “Srttrail.txt error” or the “Blue Screen of Death (BSOD)” error.
This log file is generated during the Automatic Repair process and contains information about the actions taken to fix the problem. If your computer is stuck in a startup error loop or you see the Srttrail.txt error on your screen, it means that Windows couldn’t repair the issue automatically.
To fix the Srttrail.txt error, you can try a few methods. First, try using the Startup Repair tool. Press the Windows key + R, type “cmd” in the Run dialog box, and press Enter to open the command prompt. Then, run the command “bcdedit /set {default} recoveryenabled No” to disable Automatic Repair.
If that doesn’t work, you can try repairing your Windows operating system using the “reparar Srttrail.txt” option in the Windows Recovery Environment (WinRE) or by using a Windows installation media.
Remember to back up your important data before attempting any repairs, and if you’re not confident in performing these steps, it’s recommended to seek professional help.
The system cannot find the file specified. Windows\System32\LogFiles\Srt\SrtTrail.txt” – This error message indicates that the SrtTrail.txt file is missing or cannot be located in the Windows System32\LogFiles\Srt directory.
Causes and Impact of Srttrail.txt BSOD Error
The Srttrail.txt BSOD error is a common issue that can cause a blue screen error on your Windows computer. This error typically occurs during startup and can prevent your PC from booting properly.
To fix the Srttrail.txt error, there are a few methods you can try. One option is to use the Windows Startup Repair tool, which can automatically fix any problems with your operating system files. Another method is to use the Command Prompt to repair the Srttrail.txt error manually.
To do this, you can boot your computer using the Windows installation media, navigate to the Command Prompt option, and run the following command: bcdedit /set {default} bootstatuspolicy ignoreallfailures.
If these methods don’t work, you can also try using the System File Checker tool to scan for and repair any corrupted system files.
Remember to back up your data before attempting any repairs, as there is always a risk of data loss.
SrtTrail.txt is a log file used to diagnose and repair startup issues in Windows” – SrtTrail.txt is a crucial log file that contains diagnostic information about system startup problems. It helps in troubleshooting and resolving issues related to Windows startup.
Methods to Fix Windows 10 Logfiles\Srt\SrtTrail.txt Error
- Perform a Startup Repair: Use the Windows 10 installation media to access the advanced startup options and launch the Startup Repair tool to fix the SrtTrail.txt error.
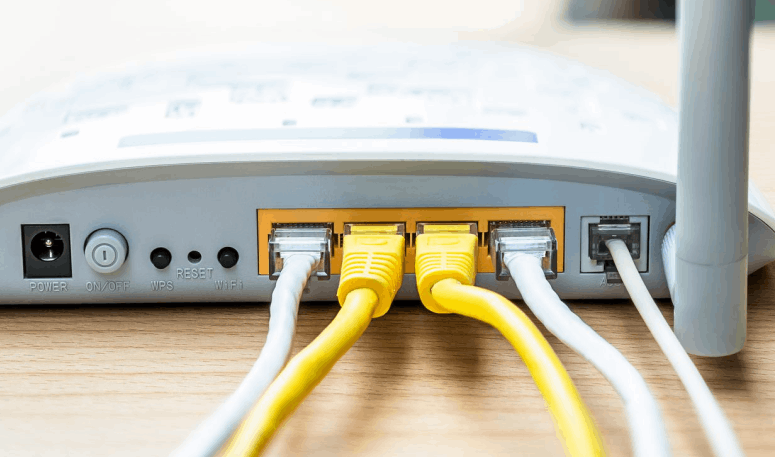
- Check Hard Disk Connections: Ensure that all connections between your computer’s hard disk and motherboard are secure and functioning properly.
- Run a Disk Check: Utilize the CHKDSK command in Command Prompt to scan and repair any potential errors on the hard drive.
- Disable Automatic Restart: Prevent your system from automatically restarting after encountering the SrtTrail.txt error by disabling the “Automatic Restart” feature.
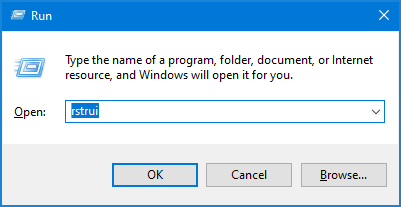
- Perform System Restore: Use a previous system restore point to revert your computer’s settings to a state where the SrtTrail.txt error did not occur.
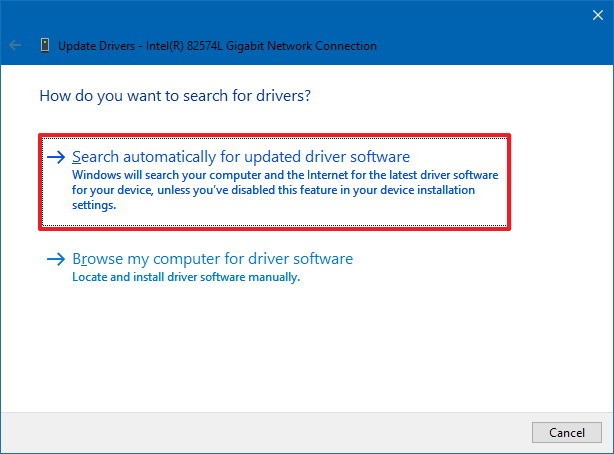
- Update Device Drivers: Ensure that all device drivers on your computer are up to date, as outdated or incompatible drivers can lead to the SrtTrail.txt error.
- Check for Windows Updates: Regularly install the latest Windows updates to ensure that your operating system has all the necessary patches and bug fixes.
- Scan for Malware: Run a thorough scan with a reliable antivirus or anti-malware software to detect and remove any potential malware causing the SrtTrail.txt error.
- Perform a Clean Boot: Temporarily disable all non-essential startup programs and services to identify if any of them are causing conflicts with the SrtTrail.txt error.
- Reset Windows 10: As a last resort, reset your Windows 10 installation to its default settings, which can help resolve persistent SrtTrail.txt errors.
Reconnecting Hard Drive and Reinstalling Laptop Battery
To reconnect your hard drive and reinstall your laptop battery, follow these steps:
1. Turn off your laptop and unplug it from any power source.
2. Locate the side panel of your laptop and remove it to access the internal components.
3. Locate the hard drive and disconnect the cables connected to it.
4. Carefully remove the hard drive from its slot and set it aside.
5. If your laptop battery is removable, gently remove it from its compartment.
6. Wait for a few seconds, then reinsert the hard drive and reconnect the cables securely.
7. If your laptop battery is removable, reinsert it back into its compartment.
8. Replace the side panel and secure it in place.
9. Plug your laptop back into a power source and turn it on.
10. Check if the startup issue or Blue Screen of Death (BSoD) error is resolved.
If the problem persists, you may need to seek further assistance or consider repairing your operating system files.
Checking for Memory Failure
If you’re experiencing a blue screen error or a startup error that leads to a loop, it’s possible that there may be a memory failure in your PC. One way to address this issue is by checking the Windows System32 Logfiles Srt SrtTrail.txt file.
To begin, start your computer and wait for the Windows Automatic Repair process to initiate. If this doesn’t happen, manually enter the Windows Recovery Environment (WinRE) by restarting your PC and pressing the F8 key repeatedly. Once in WinRE, select “Troubleshoot” and then “Advanced options.”
Next, choose “Command Prompt” and type the following command: “notepad C:\Windows\System32\Logfiles\Srt\SrtTrail.txt”. This will open the SrtTrail.txt file in Notepad.
Scroll through the file and look for any error messages or issues related to memory. If you find any, note the memory address mentioned and search online for a solution.
Updated: September 2025
Fortect is a software that can help address issues with Windows system32 logfiles srt srttrail txt download. It can repair damaged system files and faulty settings that may be causing normal tasks to stop working or resulting in confusing error messages. Additionally, if there are missing or corrupt DLL files,
Fortect can automatically fix the issue.
It can also fix the causes of the Blue Screen of Death (BSoD) such as incompatible DLLs, drivers, and Windows bugs. However, it is important to note that Fortect cannot guarantee fixing every issue related to the system32 logfiles srt srttrail txt download.
Verifying Disk Controller Mode
To verify the disk controller mode on your Windows system, follow these steps:
1. Start by accessing the Windows System32 Logfiles folder on your desktop computer.
2. Locate the “SrtTrail.txt” file within the folder.
3. Open the file using a text editor or Notepad.
4. Look for the line that mentions the disk controller mode.
5. If the mode is not set to the desired value, you can change it by following these steps:
a. Press the Windows key + R to open the Run dialog box.
b. Type “devmgmt.msc” and press Enter to open the Device Manager.
c. Expand the “IDE ATA/ATAPI controllers” or “Storage controllers” section.
d. Right-click on the disk controller and select “Properties”.
e. Navigate to the “Advanced Settings” tab and modify the mode as needed.
6. Save the changes and restart your computer for the new settings to take effect.
By verifying and adjusting the disk controller mode, you can resolve issues related to the Windows Automatic Repair process and the SrtTrail.txt file.
Disconnecting External USB Devices
If you encounter issues with the Windows System32 Logfiles Srt SrtTrail.txt file and need to disconnect external USB devices, follow these steps:
1. Restart your desktop computer and press the F8 key repeatedly during startup to access the Advanced Boot Options menu.
2. Choose “Safe Mode” or “Safe Mode with Networking” and press Enter.
3. Once in Safe Mode, click the “Start” menu and open the Device Manager.
4. Expand the “Universal Serial Bus controllers” category.
5. Right-click on each USB device listed and select “Uninstall” to disconnect them.
6. Restart your computer normally and check if the issue persists.
Please note that disconnecting USB devices temporarily can help troubleshoot certain problems, but it’s important to identify the root cause and find a permanent solution. If the issue persists, consider seeking further assistance or consulting Microsoft support documentation for alternative troubleshooting methods.
Checking Boot Priority in BIOS
To check the boot priority in BIOS, follow these steps:
1. Restart your computer and enter BIOS by pressing the designated key (usually F2 or Delete) during startup.
2. Once in BIOS, navigate to the “Boot” or “Boot Priority” section using the arrow keys on your keyboard.
3. Look for a list of devices or drives that are currently set as the boot priority. This determines the order in which your computer looks for an operating system to start up.
4. To change the boot priority, select the desired device or drive using the arrow keys and press the “+” or “-” keys to move it up or down the list.
5. Save your changes and exit BIOS. Your computer will now prioritize the selected device or drive for booting.
If you’re experiencing startup issues and have encountered the “Windows\System32\Logfiles\Srt\SrtTrail.txt” error, refer to Microsoft’s article on “How to repair Windows using SrtTrail.txt” for detailed instructions on resolving this scenario.
Enabling NX Or XD Mode in BIOS
To enable NX or XD mode in BIOS, follow these steps:
1. Restart your computer and enter the BIOS settings by pressing the designated key during startup (usually Del, F2, or F10).
2. Look for a section related to CPU or Security in the BIOS menu.
3. Locate the setting for NX or XD mode. It may be named “Execute Disable Bit” or something similar.
4. Enable the NX or XD mode by selecting the appropriate option and saving the changes.
5. Exit the BIOS and continue the startup process.
Enabling NX or XD mode can provide an extra layer of security by preventing certain types of malicious code from executing. However, not all CPUs or BIOS versions support this feature. If you don’t see the option in your BIOS, it may not be available on your system. Additionally, enabling this mode may affect compatibility with some older operating systems such as Windows 7.
Remember to save any changes you make in the BIOS before exiting. If you encounter any issues or have further questions, consult your computer manufacturer or seek assistance from a technical expert.
Using Command Prompt Tool for Troubleshooting
If you’re encountering issues with the Windows System32 Logfiles Srt SrtTrail.txt file, you can use the Command Prompt tool for troubleshooting. Follow these steps to fix the problem:
1. Boot your computer and press the F8 key repeatedly until the Advanced Boot Options menu appears.
2. Select “Repair Your Computer” and press Enter.
3. Choose your language and login credentials.
4. In the System Recovery Options menu, select Command Prompt.
Once in Command Prompt:
5. Type “cd /d C:\Windows\System32\Logfiles\Srt” and press Enter to navigate to the Srt folder.
6. Type “ren SrtTrail.txt SrtTrail.old” and press Enter to rename the problematic file.
7. Close the Command Prompt and restart your computer.
These steps should help resolve the issue with the SrtTrail.txt file. If you encounter any further problems, it’s recommended to seek additional assistance or consult Microsoft’s support documentation.
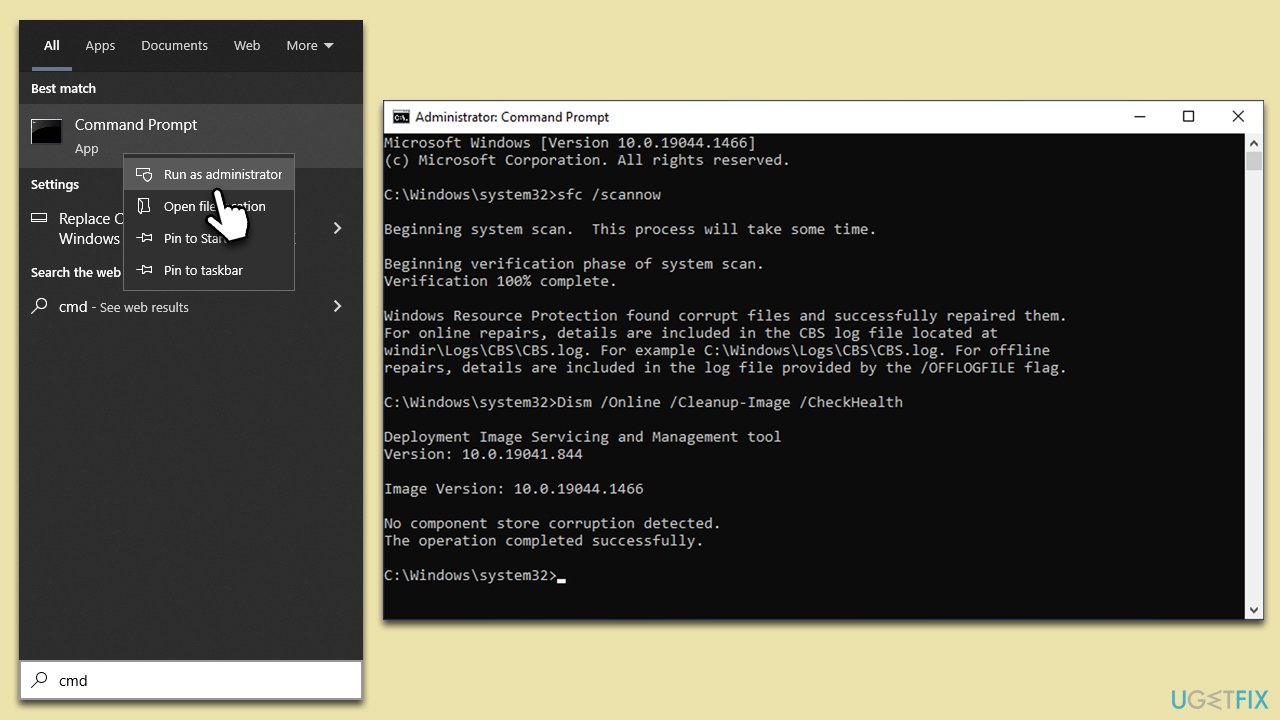
Implementing SFC and DISM for Error Resolution
Implementing SFC and DISM for Error Resolution
Windows System32 Logfiles Srt SrtTrail.txt Download
| Error Resolution Method |
Description |
| SFC (System File Checker) |
SFC is a built-in Windows utility that scans for corrupted system files and attempts to repair them.
To use SFC, open Command Prompt as an administrator and type the following command:
sfc /scannow
Wait for the scan to complete and follow any instructions provided by the utility.
|
| DISM (Deployment Image Servicing and Management) |
DISM is another Windows utility that can be used to repair errors related to the Windows System32 files.
To use DISM, open Command Prompt as an administrator and type the following command:
dism /online /cleanup-image /restorehealth
Wait for the process to complete and follow any instructions provided by the utility.
|
Example Message
?
It is advisable to download the windows system32 logfiles srt srttrail txt file for troubleshooting and analyzing system errors. Download this tool to run a scan