Month: July 2024

Seagate External Hard Drive Not Reading – Fix Guide

Having trouble with your Seagate external hard drive not reading? Here is a fix guide to help you troubleshoot and resolve the issue.

October 2024: Enhance your computer’s performance and eliminate errors with this cutting-edge optimization software. Download it at this link

  1. Click here to download and install the optimization software.
  2. Initiate a comprehensive system scan.
  3. Allow the software to automatically fix and repair your system.

Troubleshooting Connection and Power Issues

If you are facing connection and power issues with your Seagate external hard drive, there are a few troubleshooting steps you can take to resolve the problem.

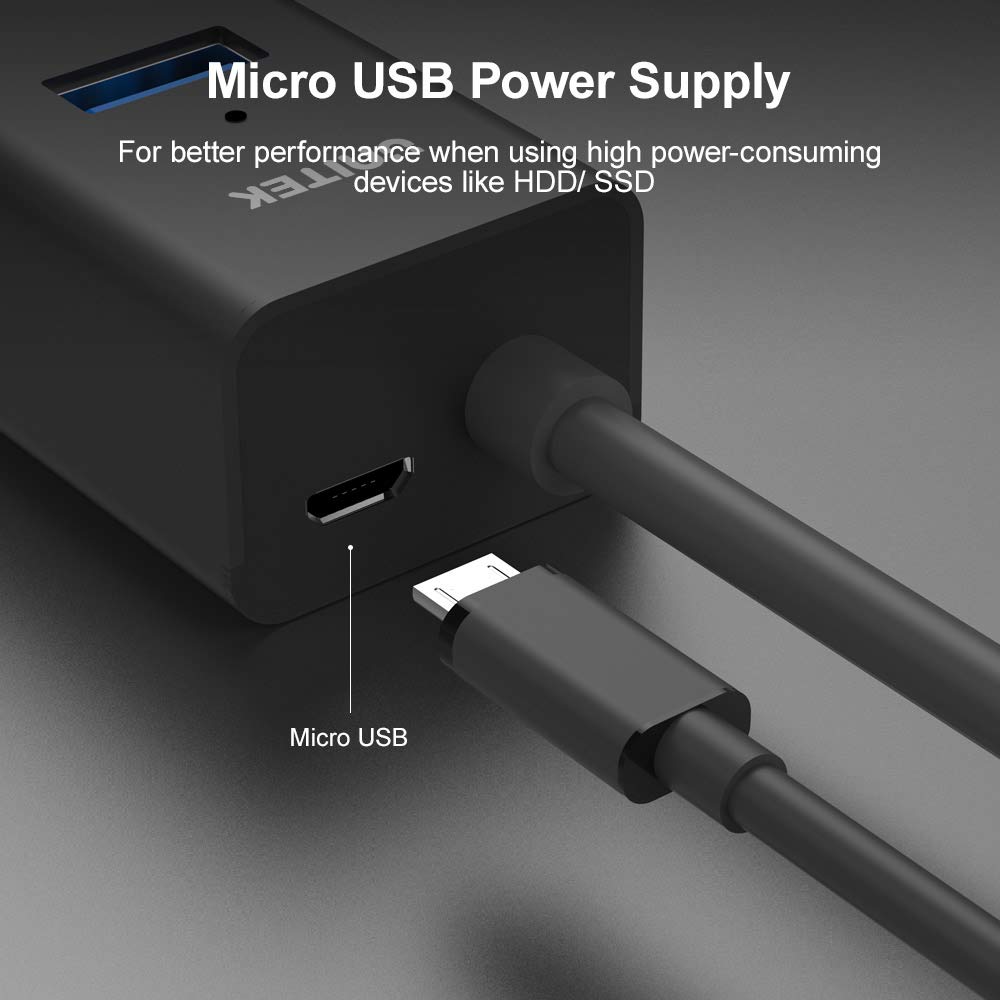
First, check the power source. Make sure the AC adapter is properly plugged into a working power strip or surge protector. If the power source is not the issue, try using a different power outlet to rule out any electrical problems.

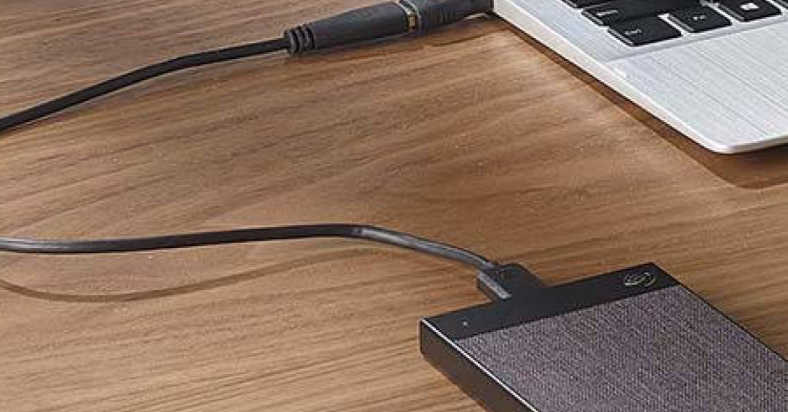
Next, check the connection between the hard drive and your computer. Ensure that the USB cable is securely connected to both the hard drive and your computer. Try using a different USB port on your computer to see if that resolves the issue.

If the hard drive is still not reading, try connecting it to a different computer to see if the problem is with your computer hardware. If the hard drive works on another computer, the issue may be with your computer’s USB ports or device drivers.

Check the Device Manager on your computer to see if the hard drive is recognized. If the hard drive is listed in the Device Manager, try updating the device drivers to see if that resolves the issue. If the hard drive is not listed, there may be a problem with the hard drive itself.

If you suspect that the hard drive may be experiencing disk formatting or file system issues, you can try using disk management tools to troubleshoot. Use the Command Line Interface to check the drive’s status and attempt to repair any errors.

If the hard drive is still not reading after trying these troubleshooting steps, you may need to consider data recovery options. Consult Seagate’s warranty information to see if you are eligible for data recovery services. If not, you may need to seek out a professional data recovery service.

Diagnosing and Repairing Drive Detection Problems

If your Seagate external hard drive is not being detected by your computer, there are a few steps you can take to diagnose and repair the issue.

First, check the connections: Make sure the USB cable is securely connected to both the hard drive and the computer. Try using a different USB port on your computer to see if that resolves the issue.

Next, power cycle the drive: Disconnect the power cable from the drive, wait a few seconds, and then reconnect it. This can sometimes reset the drive and fix detection issues.

If the drive is still not being detected, try using a different USB cable or adapter: Sometimes the issue can be with the cable itself, so swapping it out for a different one can help determine if that’s the problem.

Check the drive in Disk Management: Right-click on the Windows Start button and select “Disk Management.” Look for the Seagate drive in the list of disks. If it’s there, it may just need a drive letter assigned to it. Right-click on the drive and select “Change Drive Letter and Paths.”

If the drive is not showing up in Disk Management, try updating the device driver: Right-click on the Windows Start button and select “Device Manager.” Look for any devices with a yellow exclamation mark next to them, which indicates a driver issue. Right-click on the Seagate drive and select “Update Driver.”

Another option is to uninstall and reinstall the device driver: Right-click on the Seagate drive in Device Manager and select “Uninstall device.” Disconnect the drive, restart your computer, and then reconnect the drive. Windows should automatically reinstall the driver.

If none of these steps work, the issue may be with the drive itself: In this case, you may need to contact Seagate for warranty information or consider taking the drive to a professional for repair.

Formatting and Partitioning Solutions

  • Open Disk Management by pressing Win+X and selecting Disk Management
  • Right-click on the Seagate external hard drive and select Format
  • Follow the prompts to format the drive with the desired file system and allocation unit size
  • If the drive is not recognized, change the drive letter by right-clicking on the drive and selecting Change Drive Letter and Paths
  • Select Add, choose a drive letter, and click OK
  • If the drive still does not appear, try partitioning the drive by right-clicking on the unallocated space and selecting New Simple Volume
  • Follow the prompts to create a new partition on the drive
  • Restart the computer and check if the Seagate external hard drive is now recognized

Maintaining Drive Health and Preventing Data Loss

To maintain drive health and prevent data loss on your Seagate external hard drive, it is important to follow some key steps. Firstly, ensure that your drive is properly formatted to the appropriate file system, such as NTFS, to ensure compatibility with your operating system.

Regularly check for any signs of physical damage on your hard drive, such as cracks or dents, which may indicate potential issues. Additionally, avoid forcefully disconnecting the drive from your computer to prevent any data corruption.

It is also crucial to keep your drive updated with the latest firmware to ensure optimal performance and compatibility with your system. Regularly backing up your data to another storage device or cloud service is also recommended to prevent complete data loss in case of drive failure.

If your Seagate external hard drive is not reading, try connecting it to a different USB port or computer to rule out any issues with the current setup. Check the power source to ensure that the drive is receiving adequate power to function properly.

In some cases, issues with the drive may be resolved by performing a disk check or repair using your operating system’s built-in tools. Additionally, updating the device drivers for your hard drive may help resolve compatibility issues with your system.

If you are still experiencing issues with your Seagate external hard drive not reading, consider reformatting the drive to address any file system errors that may be causing the problem. Be sure to back up any important data before proceeding with this step.

FAQs

Why is my Seagate hard drive not being detected?

Your Seagate hard drive may not be detected due to faulty cabling. Try replacing the power and data cables with known working ones. You can also connect the hard drive to an external enclosure (ensure compatibility) to see if it is detected.

Why is my Seagate hard drive not readable?

Your Seagate hard drive may not be readable because it is formatted for a different operating system than the one you are using. Windows computers cannot natively read or write to drives formatted for Mac (HFS+ or APFS).

How do I fix undetected Seagate external hard drive?

To fix an undetected Seagate external hard drive, you can try connecting it to a different port on your computer, using a different cable, testing it on a different computer, making sure the drive light is on, and trying a different power outlet.

How do I recover my external hard drive that won’t read?

To recover an external hard drive that won’t read, you can try using data recovery software. Connect the hard drive to your computer, launch the software, select the drive, preview recoverable files, and then recover the selected files.

Fallout 4 not launching on Xbox One fix

Are you experiencing issues with Fallout 4 not launching on your Xbox One? Let’s explore some potential fixes for this frustrating problem.

October 2024: Enhance your computer’s performance and eliminate errors with this cutting-edge optimization software. Download it at this link

  1. Click here to download and install the optimization software.
  2. Initiate a comprehensive system scan.
  3. Allow the software to automatically fix and repair your system.

Troubleshooting Highlights

  • Check for Updates:
    • Make sure your Xbox One is up to date with the latest software updates.
    • Check for any pending updates for Fallout 4 in the Xbox Store.
  • Restart Console:
    • Press and hold the Xbox button on your console for 10 seconds to perform a hard reset.
    • After restarting, try launching Fallout 4 again.
  • Clear Cache:
    • Press and hold the power button on the front of the console until it turns off completely.
    • Unplug the power cord from the back of the console and wait for 10 seconds.
    • Plug the power cord back in and restart the console.
  • Reinstall Game:
    • Go to My games & apps on the Xbox dashboard.
    • Select Fallout 4 and choose Manage game.
    • Select Uninstall all to remove the game from your console.
    • Reinstall Fallout 4 from the Xbox Store.

Current Bugs in Quality Mode

Fallout 4 game menu

If you have recently installed any video game mods, try disabling them to see if that resolves the issue. Additionally, checking for any updates to the game or your Xbox system software could help fix any bugs causing Fallout 4 to not launch.

Effective Solutions

Xbox One controller

1. Restart your Xbox One: Power off your console completely and then turn it back on after a few seconds.

2. Check for updates: Make sure your Xbox system software and the game itself are both up to date.

3. Clear the cache: Press and hold the power button on your console for 10 seconds to clear the cache.

If the issue persists, you may need to uninstall and reinstall the game or contact Xbox support for further assistance.

Performance Optimization Tips

Tip Description
Clear Cache Clearing the cache on your Xbox One can help improve performance. To do this, go to Settings > Disc & Blu-ray > Persistent Storage > Clear Persistent Storage.
Update Game Make sure you have the latest updates for Fallout 4 installed. Developers often release patches to fix performance issues.
Manage Storage Ensure you have enough storage space on your Xbox One. Deleting unused games or apps can free up space and improve performance.
Adjust Graphics Settings Lowering the graphics settings in the game can help improve performance on the Xbox One.
Reboot Console Restarting your Xbox One can help clear out any temporary issues that may be affecting performance.

F.A.Q.

Why won’t Fallout 4 work?

Fallout 4 won’t work because there may be issues with Steam updating, game files needing verification, or outdated PC drivers, especially for the graphics card.

Is Fallout 4 playable on Xbox One?

Fallout 4 is playable on Xbox One.

Why is my Fallout 4 crashing on Xbox One?

My Fallout 4 on Xbox One may be crashing due to mods that have been recently updated. To troubleshoot, try removing all mods from the game and adding them back one by one to see if any are causing the issue.

Why is Fallout 4 stuck on the loading screen?

Fallout 4 may be stuck on the loading screen due to conflicts with a large number of activated mods. To fix this issue on Xbox, clear the Reserved Space for the title. On PlayStation, the game will need to be uninstalled and then reinstalled.

Fix Windows 7 Update Stuck on Checking for Updates

Are you frustrated with your Windows 7 update being stuck on checking for updates? Let’s explore some solutions to fix this issue.

October 2024: Enhance your computer’s performance and eliminate errors with this cutting-edge optimization software. Download it at this link

  1. Click here to download and install the optimization software.
  2. Initiate a comprehensive system scan.
  3. Allow the software to automatically fix and repair your system.

Troubleshooting Steps and Tools

  • Open Command Prompt as an administrator
  • Type net stop wuauserv and press Enter
  • Type net stop bits and press Enter
  • Delete the contents of the SoftwareDistribution folder
  • Type net start wuauserv and press Enter
  • Type net start bits and press Enter

Run Windows Update Troubleshooter

  • Open Control Panel
  • Go to Troubleshooting
  • Click on Fix problems with Windows Update
  • Follow the on-screen instructions

Manually Install Windows Updates

  • Go to the Microsoft Update Catalog website
  • Search for the updates by their KB number
  • Download the updates
  • Install the updates manually

Restart and Repair Techniques

If your Windows 7 update is stuck on “Checking for Updates,” try restarting and repairing techniques to resolve the issue. First, restart your computer to see if that helps kickstart the update process. If that doesn’t work, try running the System File Checker tool to scan and repair corrupted system files.

Another technique you can try is to perform a System Restore to revert your system back to a previous state where the updates were working correctly. This can sometimes fix update issues by undoing recent changes that may have caused the problem.

If the above methods don’t work, you can try manually downloading and installing updates from the Microsoft Update Catalog. This can bypass the automatic update process and ensure that your system gets the necessary updates.

Additionally, you can try changing your Internet Protocol (IP) address or switching to a different DNS server like Google Public DNS to see if that helps with the update process. Sometimes network issues can cause update problems, so changing these settings may resolve the issue.

If all else fails, you can try using the Windows Assessment and Deployment Kit to diagnose and repair update issues. This tool is more advanced and can help troubleshoot complex update problems that other methods may not be able to fix.

Manual Update and System File Checks

Windows Update settings menu.

Step Description
Step 1 Open Windows Update by clicking Start, typing Windows Update, and then clicking Windows Update in the search results.
Step 2 Click Check for updates.
Step 3 If updates are found, click Install updates.
Step 4 Restart your computer if prompted.
Step 5 Run System File Checker to scan for and repair corrupted system files. Open Command Prompt as an administrator and type sfc /scannow.
Step 6 Restart your computer.

Fresh Start with a Clean Install

Start by backing up all your important files to an external storage device to avoid losing any data during the clean install process.

Next, insert your Windows 7 installation DVD or USB drive and restart your computer.

Press any key to boot from the DVD or USB drive when prompted.

Follow the on-screen instructions to reach the installation screen.

Choose the option to “Install now” and select the version of Windows 7 you have a product key for.

Accept the license agreement and choose the “Custom (advanced)” installation option.

Select the partition where you want to install Windows 7 and follow the prompts to complete the installation.

Once the installation is complete, make sure to install all the necessary drivers for your hardware components.

Finally, run Windows Update to download and install the latest updates for your newly installed Windows 7 operating system.

FAQ

How to fix Windows update stuck on 7%?

To fix Windows update stuck on 7%, run the Windows Update Troubleshooter. Open the Windows search bar, type “Troubleshoot,” select “Troubleshoot settings,” click on “Windows Update” under “Get up and running,” and then click “Run the troubleshooter.” Follow the on-screen instructions.

What should I do if Windows update is stuck?

If Windows update is stuck, you can try pressing ‘Ctrl’, ‘Alt’, and ‘Delete’ on your keyboard simultaneously to access the login screen. Sign in as usual and attempt to update the OS again from there.

How do I get my computer out of update mode?

To get your computer out of update mode, you can press and hold the power button until it turns off, and then turn it back on. This should interrupt the update process and allow your computer to revert the changes made during the update.

How do I stop Windows 7 from updating while in progress?

To stop Windows 7 from updating while in progress, you can go to the service window, find the Windows update service, and turn off its running status. Then, right-click on Windows update.

Why is my external hard drive blinking: causes and solutions

In researching why my external hard drive is blinking, I discovered several potential causes and solutions.

October 2024: Enhance your computer’s performance and eliminate errors with this cutting-edge optimization software. Download it at this link

  1. Click here to download and install the optimization software.
  2. Initiate a comprehensive system scan.
  3. Allow the software to automatically fix and repair your system.

Change USB Port, Cable, or Restart Device

USB port with cable unplugged

If your external hard drive is blinking, it could indicate a connection issue. Start by changing the USB port or cable to see if that resolves the problem. A faulty port or cable could be causing the blinking light.

If changing the port or cable doesn’t work, try restarting your device. Sometimes a simple reboot can fix connectivity issues and stop the blinking light on your external hard drive.

If the blinking light persists even after changing the port, cable, or restarting the device, it could indicate a more serious issue. Consider troubleshooting the hard drive using the appropriate software or seeking professional help.

Remember to back up your data regularly to prevent any loss in case of a hard drive malfunction. Data recovery can be a complex and expensive process, so it’s best to be proactive about protecting your files.

In some cases, the blinking light on your external hard drive could be a sign of a computer virus. Make sure to run a virus scan on your device to rule out any malicious software causing the issue.

Address Power Supply and USB Root Hub Issues

If your external hard drive is blinking, it may be indicating an issue with the power supply or USB root hub.

First, check the power supply of your external hard drive. Make sure it is properly connected and receiving power. Try using a different power outlet or AC adapter to rule out any power supply issues.

If the power supply seems to be working fine, the blinking could be related to a problem with the USB root hub. Try connecting the external hard drive to a different USB port on your computer to see if the blinking stops.

If the blinking persists, there may be a driver issue causing the problem. Update the device drivers for your external hard drive by going to the Device Manager on your computer and selecting the “Update Driver” option.

It’s also worth checking for any software conflicts that could be causing the blinking. Uninstall any recently installed software or updates that may be interfering with the proper functioning of your external hard drive.

If all else fails, consider performing a reboot of your computer to see if that resolves the issue. Rebooting can often clear up any temporary glitches that may be causing the blinking.

Conduct Virus Cleanup and Antivirus Scans

  • Run a full antivirus scan on your external hard drive to detect and remove any malware or viruses that may be causing it to blink.
  • Update your antivirus software to ensure that it has the latest virus definitions and can effectively detect and remove any threats.
  • Use a reputable antivirus program to ensure that your external hard drive is properly protected against malware and viruses.

Update or Reinstall Hard Drive Driver

If your external hard drive is blinking, it could be due to a driver issue. To fix this problem, you can update or reinstall the hard drive driver.

To update the hard drive driver:
1. Right-click on the Start button and select Device Manager.
2. Expand the Disk drives category.
3. Right-click on your external hard drive and select Update driver.
4. Follow the on-screen instructions to update the driver.

To reinstall the hard drive driver:
1. Right-click on the Start button and select Device Manager.
2. Expand the Disk drives category.
3. Right-click on your external hard drive and select Uninstall device.
4. Disconnect the hard drive, restart your computer, then reconnect the hard drive. Windows will automatically reinstall the driver.

If updating or reinstalling the driver doesn’t solve the blinking issue, you may need to check the hard drive for errors using the built-in Windows Disk Check tool or a third-party disk utility.

It’s also possible that the blinking is caused by a faulty USB port or cable. Try connecting the hard drive to a different port or using a different cable to see if the issue persists.

In some cases, the blinking may be a sign of data corruption or a failing hard drive. Back up your important files immediately and consider seeking professional data recovery services if needed.

Explore Manual Data Recovery Options

If your external hard drive is blinking, it could indicate a problem that needs to be addressed promptly. One possible cause of this issue is a corrupted file system, which can prevent your computer from recognizing the drive. To resolve this, you can try performing a manual data recovery.

One option is to use a data recovery software program to scan the external hard drive for any lost or corrupted files. These programs are designed to recover data from damaged or inaccessible storage devices. Make sure to follow the instructions provided by the software carefully to avoid any further data loss.

Another manual data recovery option is to connect the external hard drive to a different computer to see if it is recognized. Sometimes, the issue may be with the USB port or driver on your original computer. If the drive is recognized on another computer, you can try transferring the data to a different storage device.

If the above methods do not work, you can also try accessing the external hard drive through the Command Prompt on your computer. This can sometimes bypass any issues preventing the drive from being recognized by the operating system. Use the “chkdsk” command in Command Prompt to scan and repair any errors on the external hard drive.

F.A.Q.

How do I fix my external hard drive blinking but not detectable?

To fix your external hard drive blinking but not detectable, you can try disabling the power-saving setting for the USB Root Hub in the Device Manager.

What does it mean when your flash drive is blinking?

When your flash drive is blinking, it usually indicates that there is a problem with the data stored on it. It is important to recover your data from the drive as soon as possible.

Why is my WD external hard drive light blinking but not detecting?

Your WD external hard drive light blinking but not detecting may be due to the file system not recognizing the HDD. Try troubleshooting by changing the USB port or cable, uninstalling drivers, or changing the drive letter.

Resolve DNS Issues: Troubleshooting Methods

In this article, I will discuss troubleshooting methods for resolving DNS issues.

October 2024: Enhance your computer’s performance and eliminate errors with this cutting-edge optimization software. Download it at this link

  1. Click here to download and install the optimization software.
  2. Initiate a comprehensive system scan.
  3. Allow the software to automatically fix and repair your system.

Understanding DNS Issues

When facing DNS issues, the first step is to check your internet connection to ensure it’s working properly. If you’re unable to access websites, there may be a problem with your DNS settings.

Try using Google Public DNS to see if the issue is with your current DNS server. You can change your DNS settings on your computer or router to use Google Public DNS.

If you’re experiencing slow loading times for websites, clear your browser cache to see if that helps improve the performance. Cached data can sometimes cause DNS issues.

Another troubleshooting method is to ping a website to see if you’re able to communicate with it. If the ping is successful, it could be a DNS problem. If not, there may be an issue with your internet connection.

If you suspect malware may be causing DNS issues, run a malware scan on your computer to remove any potential threats. Malware can sometimes interfere with DNS settings.

If all else fails, restart your modem and router to see if that resolves the DNS issues. Sometimes a simple reset can fix connectivity problems.

Importance of Troubleshooting

Troubleshooting is crucial when it comes to resolving DNS issues. By identifying and addressing the root cause of the problem, you can ensure a smooth and uninterrupted browsing experience for users.

When troubleshooting DNS issues, it is important to start by checking the DNS server settings on your computer or network device. Make sure that the correct IP address is configured and that there are no issues with the connection to the server.

If the DNS server settings are correct, you can try flushing the DNS cache to refresh the system and clear out any outdated information. This can help resolve issues related to incorrect IP addresses or domain names.

Another important troubleshooting method is to ping the DNS server to check for connectivity issues. If you are unable to ping the server, there may be a problem with the network connection or firewall settings.

In some cases, DNS issues can be caused by corrupted firmware or software. Updating the firmware on your router or network device, as well as checking for any software updates, can help resolve these issues.

Identifying Symptoms and Causes

When troubleshooting DNS issues, it is crucial to identify the symptoms and causes accurately. Some common symptoms of DNS problems include slow website loading, error messages when trying to access websites, or inability to connect to certain websites. These issues can be caused by various factors such as incorrect DNS settings, network connectivity problems, or server issues.

One way to identify DNS issues is by pinging the domain name to check if it resolves to the correct IP address. If there is a discrepancy, it may indicate a DNS problem. Another method is to clear the DNS cache on your computer to remove any outdated information that could be causing the issue.

If the problem persists, try changing your DNS server settings to use a different DNS provider such as Google or Cloudflare. This can help resolve DNS issues caused by server problems or network congestion. Additionally, check your router settings to ensure that DNS settings are configured correctly.

Diagnostic Tools and Tests

Tool/Test Description
Dig A command-line tool for querying DNS servers and displaying detailed information about DNS records.
Nslookup A command-line tool used to query DNS servers to retrieve DNS records and troubleshoot DNS issues.
Traceroute A tool that shows the route taken by packets from your computer to a destination server, helping identify network issues.
Wireshark A network protocol analyzer that captures and displays packet data, aiding in diagnosing network and DNS issues.
DNS Benchmark A tool that tests the speed and performance of DNS servers, helping you choose the fastest and most reliable one.

ISP Settings and DNS Problems

When experiencing DNS problems, it is important to first check your ISP settings. Make sure that your DNS server addresses are correctly configured in your router settings or network adapter properties. This ensures that your device can properly communicate with the DNS server to resolve domain names.

If you are still facing DNS issues after checking your ISP settings, you may need to troubleshoot the problem further. Try flushing your DNS cache by opening the command prompt and typing “ipconfig /flushdns”. This can help clear any outdated or incorrect DNS information stored on your device.

Another troubleshooting method is to change your DNS server to a public DNS service such as Google DNS (8.8.8.8 and 8.8.4.4) or OpenDNS (208.67.222.222 and 208.67.220.220). This can sometimes resolve DNS problems caused by issues with your ISP’s DNS servers.

If you are still unable to resolve the DNS problem, contact your ISP for assistance or consider using a network monitoring tool like Pingdom to diagnose the issue. It is important to address DNS problems promptly to ensure smooth and reliable internet access.

Fixing Common DNS Errors

If you are experiencing common DNS errors, follow these troubleshooting methods to resolve the issue quickly and effectively.

1. Check your DNS server settings: Make sure your DNS server settings are correct and properly configured on your device. Incorrect settings can lead to DNS errors.

2. Clear your DNS cache: Clearing your DNS cache can help resolve any caching issues that may be causing DNS errors. This can be done through the command prompt on Windows or by restarting your DNS resolver service.

3. Flush your DNS: Flushing your DNS can also help resolve DNS errors by clearing out any outdated or incorrect DNS information stored on your device. This can be done through the command prompt using the “ipconfig /flushdns” command.

4. Restart your DNS resolver service: Sometimes simply restarting your DNS resolver service can fix DNS errors. This can be done through the command prompt by stopping and then starting the DNS resolver service.

If you continue to experience DNS errors after trying these troubleshooting methods, you may need to contact your Internet Service Provider or a network administrator for further assistance.

Preventative Measures for Future Issues

  • Regularly update your DNS server software:
    • Check for updates and patches regularly to ensure your DNS server is running smoothly.
    • Set up automatic updates if possible to keep your server up-to-date.
  • Monitor your DNS server performance:
    • Use monitoring tools to keep track of your DNS server’s performance.
    • Set up alerts for any unusual activity or performance issues.
  • Implement security measures:
    • Use firewalls and other security measures to protect your DNS server from attacks.
    • Regularly review and update your security settings to stay ahead of potential threats.

Managing DNS Settings and Servers

To manage DNS settings and servers effectively, start by accessing your domain registrar or web hosting account. Look for the option to modify DNS settings, typically found under the domain management section.

Update the DNS records with the correct information provided by your hosting provider. This includes the A record, CNAME record, MX record, and any others necessary for your website to function properly.

After making changes, it’s crucial to flush the DNS cache to ensure that the new settings take effect immediately. You can do this by running the command “ipconfig /flushdns” on Windows or “sudo killall -HUP mDNSResponder” on Mac.

If you’re experiencing DNS issues despite correct settings, try pinging the domain to see if the server is responding. Use the command “ping yourdomain.com” in the command prompt to check for connectivity.

In case of persistent problems, consider switching to a different DNS server such as Google DNS or OpenDNS. This can sometimes resolve issues related to slow loading times or unreachable websites.

Switching Browsers and Devices

If you’re experiencing DNS problems on one browser, try accessing the same website on a different browser. This can help verify if the issue is browser-related or stemming from a larger network problem.

Similarly, testing the website on a different device, such as a smartphone or tablet, can provide valuable insights into whether the problem is specific to your computer or affecting multiple devices on your network.

By switching browsers and devices, you can narrow down the source of the DNS issue and determine the best course of action to resolve it effectively.

Remember to clear the cache and cookies on the new browser or device to ensure accurate testing results and avoid any potential conflicts that may arise from stored data.

If the problem persists across different browsers and devices, consider contacting your Internet Service Provider to investigate potential network issues that may be affecting your DNS resolution.

Safe Mode and Network Troubleshooting

Safe Mode can be a useful tool when troubleshooting DNS issues. Boot your computer into Safe Mode by restarting your computer and pressing F8 before the Windows logo appears. This will help you identify if any third-party software is causing the problem.

In Safe Mode, try flushing the DNS cache by opening the Command Prompt and typing “ipconfig /flushdns”. This will clear out any old or corrupted DNS information that may be causing issues.

Network Troubleshooting can also help resolve DNS issues. Check your network connection by pinging a website to see if you are receiving a response. If not, there may be an issue with your connection.

If you suspect your router is causing the problem, try restarting it by unplugging it for 30 seconds and then plugging it back in. This can often resolve network issues related to DNS.

By utilizing Safe Mode and Network Troubleshooting methods, you can pinpoint the root cause of DNS issues and resolve them efficiently.

Updating Network Drivers and Flushing DNS Cache

To update network drivers, first identify the network adapter in your computer. Visit the manufacturer’s website to download the latest drivers. Install the new drivers and restart your computer to apply the changes.

Flushing the DNS cache can help resolve connectivity issues. Open the command prompt and type “ipconfig /flushdns“. Press Enter and wait for the confirmation message. This will clear the cache and force your computer to retrieve new DNS information.

If you are still experiencing DNS issues after updating drivers and flushing the cache, consider restarting your router and modem. This can refresh the network connection and resolve any temporary glitches.

Remember to check for any firewall settings that may be blocking your internet connection. Adjust the settings if necessary to ensure proper network communication.

FAQ

How to resolve DNS problem?

To resolve DNS problems, you can clear the cache by typing ipconfig/flushdns in the command prompt. This will ensure that any stored DNS information causing issues is removed and new information is downloaded when accessing the website.

What causes a DNS outage?

A DNS outage can be caused by various factors such as browser cache issues, router malfunctions, DNS server problems, or firewall interference.

How to reset DNS?

To reset DNS, you can access the Command Prompt by searching for CMD in the Start Menu. Once the black window appears, type ipconfig /flushdns and press ENTER. Remember to restart your computer afterwards.

Is DNS a common problem?

DNS can be a common problem if the DNS records are not configured correctly or if there are mistakes in the IP addresses and values of your address.

WD My Book Essential Elements Not Showing Up Fix

In this article, we will discuss solutions to fix WD My Book Essential elements not showing up on your computer.

October 2024: Enhance your computer’s performance and eliminate errors with this cutting-edge optimization software. Download it at this link

  1. Click here to download and install the optimization software.
  2. Initiate a comprehensive system scan.
  3. Allow the software to automatically fix and repair your system.

Use Professional Data Recovery Tools or Services

Using professional data recovery tools can help in retrieving the missing or inaccessible data from your WD My Book Essential. These tools are equipped with advanced algorithms and techniques to recover data from various storage devices, including external hard drives like the WD My Book Essential.

If you are not familiar with data recovery tools or techniques, it is recommended to seek professional data recovery services to avoid any further complications. These services have experts who are well-trained in handling data recovery tasks and can efficiently recover your data without risking further damage to the device.

Before attempting any data recovery process, it is important to backup your data to prevent any potential data loss. This can be done by transferring your important files to another storage device or cloud storage platform.

If you are unable to access your data on the WD My Book Essential, avoid trying to fix the issue on your own as it may worsen the situation. Instead, seek help from professional data recovery experts who have the necessary tools and expertise to safely recover your data.

Address Cable, Port, and USB Issues

  • Check the USB cable connection:
    • Ensure the USB cable is securely connected to both the WD My Book Essential and the computer.
    • Try using a different USB cable to rule out any issues with the current cable.
  • Test different USB ports:
    • Try connecting the WD My Book Essential to different USB ports on the computer to see if the issue is with a specific port.
    • Avoid using USB hubs or extension cables as they may cause connectivity issues.
  • Update USB drivers:
    • Open Device Manager by pressing Win+X and selecting it from the menu.
    • Expand the “Universal Serial Bus controllers” section and right-click on each USB driver to select “Update driver.”

Update or Repair Drivers and Run Troubleshooters

If your WD My Book Essential Elements is not showing up on your computer, the issue may be related to outdated or corrupted drivers. To fix this problem, you can update or repair the drivers on your system.

1. Update Drivers:
To update the drivers for your WD My Book Essential Elements, you can go to the Device Manager on your computer. Right-click on the Start menu and select Device Manager. Locate the WD My Book Essential Elements under the Disk drives category. Right-click on it and select Update driver. Follow the on-screen instructions to search for and install the latest driver for your device.

2. Repair Drivers:
If updating the drivers does not resolve the issue, you can try repairing them instead. To repair the drivers for your WD My Book Essential Elements, you can go back to the Device Manager. Right-click on the device and select Properties. Go to the Driver tab and click on the Update Driver button. Select “Browse my computer for driver software” and then “Let me pick from a list of available drivers on my computer.” Choose the driver you want to install and follow the on-screen instructions to repair it.

3. Run Troubleshooters:
If updating or repairing the drivers does not fix the issue, you can run troubleshooters on your system to identify and resolve any problems. To do this, go to the Settings app on your computer. Click on Update & Security, then select Troubleshoot from the left-hand menu. Run the Troubleshooters for Hardware and Devices to check for any issues with your WD My Book Essential Elements.

Assign New Drive Letters or Format the Drive

– Right-click on ‘This PC’ or ‘My Computer’ and select ‘Manage.’
– Click on ‘Disk Management’ under the ‘Storage’ section.
– Right-click on the WD My Book Essential Elements drive that is not showing up and select ‘Change Drive Letter and Paths.’
– Click on ‘Change’ and select a new drive letter from the drop-down menu.
– Click ‘OK’ and the drive should now be assigned a new drive letter.

If assigning a new drive letter does not fix the issue, you may need to format the drive. Before formatting, make sure to back up any important data on the drive as formatting will erase all data. To format the drive, follow these steps:

– Right-click on ‘This PC’ or ‘My Computer’ and select ‘Manage.’
– Click on ‘Disk Management’ under the ‘Storage’ section.
– Right-click on the WD My Book Essential Elements drive that is not showing up and select ‘Format.’
– Follow the on-screen instructions to format the drive.
– Once the formatting process is complete, the drive should now be recognized by your computer.

By assigning new drive letters or formatting the drive, you should be able to fix the issue of your WD My Book Essential Elements not showing up on your computer.

FAQ

How to reset WD mybook?

To reset the WD MyBook, access the device dashboard, navigate to Settings, click on Utilities, and then select Factory Restore. Choose between Quick Factory Restore or Full Factory Restore, and then click Start to initiate the reset process.

Why is my WD hard drive not working?

Your WD hard drive may not be working due to issues with incompatible file systems, USB connection problems, or outdated drivers.

Why is my hard drive not working?

Your hard drive may not be working due to a corrupt or virus/malware infected file that needs to be removed. Use a reliable antivirus program to quarantine and remove the infected file(s) to fix the drive error.

How do I turn on mybook?

To turn on My Book, simply press the power button on the back panel.

Fix Chrome Remote Desktop Blurry Display

Are you experiencing a blurry display while using Chrome Remote Desktop? Let’s explore some solutions to fix this issue.

October 2024: Enhance your computer’s performance and eliminate errors with this cutting-edge optimization software. Download it at this link

  1. Click here to download and install the optimization software.
  2. Initiate a comprehensive system scan.
  3. Allow the software to automatically fix and repair your system.

Adjusting Screen Resolution and Settings

Adjusting screen resolution settings

To adjust screen resolution and settings in Chrome Remote Desktop, start by accessing the remote computer. On the remote desktop, right-click on the desktop and select Display settings. Here, you can adjust the screen resolution by moving the slider to your desired setting. You can also adjust other display settings like scaling and orientation.

Disabling Acceleration Options

1. Open Google Chrome on your computer.
2. Type chrome://flags in the address bar and press Enter.
3. In the search bar, type Hardware Acceleration.
4. Disable the option by clicking on the drop-down menu and selecting Disabled.
5. Restart Chrome for the changes to take effect.

Disabling acceleration options can help improve the display quality when using Chrome Remote Desktop. This simple troubleshooting step may resolve the blurry display issue you are experiencing.

Enhancing Resolution During Remote Sessions

Adjusting display settings

Resolution Method
Change Display Settings Adjust resolution settings on your local computer
Enable Remote Desktop Scaling Enable scaling in Chrome Remote Desktop settings
Use High-Speed Internet Connection Ensure a stable and fast internet connection for better resolution

Exploring High-Quality Remote Desktop Software

Remote desktop software interface.

When exploring high-quality remote desktop software to fix a blurry display on Chrome Remote Desktop, consider options like **TeamViewer** or **AnyDesk**. These programs offer better image quality and faster connections. Make sure to adjust your settings for optimal performance, such as enabling **hardware acceleration**. Additionally, check for any updates or patches that may have been released to address display issues. **Troubleshoot** by testing different resolutions or adjusting your network settings.

FAQs

How do I fix a blurry screen in Remote Desktop?

To fix a blurry screen in Remote Desktop, adjust the display settings by lowering the resolution in the Display tab before connecting to the host computer.

How do I fix blurry Google Chrome?

To fix blurry Google Chrome, you can clear the cache. Simply go to your browser, open the settings, and navigate to privacy settings to clear the cache.

Why does my Chrome look pixelated?

Your Chrome looks pixelated because of high DPI settings. One solution is to disable display scaling for higher DPI settings, effectively making Chrome ignore the Windows display settings.

No Internet Connection But WiFi is Working Fix

Struggling with a WiFi connection that won’t allow access to the internet can be frustrating.

October 2024: Enhance your computer’s performance and eliminate errors with this cutting-edge optimization software. Download it at this link

  1. Click here to download and install the optimization software.
  2. Initiate a comprehensive system scan.
  3. Allow the software to automatically fix and repair your system.

Identifying Connection Issues

To identify connection issues when facing a situation where there is no internet connection but WiFi is working, follow these steps. First, check if other devices are experiencing the same issue. If they are, the problem may lie with the router or internet service provider. Next, restart the device experiencing the issue to see if that resolves the problem. If not, try forgetting the WiFi network and reconnecting to see if that helps establish a connection.

If the problem persists, consider resetting the router or modem as a final troubleshooting step.

General Troubleshooting Steps

  • Check Network Cables:

    • Make sure all cables are securely connected to the modem/router.
    • Inspect cables for any visible damage.
  • Restart Modem/Router:

    • Unplug the power cable from the modem/router.
    • Wait for 30 seconds, then plug the power cable back in.
    • Allow the modem/router to fully restart before testing the connection.
  • Check Network Settings:

    • Ensure the WiFi is enabled on your device.
    • Verify that the correct network is selected.
    • Check for any IP address conflicts.
  • Update Network Drivers:

    • Open Device Manager by pressing Windows key + X and selecting it.
    • Expand the Network adapters category.
    • Right-click on your network adapter and select Update driver.

Resolving IP and Wireless Adapter Conflicts

Wireless network and IP address conflict diagram

To resolve IP and wireless adapter conflicts when you have no internet connection but WiFi is working, begin by restarting your router and modem. Next, check for any IP address conflicts on your devices by releasing and renewing the IP address. If the issue persists, update your wireless adapter drivers to ensure compatibility with your network. Additionally, check for any software or settings that may be blocking the connection. If all else fails, contact your internet service provider for further assistance.

Resetting Network Equipment

Network router reset page

Resetting your network equipment can help resolve issues with your internet connection even if your WiFi is working. Start by unplugging your router and modem from the power source. Wait for about 30 seconds before plugging them back in. If you have an Apple device such as an iPad, iPhone, or Apple TV, make sure to restart them as well to refresh the connection. Check if your internet connection is back after resetting the network equipment. If the issue persists, contact your internet service provider for further assistance.

F.A.Q.

Why does my internet keep saying no internet connection?

Your internet may keep saying no internet connection due to router or modem issues. These devices are the primary gateway to internet access and problems can arise from various reasons such as outdated firmware, hardware malfunctions, overheating, or temporary glitches in their operation.

Why does my iPhone keep saying I have no internet connection?

Your iPhone may keep saying you have no internet connection due to a poor connection signal, incorrect Wi-Fi password, Wi-Fi or mobile data settings, restricted network settings, or a bulky phone case. Increasing your internet speed may help resolve the issue.

Why am I suddenly not connected to the internet?

It seems that you are suddenly not connected to the internet. This could be due to various factors such as problems with your equipment, inadequate speeds, network congestion, or inclement weather. Restarting your modem/router is a common solution to resolve the issue.

How to connect to the internet when no Wi-Fi connection is available?

To connect to the internet when no Wi-Fi connection is available, you can use your smartphone as a mobile hotspot. Simply enable the “personal hotspot” or “mobile hotspot” option in your device’s settings, and then connect other devices to the hotspot as you would with a regular Wi-Fi network.