Month: February 2024

Can’t see my WiFi network in list of available networks

Having trouble connecting to your WiFi network because it’s not showing up in the list of available networks? Let’s troubleshoot that issue.

May 2024: Enhance your computer’s performance and eliminate errors with this cutting-edge optimization software. Download it at this link

  1. Click here to download and install the optimization software.
  2. Initiate a comprehensive system scan.
  3. Allow the software to automatically fix and repair your system.

Identifying Causes for Network Visibility Issues

There are several potential causes for network visibility issues when your WiFi network is not showing up in the list of available networks.

1. Signal Interference: Check for any nearby devices that could be causing electromagnetic interference, such as microwaves, cordless phones, or Bluetooth devices. Move your router away from these sources of interference.

2. Router Placement: Ensure that your router is placed in a central location in your home and not hidden away in a cabinet or behind furniture. This will help improve the signal strength and visibility of your network.

3. Network Settings: Verify that your WiFi network is broadcasting its SSID and is not hidden. You can check this in your router settings and make sure that the SSID broadcast is enabled.

4. Network Security: Make sure that your network is not set to a hidden or closed network. Check that your WiFi network is using WPA or WPA2 security protocols to prevent unauthorized access.

By addressing these common issues, you can improve the visibility of your WiFi network and ensure that it appears in the list of available networks for your devices to connect to.

Enabling Wi-Fi and Network Services

WiFi settings icon

If you can’t see your WiFi network in the list of available networks, there are a few steps you can take to troubleshoot the issue. First, make sure your device’s WiFi is turned on. If it is, but you still can’t see your network, try restarting your device.

Check if the SSID broadcast is enabled on your router. If it’s not, you won’t see your network in the list of available networks. You can enable SSID broadcast in your router’s settings.

If you still can’t see your network, try moving closer to the router or modem to see if that helps. Sometimes, distance can affect the signal strength.

Another option is to reset your network settings. This can often resolve connectivity issues. Go to your device’s settings and look for the option to reset network settings.

Restarting Devices and Services

If you can’t see your WiFi network in the list of available networks, try restarting your devices and services. First, power cycle your router by unplugging it from the power source, waiting for 30 seconds, and then plugging it back in. This can help reset the connection and refresh the network list on your device.

Next, restart your computer or device that you are trying to connect to the WiFi network. Sometimes a simple reboot can solve connectivity issues and allow your device to detect the network.

If you still can’t see your WiFi network, check if there are any software updates available for your router or device. Updating the firmware or software can sometimes resolve network visibility problems.

Lastly, make sure that your WiFi network is not hidden or set to private. Check the settings on your router to ensure that the SSID broadcast is enabled so that your network shows up in the list of available networks.

Updated: May 2024

Fortect can help with the issue of not being able to see your wireless network in the list by addressing potential Windows issues that may be causing the problem. It can repair damaged system files and faulty settings that could be hindering the network visibility.

Additionally, Fortect can address any virus damage or freezing computer issues that may be impacting your ability to connect to your wireless network.

Updating Network Drivers

To update your network drivers, follow these steps:

1. Open Device Manager by pressing Windows key + X and selecting Device Manager from the menu.

2. Locate your network adapter under the Network adapters section.

3. Right-click on your network adapter and select Update driver.

4. Choose to automatically search for updated driver software.

5. If a new driver is found, follow the on-screen instructions to install it.

6. Restart your computer after the driver update is complete.

By updating your network drivers, you may be able to resolve the issue of not being able to see your Wi-Fi network in the list of available networks. If the problem persists, consider troubleshooting other possible causes such as signal interference or router settings.

Resetting Modems and Routers

If you can’t see your WiFi network in the list of available networks, try resetting your modem and router. First, unplug both devices from the power source. Wait for about 30 seconds before plugging them back in. This process, known as power cycling, can help resolve connectivity issues.

After power cycling, wait a few minutes for the devices to fully reboot. Check your device to see if your WiFi network is now visible. If not, try restarting your device as well.

If you still can’t see your WiFi network, it may be helpful to contact your Internet service provider for further troubleshooting. They may be able to provide additional guidance or check for any service outages in your area.

Troubleshooting Network Settings

  • Make sure WiFi is turned on in device settings
  • Ensure device is not in airplane mode

Restart Device

  • Turn device off and then back on
  • Reset network settings

Move Closer to Router

  • Ensure device is within range of WiFi signal
  • Check for any physical obstructions blocking signal

Update Network Drivers

  • Open Device Manager by pressing Windows key + X
  • Find network adapters and update drivers

Reset Router

  • Unplug router for 30 seconds and then plug back in
  • Reset router to factory settings
    Unplug router for 30 seconds and then plug back in
Reset router to factory settings

Checking for Interferences and Hidden Networks

If you can’t see your WiFi network in the list of available networks, there may be interference or hidden networks causing the issue.

Check for any physical obstructions or electronic devices that could be causing interference with your WiFi signal.

Make sure your router is in a central location and not blocked by walls or furniture.

Scan for hidden networks by adjusting your WiFi settings to display all available networks.

Consider changing your WiFi channel to reduce interference from other nearby networks.

If you suspect malware or other security issues, run a thorough antivirus scan on your device.

By addressing these potential interferences and hidden networks, you should be able to see your WiFi network in the list of available networks again.

F.A.Qs

Why is my wireless network not showing up?

Your wireless network may not be showing up because your wireless hardware could be turned off or not working properly. Make sure it is turned on and try moving closer to the wireless base station/router to see if the network appears in the list.

Why can’t my device find my Wi-Fi network?

Your device may not be able to find your Wi-Fi network because your router may be unplugged or the power may be cut off. Restarting your router or plugging it back in could be a simple solution. Additionally, check if your devices are trying to connect to a different network.

Why is my Wi-Fi network hidden?

Your Wi-Fi network is hidden because it has been intentionally configured to not broadcast its SSID, which is a common security measure to reduce visibility of the network.

How do I manually add a wireless network?

To manually add a wireless network on Android, you can go to the Wi-Fi settings in the notification bar, select a network, tap on “Add Network,” and enter the password.

Example Message
?

If you can’t see your wireless network in the list, try restarting your router and checking if the network visibility settings are correctly configured. Download this tool to run a scan

Fix Pokemon Go Error 12 Failed to Detect Location 2024

Experiencing the Pokemon Go Error 12 Failed to Detect Location 2024 can be frustrating for players trying to enjoy the game.

May 2024: Enhance your computer’s performance and eliminate errors with this cutting-edge optimization software. Download it at this link

  1. Click here to download and install the optimization software.
  2. Initiate a comprehensive system scan.
  3. Allow the software to automatically fix and repair your system.

Importance of Location in Gameplay

Location is a crucial aspect of gameplay in Pokémon Go. The game relies heavily on GPS signals to determine a player’s location in the real world, which in turn affects their in-game experience.

Without accurate location detection, players may encounter errors such as Error 12, which can prevent them from playing the game properly. This error is often linked to issues with the device’s GPS signal or location settings.

It is important to ensure that your device’s GPS settings are enabled and that you have a clear line of sight to GPS satellites. Additionally, checking for any software updates or patches that may improve location detection can help resolve Error 12.

In some cases, using tools like Magisk or joysticks to spoof your location can also trigger Error 12. It’s crucial to play the game ethically and within the terms of service to avoid encountering this error.

By prioritizing the accuracy of your location settings and respecting the game’s mechanics, you can enjoy a seamless Pokémon Go experience without facing Error 12.

Common Causes of Location Errors

Make sure your GPS is enabled and set to high accuracy mode in your device settings. Additionally, ensure that Pokemon Go has permission to access your device’s location.

If you are using an iPhone, check that your iOS software is up to date. For Android users, make sure your device is running on the latest version of the operating system.

Clear the cache of the Pokemon Go app and restart your device to refresh the GPS connection.

Avoid using any unauthorized software like Magisk or joystick apps, as they can interfere with the game’s location detection.

If you are still experiencing location errors, consider checking for any updates or patches released by Niantic, Inc.

Updated: May 2024

Fortect can help with the “location not found 12” error in Pokemon Go by repairing damaged system files and settings that may be causing the issue. It can also address freezing programs or slowdowns that may be hindering the game’s performance.

Additionally, Fortect can automatically fix missing or corrupt DLL files, which are essential for proper program functioning. By restoring the system to its pre-infected state, Fortect can potentially resolve the error and allow for smoother gameplay.

Solutions for Android Devices

  • Go to Settings on your Android device.
  • Tap on Apps.
  • Find Pokemon Go in the list of apps and tap on it.
  • Tap on Storage.
  • Tap on Clear Cache and then tap on Clear Data.

Enable Mock Locations

  • Go to Settings on your Android device.
  • Tap on About Phone.
  • Find Build Number and tap on it multiple times until you see a message saying you are now a developer.
  • Go back to Settings and tap on Developer Options.
  • Find Mock Location app and select Pokemon Go from the list.

Check Location Settings

  • Go to Settings on your Android device.
  • Tap on Location.
  • Make sure Location is turned on and set to High Accuracy.
  • Restart your device after changing the settings.

Solutions for iOS Devices

If you are experiencing the Pokemon Go Error 12 “Failed to Detect Location 2024” on your iOS device, there are a few solutions you can try to fix the issue.

1. Check your internet connection: Make sure you have a stable internet connection, as a weak or unstable connection can cause this error.

2. Restart your device: Sometimes simply restarting your iOS device can resolve the issue.

3. Update the Pokemon Go app: Make sure you are using the latest version of the app, as outdated versions can sometimes cause errors.

If the error persists, you can try to uninstall and reinstall the app, or reset your network settings on your device.

Restarting and Resetting Tips

If you are experiencing the Pokemon Go Error 12 Failed to Detect Location 2024, try restarting and resetting your device to fix the issue.

Restart your device by turning it off and then turning it back on. This can help refresh the system and potentially resolve the error.

If restarting doesn’t work, reset the app’s cache by going to Settings > Apps > Pokemon Go > Storage > Clear Cache. This can sometimes clear up any issues with the app’s data.

You can also try resetting your GPS settings by going to Settings > Location > Advanced > Google Location Accuracy and toggling the setting off and then back on.

If the error persists, you may need to check for any software updates for both the Pokemon Go app and your device’s operating system. Keeping your software up to date can help prevent errors like this from occurring.

Frequently Asked Questions

Why does it say no location found on Pokemon go?

It says “no location found” on Pokemon Go because your device’s location services may be off. To fix this, go into your device’s settings, turn on location services, then close and refresh the app.

How do you fix the wrong location in Pokemon go?

To fix the wrong location in Pokemon Go, you can ensure that you are using a supported device, have a strong signal strength, play in urban areas, and enable the “Improve Location Accuracy” setting on Android devices.

Why can’t i spoof on Pokemon Go?

I can’t spoof on Pokemon Go because it goes against Niantic, Inc.’s Player Guidelines and Terms of Service. Although it’s technically possible, it usually requires rooting your Android or jailbreaking your iOS device.

How do I fix GPS not found in Pokemon?

To fix GPS not found in Pokemon, you can check and turn on your device’s location services. Simply go to your device’s settings and navigate to the Privacy section for iOS or Location for Android. Make sure to switch on the location services and restart the app before trying to play the game again.

Example Message
?

Sorry, but it seems that the location you are trying to find in Pokemon Go is not available. Download this tool to run a scan

Fix Windows Update Error 8024000B on Windows 11/10

Are you encountering Windows Update Error 8024000B on your Windows 11/10 system?

May 2024: Enhance your computer’s performance and eliminate errors with this cutting-edge optimization software. Download it at this link

  1. Click here to download and install the optimization software.
  2. Initiate a comprehensive system scan.
  3. Allow the software to automatically fix and repair your system.

Running Cleanup PowerShell Script for Superseded Updates

PowerShell command prompt

To fix Windows Update Error 8024000B on Windows 11/10, you can run a cleanup PowerShell script for superseded updates. This script helps remove unnecessary updates that may be causing the error. Follow these steps:

1. Open PowerShell as an administrator by searching for “PowerShell” in the Start menu, right-clicking on “Windows PowerShell,” and selecting “Run as administrator.”
2. In the PowerShell window, copy and paste the following command and press Enter: Get-WindowsUpdateLog
3. This command will generate a log file. Note the file path displayed in the PowerShell window.
4. Open File Explorer and navigate to the log file’s location. Double-click the file to open it in a text editor.
5. Use the search function in the text editor and look for the error code “8024000B.” This will help you identify the problematic updates.
6. Once you’ve identified the superseded updates causing the error, you can run the cleanup script. Copy and paste the following command into the PowerShell window, replacing “KBXXXXXXX” with the update’s KB number: DISM.exe /Online /Remove-Package /PackageName:Package_for_RollupFix~31bf3856ad364e35~amd64~~XXXXXXX.~~.~~.~~ /norestart
7. Press Enter to execute the command and remove the update.
8. Repeat step 6 for each superseded update causing the error.
9. After removing the updates, restart your computer and check if the Windows Update Error 8024000B is resolved.

By running the cleanup PowerShell script for superseded updates, you can fix the Windows Update Error 8024000B on Windows 11/10.

Updated: May 2024

Fortect is a powerful tool that can address error 8024000b and its specific aspects. Whether it’s damaged system files, faulty settings, or confusing issue messages, Fortect repairs them all to ensure normal tasks run smoothly. It also tackles the lingering damage caused by viruses and malware, securing the system and restoring it to its pre-infected state.

Additionally, Fortect fixes issues that lead to freezing programs, damaged DLLs, and even the severe Blue Screen of Death (BSoD). It also compares the current OS with a healthy version, allowing for a safe and efficient recovery without affecting user data.

Renaming the Spupdsvc.exe File

Windows file renaming

To fix Windows Update Error 8024000B on Windows 11/10, one potential solution is to rename the Spupdsvc.exe file. Follow these steps:

1. Open File Explorer and navigate to the following location: C:\Windows\System32.
2. Locate the Spupdsvc.exe file in the folder.
3. Right-click on the file and select Rename.
4. Change the file name to “Spupdsvc.old” or any other name of your choice.
5. Confirm the change by pressing Enter.
6. Restart your computer.

Renaming the Spupdsvc.exe file can resolve conflicts and errors related to Windows Update. This procedure is particularly helpful when encountering Error 8024000B.

Using the Windows Updates Troubleshooter

If you’re encountering the Windows Update Error 8024000B on Windows 11/10, you can use the Windows Updates Troubleshooter to resolve the issue. The troubleshooter is a built-in tool that can automatically detect and fix common Windows Update problems.

To use the Windows Updates Troubleshooter, follow these steps:

1. Press the Windows key + I to open the Settings app.
2. Go to “Update & Security” and click on “Troubleshoot” in the left sidebar.
3. Scroll down and click on “Windows Update” under “Get up and running.”
4. Click on “Run the troubleshooter” and wait for the tool to detect and fix any issues.
5. Once the troubleshooter completes its process, restart your computer and check if the error is resolved.

Using the Windows Updates Troubleshooter can help you quickly identify and fix the Windows Update Error 8024000B, ensuring your system stays up to date and secure.

Understanding Windows Update Processes

  1. Press Win + R to open the Run dialog box.
  2. Type services.msc and press Enter.
  3. In the Services window, scroll down and locate Windows Update.
  4. Right-click on Windows Update and select Stop.
  5. Next, right-click on Windows Update again and select Start.
  6. Close the Services window and check if the Windows Update error 8024000B is resolved.

Repair Method 2: Clear Windows Update Cache

  1. Press Win + R to open the Run dialog box.
  2. Type services.msc and press Enter.
  3. In the Services window, locate Windows Update and right-click on it.
  4. Select Stop to stop the Windows Update service.
  5. Open File Explorer and navigate to the following path: C:\Windows\SoftwareDistribution.
  6. Delete all the files and folders present in the SoftwareDistribution folder.
  7. Go back to the Services window, right-click on Windows Update, and select Start to restart the service.
  8. Check if the error 8024000B is resolved after clearing the Windows Update cache.

Repair Method 3: Run Windows Update Troubleshooter

  1. Press Win + I to open the Settings app.
  2. Click on Update & Security.
  3. In the left pane, select Troubleshoot.
  4. Scroll down and click on Additional troubleshooters.
  5. Click on Windows Update and then click on Run the troubleshooter.
  6. Follow the on-screen instructions and let the troubleshooter detect and fix any issues related to Windows Update.
  7. After the troubleshooter completes, restart your computer and check if the error 8024000B is resolved.

F.A.Qs

How do I fix potential Windows Update database error?

To fix potential Windows Update database errors, you can try the following solutions:

1. Run the Windows Update Troubleshooter: Use the built-in troubleshooter tool to automatically detect and fix common issues with Windows Update.

2. Reset the Windows Update components: Stop the Windows Update service, clear the temporary update files, and restart the service to reset the update components.

3. Check for sufficient disk space: Ensure that you have enough free space on your system drive as Windows Update requires space to download and install updates.

4. Disable third-party antivirus software: Temporarily disable any antivirus or firewall software that may be interfering with the Windows Update process.

5. Perform a clean boot: Start your computer with only essential services and startup programs to eliminate any conflicts that might be causing the database error.

Remember to always create a backup before making any changes to your system to avoid any potential data loss.

How do I fix 0x80240020 (- 2145124320?

To fix 0x80240020 (-2145124320), consider upgrading drivers and uninstalling any incompatible apps. For managed workstations, report compatibility issues to CCIT Imaging and PC Management.

How do I get rid of install error 0x800f020b?

To resolve the install error 0x800f020b, you can follow these steps:

1. Make sure your internet connection is stable and reliable.
2. Check for any pending Windows updates and install them.
3. Run the Windows Update troubleshooter to identify and fix any issues.
4. Temporarily disable any antivirus or firewall software that may be interfering with the installation process.
5. Use the Deployment Image Servicing and Management (DISM) tool to repair any corrupted system files.
6. If all else fails, you may need to perform a clean installation of Windows.

How do I fix Windows Update download error 0x80004002?

To fix Windows Update download error 0x80004002, you can try running the Windows Update troubleshooter or resetting the Windows Update components.

Example Message
?

To resolve error 8024000b, try restarting your computer and then checking for Windows updates again. Download this tool to run a scan

PS4 Mic Headset Sale

Looking for a great deal on a PS4 mic headset? Look no further!

May 2024: Enhance your computer’s performance and eliminate errors with this cutting-edge optimization software. Download it at this link

  1. Click here to download and install the optimization software.
  2. Initiate a comprehensive system scan.
  3. Allow the software to automatically fix and repair your system.

Top Deals and Latest Trends

PS4 Mic Headset on sale

Best Buy is a great place to start your search. They offer a wide selection of PS4 mic headsets at competitive prices. Check their website or visit a store near you to explore their current deals and discounts.

If you’re located in Canada, you can also check out local retailers like EB Games or Amazon.ca. They often have special promotions and sales on PS4 headsets.

For those in the United States, besides Best Buy, you can also check out online marketplaces like Amazon.com or Newegg. These platforms offer a wide range of options and often have customer reviews to help you make an informed decision.

When looking for a PS4 mic headset, consider the features you need. Look for headsets with a built-in microphone for clear communication with your teammates during multiplayer games. Additionally, pay attention to the audio quality and comfort of the headset.

Stay up to date with the latest trends in PS4 mic headsets. Follow gaming forums, YouTube channels, and social media accounts dedicated to gaming to get insights and recommendations from fellow gamers.

Don’t miss out on the best deals and latest trends for PS4 mic headsets. Take advantage of the resources available to you and find the perfect headset for your gaming needs.

Updated: May 2024

Fortect is a powerful program that can help address and resolve the pas4 mic error. It tackles various specific aspects of the error, such as damaged system files, faulty settings, and missing DLL files.

Additionally, Fortect repairs the causes of annoying slowdowns, freezing programs, and the dreaded Blue Screen of Death (BSoD). It also ensures that Windows and other programs run smoothly, while comparing the current operating system with a healthy version for seamless OS recovery.

Enhancing Recording Quality

If you’re looking to enhance the recording quality of your PS4 mic headset, there are a few tips and tricks you can try. First, make sure your headset is properly connected to your PS4 and that the audio settings are adjusted correctly. Check for any updates or firmware upgrades for your headset, as these can often improve performance.

Next, consider the positioning of your microphone. Make sure it is close enough to your mouth to capture clear audio, but not so close that it picks up unwanted background noise. Experiment with different microphone positions to find the optimal setup for your voice and recording environment.

If you’re still not satisfied with the recording quality, you may want to consider investing in a higher quality headset or microphone. Look for headsets that are specifically designed for recording or broadcasting, as these often have better audio quality and noise cancellation features.

In terms of purchasing options, there are many online retailers that offer PS4 mic headsets for sale. Some popular options include Amazon, Best Buy, and GameStop. If you’re located in Canada, you can check out retailers like Walmart or EB Games. For those in the United States, Walmart, Target, and GameStop are also good options.

Product Features

PS4 mic headset

  • No sound from headset:
    • Check the volume settings on both the PS4 and the headset.
    • Make sure the headset is properly connected to the controller.
    • Try using a different headset or controller to see if the issue is with the headset or the controller.
      Make sure the headset is properly connected to the controller.
Try using a different headset or controller to see if the issue is with the headset or the controller.
    • Restart the PS4 and try again.
  • Poor sound quality:
    • Ensure that the headset is securely plugged into the controller.
    • Check for any damage to the headset cable.
    • Adjust the volume levels on both the PS4 and the headset.
    • Try using a different headset or controller to determine if the issue lies with the headset or the controller.
      Adjust the volume levels on both the PS4 and the headset.
Try using a different headset or controller to determine if the issue lies with the headset or the controller.
  • Mic not working:
    • Make sure the mic is securely connected to the headset.
    • Check the microphone settings on the PS4.
    • Try using a different mic to see if the issue is with the mic or the controller.
    • Restart the PS4 and test the mic again.
      Try using a different mic to see if the issue is with the mic or the controller.
Restart the PS4 and test the mic again.
  • Interference or static:
    • Ensure there are no wireless devices or other sources of interference nearby.
    • Check the headset cable for any damage or loose connections.
    • Adjust the volume levels on both the PS4 and the headset.
    • Try using a different headset or controller to see if the issue persists.
      Adjust the volume levels on both the PS4 and the headset.
Try using a different headset or controller to see if the issue persists.

Technical Specifications

PS4 controller and headset

Product Brand Compatibility Connectivity Microphone Price
PS4 Mic Headset Various PlayStation 4 Wired or Wireless Boom microphone $X.XX

FAQs

Is there a mic on the PS4?

Yes, there is a microphone on the PS4, although its power is limited.

Does DS4 have a mic?

No, the DS4 controller does not have a microphone.

Example Message
?

I highly recommend investing in a pas4 mic for crystal clear audio quality during your performances or recordings. Download this tool to run a scan

Lenovo Laptop WiFi Connection Issues

Having trouble with your Lenovo laptop’s WiFi connection? Let’s dive into the common issues and effective solutions.

May 2024: Enhance your computer’s performance and eliminate errors with this cutting-edge optimization software. Download it at this link

  1. Click here to download and install the optimization software.
  2. Initiate a comprehensive system scan.
  3. Allow the software to automatically fix and repair your system.

Basic Troubleshooting Steps

Step-by-step troubleshooting guide

1. Check Wi-Fi Connection: Ensure that your Lenovo laptop is connected to a Wi-Fi network. Look for the Wi-Fi icon in the system tray or the network settings in the Control Panel. If not connected, click on the Wi-Fi icon and select your desired network to connect to.

2. Restart Your Laptop: Sometimes, a simple restart can fix connectivity issues. Close all open programs and files, click on the “Start” button, and choose “Restart” from the context menu. Wait for your laptop to reboot and then try connecting to Wi-Fi again.

3. Check Airplane Mode: Make sure Airplane Mode is turned off. Press the Windows key + A to open the Action Center, and click on the Airplane Mode icon to toggle it off if it’s enabled. Airplane Mode disables all wireless connections, including Wi-Fi.

4. Update Wi-Fi Drivers: Outdated or incompatible Wi-Fi drivers can cause connection problems. Open the Device Manager by pressing the Windows key + X and selecting “Device Manager” from the menu. Expand the “Network Adapters” category, right-click on your Wi-Fi adapter, and choose “Update driver.” Follow the on-screen instructions to update the driver.

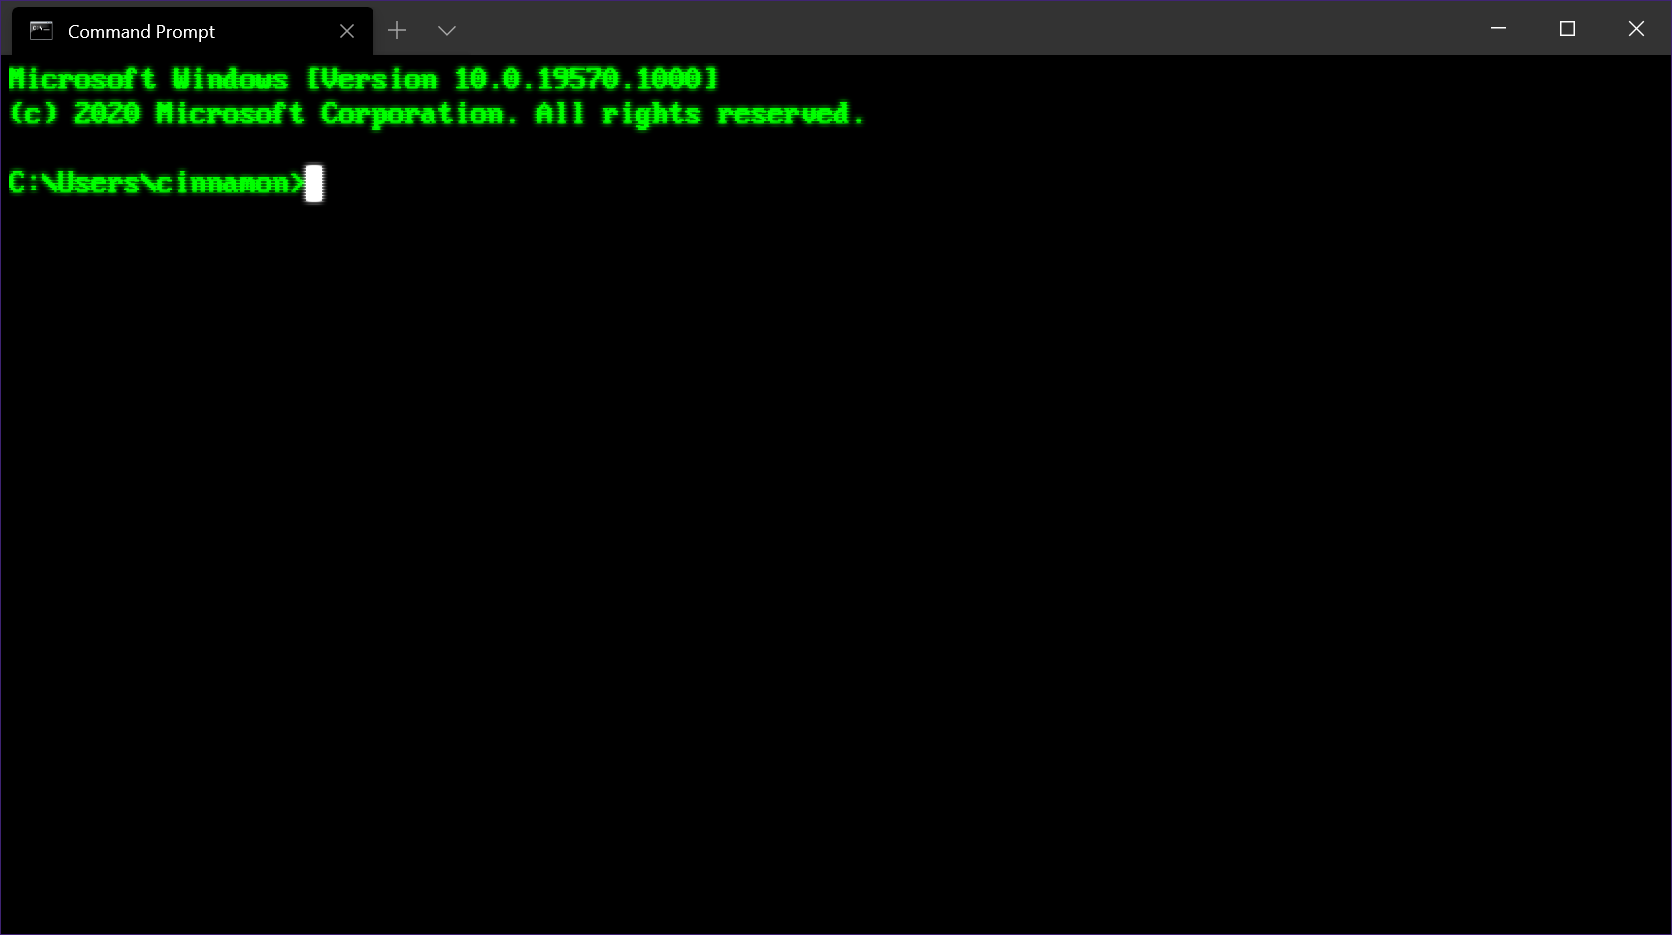
5. Reset Network Settings: Resetting the network settings can often resolve Wi-Fi connection issues. Press the Windows key + X and select “Command Prompt (Admin)” from the menu. In the Command Prompt window, type netsh winsock reset and press Enter. Restart your laptop after the process completes.

6. Disable Power Saving Mode: Power saving settings can sometimes interfere with Wi-Fi connectivity. Press the Windows key + X and select “Power Options” from the menu. Click on “Change plan settings” next to your active power plan, and then select “Change advanced power settings.” Expand the “Wireless Adapter Settings” category and set both “On battery” and “Plugged in” options to “Maximum Performance.” Click Apply and OK to save the changes.

7. Check for Physical Obstructions: Move closer to your router to rule out any physical obstructions that may be blocking the Wi-Fi signal. Also, ensure that your laptop is within the range of the router.

8. Restart Your Router: Unplug your router from the power source, wait for about 30 seconds, and then plug it back in. Wait for the router to reboot completely before attempting to connect to Wi-Fi again.

9. Contact Lenovo Support: If none of the above steps resolve the Wi-Fi connection issues, it may be time to contact Lenovo support. Check your laptop’s warranty status and reach out to Lenovo for further assistance.

Updated: May 2024

If you’re experiencing issues with your Lenovo laptop not connecting to WiFi, Fortect can help. It addresses the causes of connectivity problems such as damaged system files and faulty settings. Additionally, it can repair any damage caused by viruses or malware, ensuring your system is restored to its pre-infected state.

Fortect also addresses freezing or slow programs, damaged DLL files, and even resolves the Blue Screen of Death (BSoD) by fixing compatibility issues and identifying malfunctioning hardware. It can also assist with OS recovery without affecting user data.

Ensure Your Wireless Adapter is Enabled

1. Open the Start menu and search for “Device Manager.”
2. Click on “Device Manager” in the search results to open the Device Manager window.
3. Expand the “Network adapters” section to see a list of network adapters installed on your laptop.
4. Look for your wireless adapter, which may be labeled as “Wireless LAN” or something similar.
5. If the wireless adapter is disabled, it will have a down arrow icon next to it. Right-click on the adapter and select “Enable” from the context menu. Alternatively, you can also enable the adapter by double-clicking on it and selecting the “Enable” button on the device properties window.
6. Once the adapter is enabled, the down arrow icon should disappear, indicating that the adapter is now active.
7. Try connecting to your Wi-Fi network again to see if the issue is resolved.

If you’re still experiencing connection issues, there may be other factors at play. It’s worth considering the following troubleshooting steps:

1. Make sure that the Wi-Fi switch on your laptop is turned on. This switch is usually located on the side or front of the laptop.
2. Check that the wireless function key on your laptop’s keyboard is not disabled. Look for a key with an antenna or wireless symbol on it and press it to toggle the wireless function on or off.
3. Restart your laptop and try connecting to your Wi-Fi network again.
4. Update your wireless adapter driver. Visit the Lenovo website and search for your laptop model to find the latest driver for your wireless adapter. Download and install the driver following the instructions provided.
5. Check for any physical obstructions or interference that may be affecting your Wi-Fi signal. Move closer to your router or remove any objects that could be blocking the signal.
6. If possible, try connecting to a different Wi-Fi network or using a wired Ethernet connection to determine if the issue is specific to your network or adapter.
7. Consider resetting your router or contacting your internet service provider for assistance if other devices are also experiencing connection issues.

If you’re still unable to resolve the issue, it may be necessary to contact Lenovo support or take your laptop to a professional for further diagnosis and repair.

Update and Manage Your Wireless Network Drivers

Wireless network signal bars

1. Open the Device Manager by pressing the Windows key + X and selecting “Device Manager” from the menu.

2. In the Device Manager window, locate and expand the “Network adapters” category.

3. Right-click on your wireless network adapter and select “Update driver.”

4. Choose the option to search automatically for updated driver software. Windows will then search for the latest driver for your wireless adapter and install it if one is found.

5. If Windows doesn’t find a new driver, you can try downloading the latest driver from the Lenovo support website. Go to the Lenovo website, navigate to the support page for your specific laptop model, and download the latest wireless network driver.

6. Once the driver is downloaded, double-click on the downloaded file and follow the on-screen instructions to install it.

7. After the driver installation is complete, restart your laptop to apply the changes.

To manage your wireless network drivers, you can also use the Lenovo Vantage software. This software provides an easy way to update and manage drivers for your Lenovo laptop. Here’s how to use it:

1. Download and install the Lenovo Vantage software from the Lenovo support website.

2. Launch the Lenovo Vantage software and navigate to the “Hardware Settings” section.

3. Under the “Hardware Settings” section, click on the “Device” tab.

4. In the Device tab, you will see a list of all the hardware devices on your laptop, including the wireless network adapter.

5. Locate the wireless network adapter in the list and click on it.

6. In the wireless network adapter settings, you will find options to update the driver, enable or disable the adapter, and troubleshoot any issues.

7. Click on the “Update” button to check for any available driver updates for your wireless network adapter.

8. If a new driver is found, follow the on-screen instructions to download and install it.

Review and Adjust Power Management Settings

To fix Lenovo laptop WiFi connection issues, it is important to review and adjust the power management settings. These settings can sometimes interfere with the WiFi connection and cause connectivity problems. Here’s how you can review and adjust the power management settings on your Lenovo laptop:

1. Open the Windows 10 Start menu and search for “Power Options.”
2. Click on “Power Options” to open the Power Settings.
3. In the Power Options window, you will see different power plans. Make sure the “Balanced (recommended)” power plan is selected.
4. Click on “Change plan settings” next to the Balanced power plan.
5. On the next screen, click on “Change advanced power settings.”
6. In the Advanced settings window, scroll down and expand the “Wireless Adapter Settings.”
7. Expand the “Power Saving Mode” option.
8. Make sure the “Maximum Performance” option is selected for both “On battery” and “Plugged in.”
9. Click on “Apply” and then “OK” to save the changes.

By adjusting the power management settings, you are ensuring that your Lenovo laptop’s WiFi adapter is always performing at its maximum potential, without any power-saving restrictions.

If you are still experiencing WiFi connection issues after adjusting the power management settings, there are a few additional troubleshooting steps you can try:

1. Update your device drivers: Outdated or incompatible drivers can cause WiFi connection problems. Visit the Lenovo support website and download the latest drivers for your laptop’s WiFi adapter.

2. Disable Wireless Zero Configuration: Wireless Zero Configuration is a Windows service that can sometimes interfere with WiFi connections. To disable it, press the Windows key + R to open the Run dialog box. Type “services.msc” and press Enter. In the Services window, scroll down and double-click on “Wireless Zero Configuration.” In the properties window, set the Startup type to “Disabled” and click on “OK.”

3. Restart your router: Sometimes, the issue may not be with your laptop but with the router. Unplug the router from the power source, wait for a few seconds, and then plug it back in. This can help refresh the connection and resolve any temporary issues.

Remember to check if your WiFi is working on other devices like smartphones or another computer. If the issue persists only on your Lenovo laptop, it is likely a problem with the laptop itself.

If you have recently installed any new software or made changes to the operating system, you can also try performing a system restore to a previous point when the WiFi connection was working fine.

In case none of these troubleshooting steps work, it is recommended to contact Lenovo support or take your laptop to a professional for further assistance. If your laptop is still under warranty, you may be eligible for free repairs or replacements.

By reviewing and adjusting the power management settings on your Lenovo laptop, you can potentially resolve WiFi connection issues and ensure a smooth and uninterrupted internet experience.

F.A.Q.

Why is my Lenovo laptop not connecting to Wi-Fi?

Your Lenovo laptop may not be connecting to Wi-Fi because of incorrect network name (SSID) or password. You can try resolving this issue by restarting both your router and laptop. Power off both devices, wait for a few seconds, and then turn them back on.

Why is my laptop suddenly not connecting to Wi-Fi?

Your laptop may suddenly not be connecting to Wi-Fi due to several common issues. These can include your device being in airplane mode or having Wi-Fi turned off, your router being down, or you may be entering an incorrect Wi-Fi password.

Example Message
?

If your Lenovo laptop is unable to connect to WiFi, it might be due to a problem with the network adapter or a misconfiguration in your laptop’s settings. Download this tool to run a scan

Fix Windows 10 BSOD 0x00000124 WHEA_UNCORRECTABLE_ERROR

Having encountered the Windows 10 BSOD 0x00000124 WHEA_UNCORRECTABLE_ERROR, I understand the frustration it brings. In this article, we will delve into effective solutions to resolve this issue and restore the smooth functioning of your Windows 10 system.

May 2024: Enhance your computer’s performance and eliminate errors with this cutting-edge optimization software. Download it at this link

  1. Click here to download and install the optimization software.
  2. Initiate a comprehensive system scan.
  3. Allow the software to automatically fix and repair your system.

Run Blue Screen Troubleshooter

Blue screen of death (BSOD)

To fix the Windows 10 BSOD 0x00000124 WHEA_UNCORRECTABLE_ERROR, you can run the Blue Screen Troubleshooter. This tool is designed to help you identify and resolve issues related to the blue screen of death.

To run the Blue Screen Troubleshooter, follow these steps:

1. Press the Windows key + I to open the Settings app.
2. Click on “Update & Security”.
3. In the left sidebar, select “Troubleshoot”.
4. Scroll down and click on “Blue Screen” under the “Find and fix other problems” section.
5. Click on the “Run the troubleshooter” button.
6. Follow the on-screen instructions to complete the troubleshooting process.

The Blue Screen Troubleshooter will scan your system for any issues that may be causing the BSOD error. Once the scan is complete, it will provide you with recommendations on how to fix the problem.

It’s important to note that the Blue Screen Troubleshooter may not always be able to fix the issue. If that’s the case, you may need to try other troubleshooting methods or seek further assistance.

Update Device Drivers

1. Press the Windows key + X and select “Device Manager” from the menu.
2. In Device Manager, expand the categories and locate any devices with a yellow exclamation mark indicating a driver issue.
3. Right-click on the device and select “Update driver.”
4. Choose the option to search automatically for updated driver software.
5. Windows will scan your computer and the internet for the latest drivers. If a newer driver is found, it will be installed automatically.
6. If Windows doesn’t find an updated driver, you can visit the manufacturer’s website and download the latest driver manually.
7. Once the driver is updated, restart your computer for the changes to take effect.

By updating your device drivers, you can resolve compatibility issues and improve system stability. This can help fix the BSOD 0x00000124 WHEA_UNCORRECTABLE_ERROR and other related problems.

Change Processor State Settings

Windows task manager

1. Press the Windows key + X and select “Power Options” from the menu.
2. In the Power Options window, click on “Change plan settings” next to your selected power plan.
3. On the next screen, click on “Change advanced power settings.”
4. Scroll down and expand the “Processor power management” section.
5. Expand the “Minimum processor state” and “Maximum processor state” options.
6. Adjust the values for both options according to your preference. Typically, setting the minimum state to 5% and the maximum state to 100% is recommended.
7. Click “Apply” and then “OK” to save the changes.

By changing the processor state settings, you can optimize the performance of your CPU and potentially resolve the WHEA_UNCORRECTABLE_ERROR.

Updated: May 2024

Fortect is a reliable solution for resolving the 0x00000124 Windows 10 error. It tackles the underlying issues that cause freezing programs, such as damaged registry, missing files, or excessive junk. Fortect also addresses DLL file problems, automatically fixing any missing or corrupt files.

Additionally, it repairs the causes of the Blue Screen of Death, including incompatible DLLs, drivers, and Windows bugs. Fortect even compares the current operating system with a healthy version, restoring vital system files for seamless OS recovery without impacting user data.

Conduct Memory and Hard Drive Diagnostics

Step Description
1 Check for Memory Errors
2 Perform Memory Diagnostic Test
3 Check for Hard Drive Errors
4 Perform Hard Drive Diagnostic Test

Utilize System File Checker

To fix the Windows 10 BSOD 0x00000124 WHEA_UNCORRECTABLE_ERROR, you can utilize the System File Checker tool. This tool scans and repairs corrupted system files that may be causing the error.

Here’s how to use the System File Checker:

1. Press the Windows key + X and select “Command Prompt (Admin)” to open an elevated command prompt.

2. In the command prompt, type “sfc /scannow” and press Enter.

3. The System File Checker will start scanning your system for corrupted files and automatically replace them if necessary.

4. Wait for the scan to complete. It may take some time depending on your system’s speed and the size of your files.

5. Once the scan is finished, restart your computer and check if the BSOD error is resolved.

Adjust Overclocking and Driver Signatures

To fix the Windows 10 BSOD 0x00000124 WHEA_UNCORRECTABLE_ERROR, you can adjust overclocking settings and driver signatures. Adjusting overclocking settings can help resolve the issue caused by unstable system configurations. Disable overclocking and reset your system to its default settings. This can be done through the BIOS or UEFI settings.

Another potential solution is to check and update driver signatures. Disable driver signature enforcement temporarily to install unsigned or incompatible drivers. This can be done by accessing the Advanced Startup Options in Windows 10.

Keep in mind that adjusting overclocking settings and disabling driver signature enforcement should be done cautiously and with proper knowledge. Incorrect settings or incompatible drivers may cause further issues. It is always recommended to consult the manufacturer’s documentation or seek assistance from a professional if needed.

Recovery Strategies Post-BSOD

  • Perform a System Restore: Roll back your system to a previous working state using System Restore.
  • Update Device Drivers: Ensure all your device drivers are up to date, especially those related to hardware components.
  • Check for Overheating: Monitor your system’s temperature and clean any dust or debris from the cooling components.
  • Run System File Checker (SFC) and DISM: Use these built-in tools to scan and repair corrupted system files.
  • Remove Recently Installed Software: Uninstall any recently installed programs or drivers that could be causing conflicts.
  • Test Your Hardware: Check for faulty hardware components by running diagnostic tests or consulting a professional.
  • Disable Overclocking: If you have overclocked your system, revert to default settings to eliminate stability issues.
  • Scan for Malware: Perform a full system scan with a reliable antivirus or antimalware software.
    Disable Overclocking: If you have overclocked your system, revert to default settings to eliminate stability issues.
Scan for Malware: Perform a full system scan with a reliable antivirus or antimalware software.
  • Repair Windows: Use Windows repair tools like the Deployment Image Servicing and Management (DISM) tool or Windows Startup Repair.
  • Check for Memory Issues: Test your RAM modules using Windows Memory Diagnostic or third-party memory testing software.

Frequently Asked Questions

What is Whea_uncorrectable_error in Windows 11?

“WHEA_UNCORRECTABLE_ERROR” in Windows 11 is a Blue Screen of Death (BSOD) error that is usually linked to hardware problems. It can be triggered by failing hardware components, driver issues, and software conflicts. This error message signifies a hardware error that cannot be resolved by the Windows operating system.

How do I fix 0x00000124 in Windows 10?

To fix 0x00000124 in Windows 10, you can try the following solutions:

1. Run the Blue Screen Troubleshooter.
2. Update your device drivers.
3. Change the Min/Max Processor State.
4. Run the Windows Memory Diagnostic.
5. Check for hard drive issues.
6. Run an SFC scan.
7. Disable overclocking.

Example Message
?

If you are encountering the 0x00000124 error on Windows 10, it is recommended to check for any hardware issues or conflicts, update your drivers, and consider seeking professional assistance if the problem persists. Download this tool to run a scan

Troubleshoot Outlook Email Sending Problem

Having trouble sending emails through Outlook? Here’s how to troubleshoot the issue.

May 2024: Enhance your computer’s performance and eliminate errors with this cutting-edge optimization software. Download it at this link

  1. Click here to download and install the optimization software.
  2. Initiate a comprehensive system scan.
  3. Allow the software to automatically fix and repair your system.

Resending and Connectivity Checks

If you’re experiencing issues with sending emails in Outlook, there are a few steps you can take to troubleshoot and resolve the problem.

First, it’s important to check your internet connection. Make sure you’re online and connected to the internet before attempting to send any emails. If you’re using Outlook.com or Gmail, verify that your internet connection is stable and working properly.

Next, double-check your email settings. Ensure that your email account is properly set up in Microsoft Outlook and that you’ve entered the correct server information. To do this, go to the “File” tab, select “Account Settings,” and then click on “Account Settings” again. From there, select your email account and click “Change.” Verify that the incoming and outgoing server settings are correct.

If your email account is configured correctly and you’re still unable to send emails, try resending the message. Sometimes, a temporary glitch or network issue can prevent an email from being sent successfully. To resend an email, go to your “Sent Items” folder, select the email you want to resend, and click on the “Resend” button.

If resending the email doesn’t work, you can also try checking your connectivity. Use the Connectivity Checker tool in Outlook to test your connection to the email server. This tool will help identify any issues with your internet connection or server settings. To access the Connectivity Checker, go to the “File” tab, select “Options,” and then click on “Advanced.” Scroll down to the “Troubleshooting” section and click on “Connectivity Checker.” Follow the prompts to test your connection.

In some cases, the issue may be specific to your email provider or internet service provider. If you’re using a third-party email service, such as Gmail, check their website or support forums for any known issues or outages. If you suspect that your internet service provider is the problem, contact their customer support for assistance.

If you’re still unable to send emails after trying these steps, it may be helpful to contact Microsoft support for further troubleshooting. They can provide personalized guidance and help identify any underlying issues with your Outlook email account. Remember to provide them with detailed information about the problem you’re experiencing, including any error messages or error codes you may have encountered.

Updated: May 2024

Are you facing issues with sending emails in Outlook? Fortect can help. It repairs damaged system files and faulty settings that may be causing the problem. It also addresses issues like freezing programs and damaged DLL files, ensuring that Windows and other programs run smoothly.

Additionally, Fortect can repair the causes of the Blue Screen of Death (BSoD) and compare the current operating system with a healthy version for OS recovery. Try Fortect to fix your Outlook email sending problem efficiently.

Restart and Repair Procedures

Restart button

If you are facing issues with sending emails through Outlook, you can try the following restart and repair procedures to troubleshoot the problem:

1. Restart Outlook:
Sometimes, simply restarting the Outlook application can resolve the email sending problem. Close Outlook completely and then open it again to see if the issue persists.

2. Restart your computer:
A computer restart can help in resolving any temporary glitches or conflicts that may be causing the email sending problem. Close all applications, including Outlook, and restart your computer.

3. Repair Outlook:
If restarting Outlook didn’t solve the issue, you can try repairing the Outlook application. To do this, follow these steps:

a. Close Outlook and any other Office applications running on your system.
b. Open the Control Panel on your computer.
c. Select “Programs” or “Programs and Features” (depending on your version of Windows).
d. Locate Microsoft Office or Microsoft 365 in the list of installed applications and select it.
e. Click on the “Change” or “Modify” button.
f. In the installation wizard, choose the “Repair” option and follow the instructions to repair the Outlook application.

4. Clear browser cache (if using Outlook.com):
If you are accessing Outlook.com through a web browser, clearing the browser cache can help in resolving any temporary issues. To do this, follow these steps:

a. Open your web browser (e.g., Google Chrome or Microsoft Edge).
b. Click on the three-dot menu icon in the top-right corner of the browser window.
c. Select “Settings” or “Options” from the drop-down menu.
d. Scroll down and click on “Privacy and security” or “Clear browsing data.”
e. Select the option to clear cache or browsing data and click on “Clear” or “Clear data.”

5. Check your internet connection:
Ensure that you have a stable internet connection while sending emails through Outlook. If you are using a mobile device, make sure you have a strong cellular or Wi-Fi signal.

6. Verify email settings:
Double-check your email account settings in Outlook to make sure they are configured correctly. Pay attention to the incoming and outgoing server settings, port numbers, and authentication settings.

Assistance for Microsoft 365 Users

Microsoft 365 logo

  • Check your internet connection: Ensure that you are connected to the internet and that there are no network issues.
  • Verify recipient’s email address: Make sure you have entered the correct email address of the recipient.
  • Check email size limit: Confirm that the size of your email, including attachments, does not exceed the allowed limit.
  • Review email settings: Double-check your Outlook email settings to ensure they are configured correctly.
  • Disable antivirus/firewall: Temporarily disable any antivirus or firewall software that might be interfering with your email sending.
  • Clear Outbox folder: Remove any stuck or unsent emails from the Outbox folder in Outlook.
  • Try a different email client: Test sending emails using a different email client to determine if the issue is specific to Outlook.
  • Restart Outlook: Close and reopen the Outlook application to refresh its settings and potentially resolve any temporary issues.
  • Update Outlook: Ensure that you are using the latest version of Outlook and install any available updates.
  • Contact Microsoft Support: If the problem persists, reach out to Microsoft Support for further assistance.

Additional Support Options

Support Option Description
Microsoft Support Official support provided by Microsoft for Outlook email sending issues. Users can contact Microsoft support through phone, chat, or email.
Online Forums Online communities and forums where users can post their issues and seek help from other Outlook users or experts. Popular forums include Microsoft Community and Reddit.
Knowledge Base Microsoft’s online knowledge base containing articles, guides, and troubleshooting steps for various Outlook issues. Users can search for specific problems and find step-by-step instructions to resolve them.
Third-party Tools Various third-party tools and software available that specialize in troubleshooting and fixing Outlook email sending problems. These tools provide advanced diagnostics and repair options beyond the built-in Outlook troubleshooting features.
Online Tutorials Video tutorials and guides available on websites like YouTube, providing step-by-step instructions on troubleshooting Outlook email sending problems. Visual demonstrations can be helpful for users who prefer a more hands-on approach.

FAQs

Why are my Outlook emails not sending?

Your Outlook emails may not be sending because Outlook is unable to connect to the email server. To resolve this issue, you can try switching between offline and online mode by selecting the Send/Receive tab on the ribbon and toggling the Work Offline option in the Preferences group.

Why is my message failing to send in Outlook?

Your message may be failing to send in Outlook due to a problem with the recipient’s email account or a typo in their email address. To resolve this, wait for a short time and try sending the message again. Additionally, double-check the recipient’s email address for any errors.

How do I fix my email not sending?

To fix the issue of emails not sending, first check your internet connection and ensure it is stable. Next, verify that you have entered the correct email password. Pay attention to any typos or human errors. Additionally, check the SMTP server details to ensure they are correct. Make sure you are using the appropriate SMTP port. If the problem persists, consider using an ESP (Email Service Provider) that offers an SMTP relay service.

Example Message
?

To fix an email sending problem in Outlook, you can try restarting the application, checking your internet connection, ensuring your email settings are correct, or contacting your email provider for further assistance. Download this tool to run a scan

Xbox 360 Disk Error – How to Fix Unreadable Disc & Other Drive Errors

Having trouble with your Xbox 360’s disk drive? Learn how to fix unreadable disc and other drive errors in no time.

May 2024: Enhance your computer’s performance and eliminate errors with this cutting-edge optimization software. Download it at this link

  1. Click here to download and install the optimization software.
  2. Initiate a comprehensive system scan.
  3. Allow the software to automatically fix and repair your system.

Causes of Unreadable Discs

1. Scratched or dirty discs: One of the common causes of unreadable discs on Xbox 360 is scratches or dirt on the surface of the disc. These imperfections can interfere with the laser’s ability to read the data. To fix this issue, follow these steps:

– Gently clean the disc using a soft, lint-free cloth. Start from the center of the disc and wipe towards the outer edge in a straight line.
– Avoid using abrasive materials or circular motions while cleaning, as this can further damage the disc.
– If the disc is heavily scratched, you can try using a disc repair kit or take it to a professional disc repair service.

2. Faulty Optical Disc Drive (ODD): Sometimes, the issue lies with the Xbox 360’s optical disc drive itself. If the drive is not functioning properly, it may struggle to read discs, resulting in unreadable disc errors. To fix this issue, try the following:

– Power cycle your Xbox 360 by turning it off, unplugging the power cord, waiting for a few minutes, and then plugging it back in. This can help reset the ODD.
– If power cycling doesn’t work, you may need to replace the ODD. Contact Xbox support or visit an authorized service center for assistance.

3. System software or firmware issues: Outdated or corrupted system software or firmware can also lead to unreadable disc errors. To resolve this, try the following:

– Update your Xbox 360’s system software. Connect your console to the internet and go to the settings menu. Select “System” and then “Console Info & Updates.” Follow the on-screen instructions to check for and install any available updates.
– If updating the software doesn’t solve the issue, you can try clearing the system cache. Press and hold the power button on the front of the console until it turns off. Unplug the power cord, wait for a few minutes, and then plug it back in. Turn on the console and check if the disc error is resolved.

4. Misaligned laser lens: If the laser lens inside the optical disc drive is misaligned, it may struggle to read discs properly. To realign the lens, follow these steps:

– Open the disc drive by pressing the eject button on the front of the Xbox 360.
– Locate the small potentiometer on the laser assembly. Using a small screwdriver, turn the potentiometer clockwise or counterclockwise in small increments.
– Close the disc drive and try playing the disc again. Repeat the process if necessary, but be cautious not to overadjust the potentiometer.

Updated: May 2024

Fortect is a reliable solution for addressing Xbox 360 disk errors. It can repair damaged system files and faulty settings that might be causing the error message. Additionally, Fortect can fix missing or corrupt DLL files, which are crucial for proper program functioning.

It can also identify and repair issues that lead to freezing programs or slowdowns, ensuring a smooth experience while using Windows and other programs. Furthermore, Fortect can help recover the operating system without affecting user data, allowing for a seamless restart.

Fixing Unreadable Discs

Disk being cleaned or repaired

If you’re experiencing a “disk unreadable” error on your Xbox 360, don’t worry – there are several steps you can take to fix the issue. Here are some direct instructions to help you troubleshoot and resolve this problem:

1. Clean the disc: Start by wiping the disc gently with a soft, lint-free cloth. Make sure to clean it from the center towards the edges in a straight motion. Avoid using any abrasive materials or cleaners that could damage the disc.

2. Check for scratches or damage: Inspect the disc for any visible scratches or damage. If you notice any deep scratches or cracks, the disc may be beyond repair. In this case, you may need to replace the disc.

3. Clear the cache: Clearing the cache on your Xbox 360 can sometimes resolve disc reading issues. To do this, go to the “Settings” menu on your console, select “System,” then “Storage.” Choose the storage device where the game is saved, and select “Clear System Cache.” Confirm the action and wait for the process to complete.

4. Reinstall the game: If clearing the cache didn’t work, try uninstalling and reinstalling the game. Go to the “Settings” menu, select “System,” then “Storage.” Choose the storage device where the game is saved, and select “Games and Apps.” Find the game causing the issue, press the “Menu” button on your controller, and choose “Uninstall.” Once it’s uninstalled, reinstall the game from either the Xbox Games Store or the Microsoft Store.

5. Update your console: Outdated system software can sometimes cause disc reading errors. Ensure that your Xbox 360 is running the latest updates by going to the “Settings” menu, selecting “System,” then “Console Info.” Choose “Update Console” and follow the on-screen instructions to download and install any available updates.

6. Test the disc on another console: If possible, try the problematic disc on a different Xbox 360 console. This will help determine if the issue is specific to your console or the disc itself. If the disc works fine on another console, it may indicate a problem with your Xbox 360’s disc drive.

7. Contact Microsoft support: If none of the above steps resolve the issue, it’s recommended to reach out to Microsoft support for further assistance. They can provide more specific troubleshooting steps or advise on potential repairs or replacements.

Remember, it’s always a good idea to back up your game saves and data regularly to avoid losing progress. Additionally, make sure your Xbox 360 is placed on a stable surface and properly ventilated to prevent overheating, as excessive heat can affect the performance of the disc drive.

Transferring Game Licenses

Xbox 360 game disc

  1. Sign in to your Xbox Live account
    • Turn on your Xbox 360 console and press the Xbox Guide button on your controller.
      Sign in to your Xbox Live account
Turn on your Xbox 360 console and press the Xbox Guide button on your controller.
    • Select “Sign In” and enter your Xbox Live account credentials.
  2. Access the account management menu
    • Go to the Xbox Dashboard by pressing the Xbox Guide button again.
    • Scroll to the right and select “Settings”.
      Go to the Xbox Dashboard by pressing the Xbox Guide button again.
Scroll to the right and select "Settings".
    • Choose “Account Management” from the menu.
  3. Transfer licenses
    • Select “License Transfer” and confirm your decision.
    • Wait for the transfer process to complete.
    • Restart your Xbox 360 console.

Reinstalling Games

If you’re experiencing a disk error on your Xbox 360 and are unable to play your games, don’t worry! Reinstalling your games can often fix the issue and get you back to gaming in no time. Here’s how to do it:

1. Start by inserting the game disc into your Xbox 360 console. If you’re experiencing a disk error, you may encounter an “unreadable disc” message.

2. Press the Xbox button on your controller to open the guide.

3. Navigate to the “My games & apps” section and select “Games” from the menu.

4. Find the game you want to reinstall and highlight it.

5. Press the “Menu” button on your controller (the one with three horizontal lines) to open the game options menu.

6. Select “Manage game & add-ons” from the menu.

7. In the “Manage” tab, you’ll see options to uninstall the game or view available updates. Since we’re reinstalling, select “Uninstall all” to remove the game from your console.

8. Once the game is uninstalled, go back to the “Games” section in “My games & apps.”

9. Select “Ready to install” to see a list of all your purchased games that aren’t currently installed on your console.

10. Find the game you want to reinstall and select it.

11. Press the “Install” button to start the installation process.

12. Depending on the size of the game and the speed of your internet connection, the installation may take some time. Be patient and let it finish.

13. Once the game is installed, you should be able to play it without any disk errors.

Remember, this method only applies to games that you’ve purchased on a disc. If you’ve downloaded a game from the Xbox Games Store or Microsoft Store, you won’t need to reinstall it. Simply navigate to the “My games & apps” section, find the game, and start playing.

If you continue to experience disk errors or other drive errors after reinstalling your games, there may be a larger issue at play. In that case, it’s recommended to contact Xbox Support or consult a professional for further assistance.

F.A.Qs

How do I fix my Xbox 360 disc error?

To fix an Xbox 360 disc error, you can try the following steps:

1. Inspect and clean your game disc, DVD, or CD.
2. Remove, replace, or reformat USB flash drives (game discs and CDs only).
3. Check the disc’s type, region, or format.
4. Try another game disc, DVD, or CD.
5. If the issue persists, consider servicing your console.

Why does my Xbox keep saying disc read error?

My Xbox keeps saying “disc read error” because there may be an issue with the settings for Sleep mode or the console’s disc drive may need servicing.

How do you fix a Xbox 360 hard drive failure?

To fix an Xbox 360 hard drive failure, start by turning off and then on the console. If available, try using another hard drive with the console. Formatting the hard drive or replacing it may also resolve the issue.

Why is my Xbox not recognizing discs?

Your Xbox may not be recognizing discs due to excessive scratches, nicks, or other damages on the discs. Alternatively, it could be caused by a problem with the disc drive. To troubleshoot, try using another game disc to test the disc drive.

Example Message
?

If you are experiencing a disk error on your Xbox 360, try cleaning the disk thoroughly and ensure it is not scratched or damaged before attempting to play it again. Download this tool to run a scan

Fixing WHEA Uncorrectable Error in Windows 10

If you’ve encountered the WHEA Uncorrectable Error in Windows 10, this article provides effective solutions to fix it.

May 2024: Enhance your computer’s performance and eliminate errors with this cutting-edge optimization software. Download it at this link

  1. Click here to download and install the optimization software.
  2. Initiate a comprehensive system scan.
  3. Allow the software to automatically fix and repair your system.

Identifying and Understanding the Error

Blue screen of death with error message

When encountering a WHEA Uncorrectable Error in Windows 10, it is crucial to identify and understand the error to resolve it effectively. Here are some steps to help you with this process:

1. Read the article carefully: Start by thoroughly reading the article titled “Fixing WHEA Uncorrectable Error in Windows 10.” Pay attention to any specific instructions or troubleshooting steps mentioned.

2. Understand the error: The WHEA Uncorrectable Error is a hardware-related issue that usually indicates a problem with your computer’s memory or CPU. It can lead to system crashes or the infamous “blue screen of death.”

3. Check your computer’s hardware: Start by reviewing your computer’s hardware components, such as the CPU, RAM, and power supply. Ensure that all connections are secure and there are no physical damages.

4. Update Windows and device drivers: Keeping your operating system and device drivers up to date can often resolve compatibility issues and fix errors. Use the Windows Update tool to check for any available updates, and visit the manufacturer’s website to download the latest drivers for your hardware.

5. Boot into Safe Mode: If you are experiencing frequent crashes, booting your computer into Safe Mode can help identify if a third-party software or driver is causing the error. To enter Safe Mode, restart your computer and repeatedly press the F8 key during the boot process. Once in Safe Mode, observe if the error persists.

6. Use Device Manager: Open the Device Manager utility to check for any hardware conflicts or issues. Right-click on the Start button, select “Device Manager,” and look for any yellow exclamation marks or error messages next to your hardware devices. Update or reinstall any problematic drivers.

7. Seek advanced help if needed: If you are unable to resolve the WHEA Uncorrectable Error using the above steps, consider seeking assistance from Microsoft or a qualified technician. They can provide more specialized guidance and troubleshooting.

Updated: May 2024

Fortect is a powerful solution for addressing the whea uncorrectable error in Windows 10. It tackles issues such as damaged system files, faulty settings, and confusing error messages that disrupt normal tasks. Additionally, Fortect secures and restores the system to its pre-infected state, effectively eliminating any lingering damage caused by viruses or malware.

It also addresses the causes of freezing programs and slowdowns, ensuring that Windows and other programs run smoothly. Fortect can automatically fix missing or corrupt DLL files, and it repairs the causes of the Blue Screen of Death (BSoD), including incompatible DLLs, drivers, and Windows bugs. Furthermore, Fortect performs OS recovery by comparing the current operating system with a healthy version and restoring vital system files without affecting user data.

Essential Fixes for Hardware and Software Issues

  1. Open Device Manager by pressing Windows key + X and selecting Device Manager from the menu.

    • Expand the System devices category.
    • Right-click on the Intel (R) Management Engine Interface and select Properties.
    • In the Driver tab, click on Update driver and follow the on-screen instructions.
    • Restart your computer and check if the WHEA Uncorrectable Error is resolved.
  2. Run the Windows Memory Diagnostic Tool to check for memory-related issues.

    • Press Windows key + R to open the Run dialog box.
    • Type mdsched.exe and press Enter.
    • Select Restart now and check for problems (recommended).
    • Your computer will restart and the memory diagnostic tool will run automatically.
    • Wait for the scan to complete and check for any memory-related issues.
  3. Check for overheating issues and clean your computer’s internal components if necessary.

    • Shut down your computer and unplug it from the power source.
    • Open your computer case and locate the CPU and GPU.
    • Carefully clean the cooling fans and heatsinks using compressed air or a soft brush.
    • Make sure there is no excessive dust or debris buildup.
    • Reassemble your computer, plug it back in, and turn it on.
  4. Update your BIOS (Basic Input/Output System) to the latest version.

    • Visit your computer manufacturer’s website and navigate to the support or downloads section.
    • Find the latest BIOS update for your specific model.
    • Download the BIOS update file and follow the manufacturer’s instructions to install it.
    • Restart your computer and check if the WHEA Uncorrectable Error is resolved.
  5. Perform a clean boot to identify software conflicts.

    • Press Windows key + R to open the Run dialog box.
    • Type msconfig and press Enter.
    • In the General tab, select Selective startup and uncheck Load startup items.
    • Go to the Services tab and check Hide all Microsoft services.
    • Click on Disable all and then click Apply.
    • Restart your computer and check if the error persists.
    • If the error is resolved, gradually enable startup items and services to identify the conflicting software.

Optimizing System Settings and Updating Drivers

To optimize system settings and update drivers for fixing the WHEA Uncorrectable Error in Windows 10, follow these steps:

1. Boot your computer in normal mode. This will ensure that all system settings and drivers are loaded correctly.

2. Update Windows by going to Settings > Update & Security > Windows Update. Install any available updates to ensure that your operating system is up to date.

3. Update your device drivers. Go to the manufacturer’s website for each hardware component in your computer, such as the CPU, GPU, and motherboard. Download the latest drivers and install them according to the manufacturer’s instructions.

4. Check your computer hardware for any issues. Make sure all components are properly connected and functioning correctly. Inspect the power supply, RAM, and hard disk drive for any signs of damage or malfunction.

5. Optimize your computer’s memory settings. Open the Windows Hardware Error Architecture (WHEA) settings by going to Control Panel > System and Security > System > Advanced system settings > Advanced > Performance > Settings > Advanced > Change. Adjust the virtual memory settings to allocate the appropriate amount of space.

6. Ensure that your computer is free from malware and viruses. Install a reliable antivirus program and perform a full system scan to detect and remove any malicious software.

7. Consider using a mobile app or software tool to monitor your computer’s performance and troubleshoot any issues that may arise.

Advanced Solutions and System Recovery Options

Advanced Solutions and System Recovery Options
Advanced Solutions System Recovery Options
  • Update drivers
  • Check hardware
  • Run memory diagnostic tool
  • Reset overclock settings
  • Disable hardware acceleration
  • Perform a clean boot
  • Scan for malware
  • Restore previous working state
  • Startup Repair
  • System Restore
  • System Image Recovery
  • Command Prompt
  • Windows Memory Diagnostic
  • UEFI Firmware Settings
  • Go back to previous version

Frequently Asked Questions

How to fix WHEA_UNCORRECTABLE_ERROR in Windows 10?

To fix the WHEA_UNCORRECTABLE_ERROR in Windows 10, remove any overclocking settings and ensure that your motherboard BIOS is up to date by checking for any available updates.

What is the WHEA power error?

The WHEA power error is a fatal hardware error that can occur due to various reasons. It is commonly caused by malfunctioning hardware components such as the CPU, RAM, GPU, motherboard, power supply, or other hardware. Outdated or incompatible device drivers can also contribute to these errors.

Can a hard drive cause a WHEA uncorrectable error?

A hard drive can potentially cause a WHEA uncorrectable error.

Example Message
?

If you encounter an uncorrectable error in Windows 10, it is recommended to seek technical assistance or consult online forums to troubleshoot and resolve the issue effectively. Download this tool to run a scan

Troubleshooting Tips for Graphics Card Not Detected

Having trouble with your graphics card not being detected? Here are some troubleshooting tips to help you out.

May 2024: Enhance your computer’s performance and eliminate errors with this cutting-edge optimization software. Download it at this link

  1. Click here to download and install the optimization software.
  2. Initiate a comprehensive system scan.
  3. Allow the software to automatically fix and repair your system.

Common Reasons for Detection Failure

1. Outdated or incompatible drivers: Check and update your graphics card drivers to ensure compatibility with your operating system. Visit the manufacturer’s website to download the latest drivers.

2. Faulty hardware connections: Inspect the physical connections between your graphics card and motherboard. Ensure that the card is properly seated in the PCIe slot and that all power cables are securely connected.

3. BIOS settings: Access your computer’s BIOS and make sure the PCIe slot is enabled for graphics card detection. Look for any settings related to “PCIe” or “graphics card” and adjust them if necessary.

4. Windows Update issues: Check for Windows updates and install any available updates. Sometimes, updating your operating system can resolve compatibility issues with your graphics card.

5. Power supply limitations: Ensure that your power supply unit (PSU) is sufficient to handle the power requirements of your graphics card. Some high-performance cards may require additional power connectors or a higher wattage PSU.

6. Faulty graphics card: If none of the above steps work, there may be an issue with the graphics card itself. Consider testing the card in another computer or contacting the manufacturer for further assistance.

Checking the Graphics Card Installation

To check the installation of your graphics card, follow these steps:

1. Open the Device Manager by right-clicking on the Start button and selecting “Device Manager” from the context menu.

2. In the Device Manager window, expand the “Display adapters” category. This will show you the graphics card(s) installed on your computer.

3. If you see your graphics card listed here, it means it is detected by your system. If it is not listed or there is a yellow exclamation mark next to it, there may be an issue with the installation.

4. Double-click on the graphics card to open its properties. Check the “Device status” to see if there are any error messages or warnings.

5. If there are no error messages, your graphics card is likely installed correctly. However, if there are issues, you can try the following troubleshooting steps:

a. Make sure the graphics card is securely seated in its PCI Express slot on the motherboard.

b. Ensure that the power cable from the power supply unit is properly connected to the graphics card.

c. Update the device driver for your graphics card. You can do this by right-clicking on the graphics card in Device Manager and selecting “Update driver.”

d. Check for any available Windows updates, as they may include driver updates for your graphics card.

e. If you have recently installed any software or made changes to your system, try uninstalling or reverting those changes to see if it resolves the issue.

f. If none of the above steps work, you may need to consult the manufacturer’s website or contact their support for further assistance.

Enabling the Graphics Card in Device Manager

To enable the graphics card in Device Manager, follow these steps:

1. Open Device Manager by right-clicking on the Start button and selecting “Device Manager” from the context menu.

2. In Device Manager, expand the “Display adapters” category to see the graphics card(s) listed.

3. Right-click on the graphics card that is not detected and select “Enable device” from the context menu.

4. If the graphics card is already enabled, you may see the option “Disable device” instead. In that case, select “Disable device” and then “Enable device” to refresh the settings.

5. After enabling the graphics card, close Device Manager and restart your computer.

Updating Graphics Card Drivers

To update your graphics card drivers, follow these steps:

1. Identify your graphics card manufacturer. This could be Nvidia, AMD, Intel, or another brand.

2. Visit the manufacturer’s website and navigate to the support or drivers section.

3. Find the latest driver for your specific graphics card model and download it. Make sure to download the correct driver for your operating system (e.g., Windows 10 or Windows 11).

4. Once the driver is downloaded, locate the downloaded file (usually an .exe file) and double-click on it to start the installation process.

5. Follow the on-screen instructions to complete the installation. This may involve accepting terms and conditions, selecting installation options, or restarting your computer.

6. After the installation is complete, restart your computer to ensure the changes take effect.

7. Check if your graphics card is now detected by opening the Device Manager. Right-click on the Start button, select “Device Manager,” and expand the “Display adapters” category. Your graphics card should be listed here without any warnings or errors.

Updating your graphics card drivers can help resolve issues with graphics card not being detected. It ensures that your computer can properly communicate with the graphics card and utilize its capabilities for tasks like 3D modeling, rendering, and gaming.

Reinstalling Graphics Card Drivers

If your graphics card is not being detected, reinstalling the drivers might help resolve the issue. Here’s a step-by-step guide on how to do it:

1. Open the Device Manager by right-clicking on the Start button and selecting “Device Manager” from the menu.

2. Expand the “Display adapters” category to see your graphics card.

3. Right-click on your graphics card and select “Uninstall device.” Confirm the uninstallation if prompted.

4. Once the driver is uninstalled, restart your computer.

5. After the restart, Windows will automatically install a basic driver for your graphics card. This should allow your card to be detected.

6. To install the latest drivers for your graphics card, visit the manufacturer’s website (e.g., Nvidia, AMD, Intel) and download the appropriate driver for your specific model.

7. Run the driver installation file (.exe) that you downloaded and follow the on-screen instructions to install the drivers.

8. After the installation is complete, restart your computer again to apply the changes.

9. Once your computer boots up, check if your graphics card is now being detected. If not, you may need to try other troubleshooting steps or seek further assistance.

Updated: May 2024

Having trouble with your computer not detecting your video card? Fortect can help. It addresses issues like damaged system files and faulty settings that may be causing the problem. It also repairs damage caused by viruses and malware, ensuring your system is restored to its pre-infected state. Additionally, Fortect tackles freezing programs by fixing registry issues, missing files, and excessive junk.

It can even automatically fix missing or corrupt DLL files. If you’re experiencing the dreaded Blue Screen of Death, Fortect can repair the causes, including incompatible DLLs, drivers, and Windows bugs. It can also identify any malfunctioning hardware that may need replacement. Finally, Fortect offers OS recovery by comparing your current operating system with a healthy version and restoring vital system files.

Adjusting BIOS or UEFI Settings

To troubleshoot a graphics card not detected issue, you may need to adjust your BIOS or UEFI settings. Follow these steps to fix the problem:

1. Restart your computer and enter the BIOS or UEFI settings by pressing the designated key during the boot process (usually Del, F2, or F12).

2. Look for the “PCI Express” or “Graphics” settings in the BIOS or UEFI menu.

3. Select the appropriate option and make sure it is set to “Enabled” or “Auto” to allow the graphics card to be detected.

4. Save the changes and exit the BIOS or UEFI settings.

5. Restart your computer and check if the graphics card is now detected.

If the graphics card is still not detected, try the following additional steps:

– Update your BIOS or UEFI firmware to the latest version. Check the manufacturer’s website for the appropriate update and follow their instructions to install it.

– Update your device drivers. Visit the manufacturer’s website and download the latest drivers for your graphics card. Install the drivers and restart your computer.

– Check your power supply unit (PSU) connections. Ensure that the graphics card is properly connected to the PSU with the necessary power cables.

– Check for any Windows updates. Open the Windows Update settings and install any available updates. Sometimes, updates can resolve compatibility issues with graphics cards.

By adjusting your BIOS or UEFI settings, you can potentially fix the graphics card not detected issue.

Addressing Power Supply Issues

If your graphics card is not being detected by your computer, it could be due to power supply issues. Here are some troubleshooting tips to address this problem:

1. Check the power supply connections: Ensure that the power cable is securely connected to both the graphics card and the power supply unit (PSU). Sometimes, a loose connection can prevent the card from being detected.

2. Verify the power requirements: Make sure that your PSU has enough power to support your graphics card. Check the manufacturer’s specifications for the recommended power supply wattage. If your PSU is underpowered, consider upgrading to a higher wattage unit.

3. Inspect the PSU: Look for any visible signs of damage on the PSU, such as bulging capacitors or burnt components. Faulty components can cause power supply issues and prevent the graphics card from being detected.

4. Test the PSU: If you suspect that the PSU might be the problem, you can use a power supply tester or swap it with a known working unit to see if the issue is resolved.

5. Consider using a different power cable: In some cases, the power cable itself may be faulty. Try using a different power cable to see if it makes a difference in detecting your graphics card.

6. Ensure proper grounding: Make sure that your computer case and all components are properly grounded. Improper grounding can cause power supply issues and affect the detection of your graphics card.

7. Update device drivers: Check for the latest device drivers for your graphics card and install them. Outdated drivers can sometimes cause detection issues.

Exploring GPU Slot Concerns

If your graphics card is not being detected, there may be concerns with the GPU slot. Here are some troubleshooting tips to help you resolve the issue.

First, double-check that the graphics card is properly seated in the GPU slot. Sometimes, it may not be fully inserted or may have become loose. Make sure it is securely and firmly in place.

Next, ensure that the GPU slot is functioning correctly. Inspect the slot for any physical damage or debris that may be obstructing the connection. If you notice any issues, you may need to clean the slot or even consider replacing the motherboard if necessary.

Additionally, verify that the power supply unit (PSU) is providing enough power to the graphics card. Some high-performance GPUs require additional power connectors, so check if all the necessary power cables are connected properly. If your PSU doesn’t meet the power requirements, you may need to upgrade it.

It’s also crucial to have the latest device drivers installed for your graphics card. Visit the manufacturer’s website, such as Asus, Gigabyte Technology, or Zotac, to download and install the most recent drivers for your specific graphics card model.

If you’ve recently made changes to your computer hardware or installed a new operating system like Windows 10 or Windows 11, it could be causing compatibility issues. Check for any available patches or updates that address these compatibility concerns.

Lastly, if none of the above steps resolve the issue, you may want to consider seeking professional assistance from a computer technician. They can diagnose and troubleshoot the problem further, especially if it involves more complex issues like software bugs or motherboard failures.

Uninstalling Problematic Windows Updates

To uninstall problematic Windows updates, follow these steps:

1. Press the Windows key + R on your keyboard to open the Run dialog box.

2. Type “control” and press Enter to open the Control Panel.

3. In the Control Panel, click on “Programs” or “Programs and Features,” depending on your Windows version.

4. Look for the option that says “View installed updates” and click on it.

5. Scroll through the list of updates and look for any recent updates related to Windows or graphics drivers that may be causing the issue.

6. Right-click on the problematic update and select “Uninstall.” Follow the on-screen prompts to complete the uninstallation process.

7. Once the update is uninstalled, restart your computer.

After restarting, check if your graphics card is now being detected properly. If the issue persists, you may need to try other troubleshooting steps or seek further assistance.

Remember that uninstalling Windows updates should be done with caution, as they can affect the overall functionality of your computer. Only uninstall updates that you suspect may be causing the issue with your graphics card.

Additionally, it is recommended to keep your graphics card drivers up to date. Visit the manufacturer’s website, such as Asus, Gigabyte Technology, or ZOTAC, to download the latest drivers for your specific graphics card model.

Using Command Prompt for Hardware Adjustments

Command Prompt window

To adjust hardware settings for a graphics card using Command Prompt, follow these steps:

1. Open Command Prompt: Press the Windows key + R to open the Run dialog box, then type “cmd” and press Enter.

2. Run Command Prompt as administrator: Right-click on the Command Prompt icon in the taskbar and select “Run as administrator.”

3. Navigate to the graphics card settings: Use the command “cd” followed by the path to the graphics card settings. For example, if the settings are located in “C:\Program Files\GraphicsCard,” use the command “cd C:\Program Files\GraphicsCard”.

4. Access the hardware adjustment command: Once in the graphics card settings directory, use the appropriate command to adjust the desired hardware setting. Enclose the command in tags to execute it. Refer to the graphics card’s documentation for available commands.

5. Confirm the hardware adjustment: After entering the command, check if the hardware settings have been adjusted accordingly. You may need to restart your computer for the changes to take effect.

Remember to exercise caution when adjusting hardware settings through Command Prompt, as incorrect changes can cause system issues. It’s recommended to have a backup or consult with a professional if you’re unsure about any adjustments.

When to Contact the Manufacturer

Graphics card manufacturer logo

If you have followed all the troubleshooting tips mentioned above and your graphics card is still not being detected, it may be time to contact the manufacturer for further assistance. Before reaching out to them, make sure you have the necessary information such as the brand and model of your graphics card, as well as any error messages you have encountered.

Contacting the manufacturer
1. Start by visiting the manufacturer’s website and look for their support or contact page.
2. Look for their customer support phone number or email address.
3. Give them a call or send them an email explaining the issue you are facing. Be sure to provide all the necessary details mentioned earlier.
4. If possible, attach any relevant screenshots or error messages to your email.
5. Be patient and wait for their response. They may provide you with further troubleshooting steps or ask for additional information.

FAQ

Why is my PC not detecting my graphics card?

Your PC may not be detecting your graphics card due to outdated graphic drivers. Updating your graphics driver on Windows 10 can help resolve this issue. Another possible cause could be a malfunctioning or incompatible graphics card driver.

Why is my GPU not working on my computer?

Your GPU may not be working on your computer due to various reasons. One possible cause could be driver issues, where outdated or corrupted drivers can hinder GPU performance. Updating or reinstalling the drivers might help resolve the issue. Additionally, inadequate power supply can also affect GPU functionality, so ensuring a stable and sufficient power supply is essential.

Why is my graphics card not displaying?

Your graphics card may not be displaying due to a software issue, rather than a failed hardware. Updating the drivers for your graphics card can often resolve this problem. To fix the issue, you should check the operating system and GPU control software for any potential issues.

Why is my GPU not detected in Task Manager?

Your GPU may not be detected in Task Manager for several reasons. First, check if your graphics card is correctly installed, connected, and free of dust. Additionally, verify the BIOS settings to ensure that the GPU is enabled. If it is disabled, enabling it in the BIOS settings may make it visible in Task Manager. Finally, consider updating the BIOS as an outdated version can cause compatibility problems.

Example Message
?

If your computer is not detecting the video card, make sure to check the connections and ensure that the drivers are properly installed. Download this tool to run a scan