Page 43 of 51

World of Warcraft Won’t Launch – Fix PC Issue

Welcome to the fascinating realm of Azeroth, where adventurers across the globe unite to embark on thrilling quests and battles. However, amidst this immersive world, an unexpected obstacle has arisen for World of Warcraft players – a perplexing issue preventing the game from launching on PCs. Fear not, for in this article, we shall explore the solutions to overcome this hindrance and restore the epic journey that awaits.

February 2025: Enhance your computer’s performance and eliminate errors with this cutting-edge optimization software. Download it at this link

  1. Click here to download and install the optimization software.
  2. Initiate a comprehensive system scan.
  3. Allow the software to automatically fix and repair your system.

Update your graphics card drivers: Outdated graphics card drivers can prevent World of Warcraft from starting. Visit the manufacturer’s website and download the latest drivers for your specific graphics card model.

Troubleshooting WoW Launch Issues

If you’re experiencing issues launching World of Warcraft on your PC, there are a few troubleshooting methods you can try to fix the problem.

First, make sure your PC meets the minimum system requirements for the game. Check your computer specs, including RAM, storage space, processor, and graphics card.

Next, ensure that your drivers are up to date. Use a reliable driver update tool like Driver Easy to easily update your device drivers.

If the game won’t launch, try running it as an administrator. Right-click on the game’s shortcut and select “Run as administrator”.

You can also check the Task Manager for any background processes related to WoW and end them.

If you’re still experiencing issues, visit the World of Warcraft forums or the Blizzard website for more specific troubleshooting steps.

In the world of Warcraft, even the mightiest heroes stumble, but they always find a way to rise again.” – Unknown
Updated: February 2025

If you’re experiencing issues with World of Warcraft not starting, Fortect may be able to help. It can address damaged system files and faulty settings that could be causing the problem. Additionally, if there are missing or corrupt DLL files, Fortect can automatically fix the issue.

It can also identify and repair the causes of the Blue Screen of Death, such as incompatible DLLs or drivers. While Fortect cannot specifically fix issues related to the game itself, it can help ensure that your operating system is running smoothly.

Steps to Fix WoW Not Launching

  1. Restart the Computer

    • Close all running applications and save your work.
    • Click on the “Start” button and select “Restart” from the power options.
      Close all running applications and save your work.
Click on the "Start" button and select "Restart" from the power options.
    • Wait for the computer to restart and try launching World of Warcraft again.
  2. Update World of Warcraft

    • Launch the Battle.net desktop app.
    • Click on the “World of Warcraft” tab.
      Launch the Battle.net desktop app.
Click on the "World of Warcraft" tab.
    • Click on the “Options” dropdown menu and select “Scan and Repair”.
    • Wait for the process to complete and then try launching the game.
  3. Check for System Updates

    • Click on the “Start” button and select “Settings”.
    • Go to “Update & Security”.
    • Click on “Check for updates” and install any available updates for your system.
    • Restart the computer after the updates are installed and try launching the game.
      Click on "Check for updates" and install any available updates for your system.
Restart the computer after the updates are installed and try launching the game.
  4. Run the Game as an Administrator

    • Locate the World of Warcraft shortcut or executable file.
    • Right-click on it and select “Run as administrator”.
      Locate the World of Warcraft shortcut or executable file.
Right-click on it and select "Run as administrator".
    • If prompted, confirm the action by clicking “Yes”.
    • Launch the game and check if it launches without any issues.
  5. Disable Security Software

    • Open the security software installed on your computer.
    • Temporarily disable features like real-time scanning, firewall, or any other security components.
      Open the security software installed on your computer.
Temporarily disable features like real-time scanning, firewall, or any other security components.
    • Launch World of Warcraft and see if it launches successfully.
    • Remember to re-enable the security software after testing.
  6. Delete Cache and Interface Folders

    • Open the File Explorer.
    • Navigate to the World of Warcraft installation folder.
      Open the File Explorer.
Navigate to the World of Warcraft installation folder.
    • Locate the “Cache” and “Interface” folders.
    • Delete both folders.
    • Try launching the game again.

Solutions for WoW Won’t Start

  • Troubleshooting steps to fix World of Warcraft not launching
  • Check system requirements for compatibility
    Troubleshooting steps to fix World of Warcraft not launching
Check system requirements for compatibility
  • Update your graphics drivers to the latest version
  • Verify the integrity of the game files
  • Disable any conflicting background applications or antivirus software
  • Reset the World of Warcraft user interface
    Disable any conflicting background applications or antivirus software
Reset the World of Warcraft user interface
  • Run the game as an administrator
  • Reinstall the game if necessary
  • Seek help from the World of Warcraft community
  • Reach out to Blizzard Support for further assistance
    Seek help from the World of Warcraft community
Reach out to Blizzard Support for further assistance

python
import subprocess

def check_game_process():
# Check if the game process is running
process_name = "Wow.exe" # Update with the actual game process name
command = "TASKLIST /FI \"IMAGENAME eq {0}\" /NH".format(process_name)
output = subprocess.check_output(command, shell=True).decode("utf-8")

if process_name.lower() in output.lower():
print("World of Warcraft process is running.")
else:
print("World of Warcraft process is not running.")

def perform_troubleshooting():
# Add your troubleshooting steps here
print("Troubleshooting steps:")
print("1. Restart your computer.")
print("2. Update your graphics card drivers.")
print("3. Run the game as an administrator.")
print("4. Verify game files through the Blizzard Battle.net app.")
print("5. Disable any conflicting programs or overlays.")

# Main program
check_game_process()
perform_troubleshooting()

Resolving World of Warcraft Launch Problems

If you’re experiencing issues with launching World of Warcraft, there are a few steps you can take to resolve the problem. First, make sure your PC meets the minimum requirements for the game, including sufficient RAM, storage space, and a compatible operating system. Check for any updates or patches for the game and your device drivers. If the issue persists, try closing any unnecessary background processes using Task Manager.
You can also try repairing the game files through the Battle. net launcher. If all else fails, reach out to the Warcraft forums or consult with a technical expert for further assistance.

Sometimes, the greatest battles are not fought on the battlefield, but within the realms of technology. Don’t let technical issues stop you from entering Azeroth.” – Unknown
Example Message
?

If World of Warcraft won’t start, try troubleshooting the issue by checking your computer’s specifications, updating the game or reinstalling it, and ensuring your internet connection is stable. Download this tool to run a scan

How to Remove and Disable Android Lock Screen

Unlocking the untapped potential of your Android device begins with liberating it from the confines of the lock screen. In this article, we will delve into the art of removing and disabling the Android lock screen, empowering you to seamlessly navigate your device without any barriers.

February 2025: Enhance your computer’s performance and eliminate errors with this cutting-edge optimization software. Download it at this link

  1. Click here to download and install the optimization software.
  2. Initiate a comprehensive system scan.
  3. Allow the software to automatically fix and repair your system.

Disable lock screen security: Go to your device settings, navigate to the “Security” or “Lock screen” section, and choose the option to disable any lock screen security, such as PIN, pattern, or password.

Removing Screen Lock on Android

To remove the screen lock on your Android device, follow these simple steps:

1. Connect your device to your computer using a USB cable.
2. Enable USB debugging on your device by going to Settings > Developer options > USB debugging.
3. Open a command prompt or terminal on your computer and navigate to the platform-tools folder of the Android SDK installation directory.
4. Enter the command “adb devices” to make sure your device is recognized by the computer.
5. Once your device is recognized, enter the command “adb shell rm /data/system/gesture.key” to delete the lock screen password or pattern.
6. Restart your device, and the screen lock should be removed.

Note: These instructions may vary slightly depending on your device’s manufacturer and Android version.

To remove your lock screen, go to your device’s settings, navigate to ‘Security & Privacy,’ and disable the lock screen option.

Disabling Android Lock Screen

  1. Open the Settings app on your Android device.
  2. Scroll down and tap on Security or Security & Location.
    Open the Settings app on your Android device.
Scroll down and tap on Security or Security & Location.
  3. Depending on your device, you may need to tap on Screen lock or Lock screen.
  4. Enter your current lock screen credentials (pattern, PIN, or password).
  5. Tap on None or Swipe to disable the lock screen.
  6. If prompted, confirm your choice by tapping on Yes or Disable.
    Tap on None or Swipe to disable the lock screen.
If prompted, confirm your choice by tapping on Yes or Disable.

Method 2: Remove Android Lock Screen using Find My Device

  1. Visit the Find My Device website on a computer or another device.
  2. Sign in with the Google account associated with your locked Android device.
  3. Once signed in, locate and select your locked Android device.
  4. Click on Secure Device or Lock option.
  5. Enter a new password for your device.
  6. Click on Lock or Lock Device.
    Enter a new password for your device.
Click on Lock or Lock Device.
  7. Wait for a few moments and your Android device’s lock screen will be removed.

Method 3: Disable Android Lock Screen using Android Device Manager

  1. Visit the Android Device Manager website on a computer or another device.
  2. Sign in with the Google account associated with your locked Android device.
    Visit the Android Device Manager website on a computer or another device.
Sign in with the Google account associated with your locked Android device.
  3. Once signed in, select your locked Android device from the list.
  4. Click on the Lock option.
  5. Enter a new password for your device.
  6. Click on Lock or Lock Device.
    Enter a new password for your device.
Click on Lock or Lock Device.
  7. Wait for a few moments and your Android device’s lock screen will be disabled.
Updated: February 2025

If you’re experiencing issues with your lock screen, Fortect may be able to help. While we cannot guarantee it will fix all lock screen errors, Fortect specializes in repairing damaged system files and faulty settings that can cause normal tasks to stop working or result in confusing error messages.

It also addresses the causes of annoying slowdowns or freezing programs, ensuring that Windows and other programs run smoothly. Additionally, Fortect can automatically fix missing or corrupt DLL files, which are crucial for proper program functioning.

Removing Lock Screen on Samsung

To remove the lock screen on your Samsung phone, follow these simple steps:

1. Go to the Settings menu on your phone.
2. Scroll down and select “Lock screen.”
3. Tap on “Screen lock type.”
4. Enter your current screen lock password or pattern.
5. Choose “Swipe” as the new lock screen authentication method.
6. Confirm your selection and exit the menu.

Turning off Lock Screen on Android

To turn off the lock screen on your Android device, follow these simple steps:

1. Enable USB debugging on your device. Go to Settings > About phone (or tablet) > Software information > Build number. Tap on Build number 7 times to enable Developer options.

2. Go back to Settings and open Developer options. Enable USB debugging.

3. Connect your device to your computer using a USB cable.

4. Open a command prompt or terminal on your computer and enter the following command: adb devices. This will display a list of connected devices.

5. Once your device is recognized, enter the following command: adb shell.

6. Now, enter the following command to remove the lock screen: adb shell rm /data/system/gesture.key.

7. Disconnect your device from the computer.

8. Reboot your device, and the lock screen will be turned off.

Note: This method may vary slightly depending on your device’s manufacturer and Android version.

Shopping in the U.S.

Removing and disabling the Android lock screen is a simple process that can enhance your shopping experience in the U.S. Whether you’re concerned about privacy or want to save time, we’ve got you covered.

For the simplest method, use the command line tool, DroidKit. With DroidKit, you can easily delete the lock screen password, pattern lock, or fingerprint authentication. It works on all Android devices, including tablets and phones from different manufacturers.

If you prefer a more comprehensive approach, consider using device management software. These apps allow you to remove various lock screen types, such as PIN, password, or pattern lock, with just a few clicks. They also offer additional features like app management and privacy settings.

By removing the lock screen, you’ll have quicker access to your phone, allowing you to quickly browse shopping apps or make a call. Plus, you won’t have to deal with annoying ads or distractions like the clock or flashlight on your lock screen.

Download DroidKit now and unlock the full potential of your Android device. Enjoy a seamless shopping experience without any lock screen obstacles.

Example Message
?

To remove your lock screen, go to your device’s settings, select the “Security” or “Lock Screen” tab, and disable any lock screen options that are currently enabled. Download this tool to run a scan

Norton 360 Desktop Icon Missing – Retrieve and Add Norton Antivirus Icon

Lost your Norton 360 desktop icon? Don’t worry, we’ve got you covered! In this article, we will guide you on how to retrieve and add the Norton Antivirus icon to your desktop effortlessly. Say goodbye to the icon hunt and hello to hassle-free security access.

February 2025: Enhance your computer’s performance and eliminate errors with this cutting-edge optimization software. Download it at this link

  1. Click here to download and install the optimization software.
  2. Initiate a comprehensive system scan.
  3. Allow the software to automatically fix and repair your system.

Troubleshooting Norton 360 Desktop Icon

If you’re facing the issue of a missing Norton 360 desktop icon, here’s how you can retrieve and add it back to your system.

1. First, make sure you’re logged in to your Windows account with administrative privileges.

2. Open the Windows Task Manager by pressing Ctrl + Shift + Esc on your keyboard.

3. In the Task Manager, go to the “Processes” tab and look for any Norton or Symantec related processes. If you find any, right-click on them and select “End Task” to close them.

4. Next, open File Explorer and navigate to the following location: C:\Program Files\Norton 360

5. Look for the file named “Norton360.exe” and double-click on it to launch Norton 360.

6. Once Norton 360 is open, right-click on the Norton 360 icon in the system tray (located at the bottom-right corner of your screen) and select “Pin to Taskbar” to add it to your taskbar.

7. You should now see the Norton 360 icon on your taskbar. If you want to add it to your desktop as well, right-click on the Norton 360 icon in the taskbar and select “Create shortcut.” Then, drag the shortcut to your desktop.

Using the Norton Remove and Reinstall Tool

If you are experiencing a missing Norton 360 Desktop Icon, you can easily retrieve and add the Norton Antivirus Icon using the Norton Remove and Reinstall Tool. Follow these steps:

1. Download the Norton Remove and Reinstall Tool from the Norton website.
2. Save the file to your computer.
3. Close any open programs and run the downloaded file.
4. Follow the on-screen instructions to uninstall your existing Norton product.
5. Restart your computer when prompted.
6. After the restart, run the downloaded file again.
7. Follow the on-screen instructions to reinstall Norton.
8. Once the installation is complete, your Norton 360 Desktop Icon should be restored.

If you still encounter any issues, please reach out to Norton Support for further assistance.

Improving User Experience with Norton

If you’re missing the Norton 360 desktop icon and need to retrieve and add it, follow these steps:

1. Open the Norton Antivirus program on your computer.
2. Click on “Settings” in the main menu.
3. Select “Administrative Settings” from the dropdown menu.
4. In the “Administrative Settings” window, click on “Desktop Icon Settings.”
5. Check the box next to “Show Norton icon on desktop.”
6. Click “Apply” and then “OK” to save the changes.

Updated: February 2025

Fortect can help with the issue of Norton 360 desktop icon missing by addressing potential causes such as damaged system files, faulty settings, or missing DLL files. It can also address issues related to freezing programs or slowdowns, ensuring smooth performance.

While Fortect cannot specifically fix the missing icon, it can repair underlying issues that may be contributing to the problem and optimize overall system functionality.

Locating Norton on Your Computer

To retrieve and add the Norton Antivirus icon to your computer, follow these steps:

1. Open the Windows Taskbar by right-clicking on an empty space on the taskbar.
2. Select “Taskbar settings” from the menu that appears.
3. Scroll down to the “Notification area” section and click on “Select which icons appear on the taskbar.”

4. In the “Select which icons appear on the taskbar” settings window, locate “Norton Security” or “Norton 360” and toggle the switch to “On.”

5. Close the settings window and check your taskbar. The Norton icon should now be visible.

If the Norton icon is still missing, you can try restoring it through the Norton software itself:

1. Open the Norton software on your computer.
2. Look for the “Settings” or “Options” section, usually located in the top-right corner.
3. Find the “Appearance” or “Customize” tab within the settings.
4. Look for an option to “Restore” or “Show” the Norton icon in the system tray or taskbar.
5. Save your changes and check if the Norton icon has been restored.

If you are using a remote desktop connection, it’s important to note that the Norton icon may not appear on your local taskbar. Instead, it will be displayed on the taskbar of the remote desktop session.

Norton 360 as Top Antivirus Software

If you’re unable to find the Norton 360 desktop icon on your computer, don’t worry. Restoring it is a simple process.

First, open the Norton 360 program on your computer. Then, go to the Settings menu and select “Administrative Settings.” Under the “Appearance” section, click on “Desktop Icon Settings.”

In the Desktop Icon Settings window, check the box next to “Norton Antivirus” and click “Apply” followed by “OK.”

If the Norton 360 desktop icon still doesn’t appear, try restarting your computer.

For further assistance, you can visit the NortonLifeLock support forum or contact their customer support.

Resolving Issues with Norton Icon

If you’re experiencing the issue of a missing Norton 360 desktop icon, here’s how you can retrieve and add the Norton Antivirus icon to your desktop.

First, open the Norton product on your computer. Next, navigate to the Settings section and click on the Personalization option.

Within the Personalization settings, locate the Norton Fighter25 section and click on it. Under the Norton Fighter25 section, you will find the option to restore the Norton 360 desktop icon.

Click on the “Restore” button to retrieve the missing icon. Once the icon is restored, it will appear on your desktop.

If you’re still unable to locate the Norton 360 icon, try restarting your computer and checking the system tray or the windows taskbar icons.

Enabling Norton Safe Web Icon

To enable the Norton Safe Web Icon, follow these steps:

1. Open your browser and go to the Norton website.
2. Search for “Norton Safe Web Icon” in the search bar.
3. Click on the official Norton website link for the Norton Safe Web Icon.
4. Download and install the Norton Safe Web Icon add-on or extension for your browser.
5. Once installed, restart your browser to activate the Norton Safe Web Icon.
6. You can now see the Norton Safe Web Icon in your browser’s toolbar or taskbar.

Norton Widget Overview

  • Norton Widget: Learn about the Norton widget and how it enhances your antivirus experience.
  • Simple Installation Process: Discover how to easily install the Norton widget on your desktop.
    Norton Widget: Learn about the Norton widget and how it enhances your antivirus experience.
Simple Installation Process: Discover how to easily install the Norton widget on your desktop.
  • Convenient Access: Find out how the Norton widget provides quick access to your antivirus features.
  • Real-time Protection: Understand how the Norton widget keeps your computer safe with continuous monitoring.
  • Customizable Settings: Explore the various settings options available in the Norton widget for personalized protection.
  • Scanning and Detection: Learn how the Norton widget effectively scans and detects potential threats on your system.
    Customizable Settings: Explore the various settings options available in the Norton widget for personalized protection.
Scanning and Detection: Learn how the Norton widget effectively scans and detects potential threats on your system.
  • Quarantine and Removal: Discover how the Norton widget handles infected files by isolating and removing them safely.
  • Performance Optimization: Find out how the Norton widget optimizes your computer’s performance while ensuring security.
  • Automatic Updates: Stay up-to-date with the latest virus definitions and security patches through the Norton widget’s automatic updates.
  • 24/7 Support: Enjoy the peace of mind knowing that Norton provides round-the-clock support for any queries or issues you may encounter.
    Automatic Updates: Stay up-to-date with the latest virus definitions and security patches through the Norton widget's automatic updates.
24/7 Support: Enjoy the peace of mind knowing that Norton provides round-the-clock support for any queries or issues you may encounter.
Example Message
?

If the Norton 360 desktop icon is missing, try restarting your computer or reinstalling the Norton 360 software to restore the icon. Download this tool to run a scan

Fix Lenovo Laptop Missing Operating System

Welcome to our guide on fixing the issue of a missing operating system on your Lenovo laptop. If you’re experiencing this frustrating problem, fear not – we have got you covered with simple and effective solutions. So, let’s dive in and get your laptop back up and running smoothly!

February 2025: Enhance your computer’s performance and eliminate errors with this cutting-edge optimization software. Download it at this link

  1. Click here to download and install the optimization software.
  2. Initiate a comprehensive system scan.
  3. Allow the software to automatically fix and repair your system.

Check the boot order: Ensure that the boot order in the BIOS settings is correct, with the primary boot device set to the hard drive where the operating system is installed.

How to Recover Data from a PC with Error 1962

To recover data from a PC with Error 1962, follow these steps:

1. Restart your Lenovo laptop and press the F12 or F10 key repeatedly during startup to enter the BIOS settings.
2. In the BIOS settings, navigate to the “Boot” or “Boot Device” tab.
3. Set the primary boot device to your Windows installation media (USB or DVD).
4. Save the changes and exit the BIOS settings.
5. Insert your Windows installation media and restart the laptop.
6. Follow the on-screen instructions to repair your Windows operating system.
7. Once the repair process is complete, your laptop should start normally.
8. Use MiniTool Partition Wizard Pro Ultimate or similar software to recover your data from the affected partition.

For more detailed instructions, refer to the Lenovo support page or consult the user manual for your specific laptop model.

A missing operating system on a Lenovo laptop can be a minor setback, but it’s a solvable issue with the right troubleshooting steps.

Fixing Missing Operating System or OS Not Found Error

If you’re experiencing the “Missing Operating System” or “OS Not Found” error on your Lenovo laptop, here are some troubleshooting methods to resolve the issue.

1. Check the boot order in BIOS setup. Restart your laptop and press the F12 or F10 key (depending on the model) to enter the BIOS menu. Ensure that the hard disk drive is set as the first boot device.

2. Use the MiniTool Partition Wizard Pro Ultimate software to repair the Windows boot. Download and install the software from the official website. Follow the on-screen instructions to fix any boot-related errors.

3. If the above steps don’t work, check the Lenovo support page for your specific laptop model. Look for troubleshooting guides, manuals, or software that can help you troubleshoot and diagnose the issue.

When your Lenovo laptop shows a ‘missing operating system’ message, don’t panic – it’s often a simple matter of fixing boot settings or reinstalling the OS.
Updated: February 2025

Fortect can help with a Lenovo laptop missing operating system error by addressing specific aspects of the issue. It can repair damaged system files and faulty settings that may be causing the error message.

Additionally, Fortect can automatically fix missing or corrupt DLL files, which are crucial for program functioning. It can also compare the current operating system with a healthy version and restore vital system files needed for running and restarting Windows, without affecting user data.

Changing Boot Order and Checking Hard Drive

  1. Restart the Lenovo laptop and press the Del or F2 key repeatedly to enter the BIOS setup.
  2. Once in the BIOS setup, navigate to the “Boot” tab using the arrow keys.
    Restart the Lenovo laptop and press the Del or F2 key repeatedly to enter the BIOS setup.
Once in the BIOS setup, navigate to the "Boot" tab using the arrow keys.
  3. Locate the “Boot Priority” or “Boot Order” option and press Enter.
  4. Use the arrow keys to select the desired boot device (usually the hard drive or SSD).
  5. Press the + or key to move the selected boot device up or down in the boot order.
  6. Save the changes by pressing the F10 key and confirm when prompted.
    Press the + or - key to move the selected boot device up or down in the boot order.
Save the changes by pressing the F10 key and confirm when prompted.
  7. Exit the BIOS setup and restart the Lenovo laptop to apply the new boot order.

Checking Hard Drive

  1. Power off the Lenovo laptop completely.
  2. Locate the hard drive access panel, usually located on the bottom of the laptop.
  3. Remove the screws securing the access panel and carefully lift it off.
  4. Identify the hard drive and check if it is securely connected to the laptop’s motherboard.
    Remove the screws securing the access panel and carefully lift it off.
Identify the hard drive and check if it is securely connected to the laptop's motherboard.
  5. If the connection is loose, gently reconnect the hard drive and ensure it is firmly in place.
  6. Inspect the hard drive for any physical damage or signs of failure, such as cracks or unusual noises.
    If the connection is loose, gently reconnect the hard drive and ensure it is firmly in place.
Inspect the hard drive for any physical damage or signs of failure, such as cracks or unusual noises.
  7. If the hard drive appears to be damaged, it may need to be replaced.
  8. Close the access panel, secure it with the screws, and power on the Lenovo laptop.


import os

def check_boot_files():
boot_files = ["bootmgr", "BOOTNXT", "boot.ini", "NTLDR"]
for file in boot_files:
if not os.path.exists(file):
print(f"Missing boot file: {file}")

def check_boot_order():
# Access BIOS settings and check the boot order configuration
# Specific steps depend on the laptop model, BIOS version, etc.
print("Check BIOS boot order configuration")

def check_hard_drive():
# Perform checks on the laptop's hard drive health
# Specific steps may involve using S.M.A.R.T. utilities or diagnostic tools
print("Check hard drive health")

# Call the functions to diagnose the issue
check_boot_files()
check_boot_order()
check_hard_drive()

Running Startup Repair and System Restore

To begin, start by restarting your laptop and pressing the F12 or F10 key repeatedly. This will bring up the boot options menu.

From the menu, select “Startup Repair” and follow the on-screen instructions. This will automatically scan and fix any issues with your Windows boot.

If the Startup Repair doesn’t resolve the issue, you can try using the “System Restore” option. This will restore your laptop to a previous working state.

To access System Restore, go to the “Troubleshoot & Diagnose” section in the Windows boot menu. Select “System Restore” and follow the prompts to restore your laptop.

These methods can help resolve the “Missing Operating System” error and get your Lenovo laptop up and running again.

Repairing MBR and Setting BIOS to Default

  1. Boot the Lenovo laptop using a bootable USB or DVD.
  2. Choose the language preferences and click “Next”.
    Boot the Lenovo laptop using a bootable USB or DVD.
Choose the language preferences and click "Next".
  3. Click on “Repair your computer” at the bottom left corner of the screen.
  4. Select “Troubleshoot” in the next window.
  5. Choose “Advanced options” from the Troubleshoot menu.
  6. Select “Command Prompt” to open the command prompt window.
    Choose "Advanced options" from the Troubleshoot menu.
Select "Command Prompt" to open the command prompt window.
  7. Type bootrec /fixmbr and press Enter to repair the Master Boot Record (MBR).
  8. Wait for the process to complete and then close the command prompt.
  9. Restart the laptop and check if the missing operating system error is resolved.

Setting BIOS to Default:

  1. Turn off the Lenovo laptop completely.
  2. Press the power button to turn it on and immediately start pressing the Enter or F2 key repeatedly to enter the BIOS settings.
  3. In the BIOS settings, navigate to the “Exit” tab using the arrow keys.
  4. Choose the option to “Load Setup Defaults” or “Load Default Settings”.
    In the BIOS settings, navigate to the "Exit" tab using the arrow keys.
Choose the option to "Load Setup Defaults" or "Load Default Settings".
  5. Confirm the selection and exit the BIOS settings.
  6. Restart the laptop and check if the missing operating system error is resolved.

Activating Primary Partition and Checking Hard Drive Connection

To fix the “Missing Operating System” error on your Lenovo laptop, you can try activating the primary partition and checking the hard drive connection. First, restart your laptop and press F12 or F10 to enter the boot menu. Select your hard disk drive and press Enter. If the error persists, you may need to check the hard drive connection. Power off your laptop, unplug the power cord, and remove the battery.
Open the back cover and ensure the hard drive is securely connected. If necessary, consult the Product Home or Manuals for specific instructions. Reassemble your laptop and test if the issue is resolved.

Example Message
?

If your Lenovo laptop is displaying a “missing operating system” error, it is recommended to contact Lenovo customer support for assistance in resolving the issue. Download this tool to run a scan

Troubleshooting LaCie External Drive Not Showing Up on Windows/Mac

Having trouble finding your LaCie external drive on your Windows or Mac computer? Don’t worry, we’ve got you covered! In this article, we will explore some troubleshooting tips to help you resolve the issue and get your LaCie drive up and running again in no time. Let’s dive in!

February 2025: Enhance your computer’s performance and eliminate errors with this cutting-edge optimization software. Download it at this link

  1. Click here to download and install the optimization software.
  2. Initiate a comprehensive system scan.
  3. Allow the software to automatically fix and repair your system.

Check the connections: Ensure that the cables connecting your Lacie drive to your computer are securely plugged in on both ends. Try using a different USB port or cable to rule out any potential issues with the connection.

Troubleshooting Lacie Drive Connectivity Issues

If your LaCie external drive is not showing up on your Windows or Mac computer, there are a few troubleshooting steps you can take to resolve the issue.

1. Check the physical connections: Make sure the USB or power cable is securely plugged into the drive and computer. Try using a different cable or port to rule out any connection issues.

2. Verify power supply: Ensure that the LaCie drive is receiving power by connecting it to a known working power outlet or using a compatible power adapter.

3. Check device manager: On Windows, open Device Manager and look for any exclamation marks or error messages next to the LaCie drive. If found, right-click on the drive and select “Update driver” or “Uninstall device,” then restart your computer.

4. Verify disk management (Windows) or disk utility (Mac): Open Disk Management on Windows or Disk Utility on Mac to see if the LaCie drive is detected but not assigned a drive letter or partition. If so, right-click on the drive and select “Change Drive Letter and Paths” (Windows) or click on the “Partition” tab and follow the prompts (Mac).

5. Update firmware and drivers: Visit the LaCie support website to check for any available firmware or driver updates for your specific drive model. Download and install them following the provided instructions.

6. Use third-party software: Consider using data recovery or disk management software like MiniTool or Disk Drill to help diagnose and recover data from the LaCie drive.

Checking and Editing Preferences for Lacie Drive on Mac

To check and edit preferences for your LaCie drive on a Mac, follow these steps:

1. Connect your LaCie drive to your Mac using the appropriate cable or adapter.
2. Open Finder and navigate to the “Applications” folder.
3. Locate and open “Disk Utility.”
4. In Disk Utility, select your LaCie drive from the list on the left-hand side.
5. Click on the “Erase” tab and choose the desired file system format (such as NTFS or Mac OS Extended) for your LaCie drive.
6. Give your LaCie drive a name and click “Erase” to reformat it.
7. Once the reformatting is complete, your LaCie drive should appear in Finder.
8. To edit preferences and customize your LaCie drive, you can use the LaCie Setup Assistant or the LaCie Desktop Manager if applicable.
9. If your LaCie drive is still not showing up, try connecting it to a different USB port or using a different USB cable or adapter.
10. If the issue persists, you may need to update the drivers for your LaCie drive or seek further support from LaCie.

Basic Checks and Fixes for Lacie Drive Not Showing Up

If your LaCie external drive is not showing up on Windows or Mac, try these troubleshooting steps:

1. Check the physical connections: Make sure the USB cable is securely plugged into both the drive and the computer. Also, check if the power adapter is properly connected if applicable.

2. Try a different USB port or cable: Sometimes, a faulty port or cable can cause connectivity issues. Connect the drive to a different USB port or try using a different USB cable to see if that resolves the problem.

3. Check the power source: Ensure that the drive is receiving power by connecting it to a different power outlet or using a different power adapter if available.

4. Verify device recognition: Open the Disk Management (Windows) or Disk Utility (Mac) to see if the drive is recognized. If it appears in the list, but is not assigned a drive letter or mount point, you may need to manually assign one.

5. Update the drive’s driver or firmware: Visit the LaCie website and download the latest driver or firmware for your specific LaCie drive model. This can address compatibility issues and improve performance.

6. Check for drive errors: Use a disk utility tool like MiniTool Partition Wizard (Windows) or Disk Utility (Mac) to scan and repair any disk errors. This can fix common issues that prevent the drive from being recognized.

Updated: February 2025

If you’re dealing with a lacie drive not showing up error, Fortect may be able to help. It can address issues such as damaged system files, faulty settings, and missing DLL files that may be causing the problem.

While it cannot fix every issue, Fortect is designed to repair various Windows-related issues, ensuring smooth performance and addressing the causes of freezing programs. It can also help recover the operating system without affecting user data.

NTFS Formatting and Mac Compatibility for Lacie Drive

If your LaCie external drive is not showing up on Windows or Mac, it may be due to NTFS formatting and Mac compatibility issues. To troubleshoot this problem, follow these steps:

1. Connect the LaCie drive to your computer using the appropriate interface (USB 3.0, USB adapter, etc.).
2. Check if the drive appears in Disk Drives or other storage device listings in the Device Manager or Disk Utility.
3. If the drive is not recognized, open Disk Management (Windows) or Disk Utility (Mac) to see if it appears there.
4. If the drive is listed but not accessible, it may be formatted with NTFS, which is not natively supported on Mac. To resolve this, reformat the drive to a compatible file system like exFAT or FAT32. Note that reformatting will erase all data on the drive, so make sure to back up your files beforehand.
5. If reformatting is not an option, you can try using third-party software like Paragon NTFS for Mac to enable read and write access to NTFS-formatted drives.
6. If the LaCie drive still does not show up, there may be hardware issues. Try connecting it to a different computer or using a different USB cable to rule out connectivity problems.
7. If none of the above methods work, there may be a problem with the drive itself. Contact LaCie support for further assistance or consider data recovery options if your files are crucial.

Repairing Lacie Drive Errors with First Aid

To repair Lacie drive errors using First Aid, follow these steps:

1. Connect the Lacie drive to your computer using the appropriate interface standard (e.g., USB 3.0, USB adapter, etc.).

2. On Windows: Open the Disk Drives page in the Device Manager and check if the Lacie drive is listed. If not, try connecting it to a different USB port or using a different USB cable.

3. On Mac: Go to the Disk Utility or Lacie Setup Assistant and check if the drive is detected. If not, try connecting it to a different port or using a different cable.

4. Run First Aid: On Windows, use the built-in troubleshooter or a third-party software to run a disk check on the Lacie drive. On Mac, use the Disk Utility or Lacie Setup Assistant to run First Aid.

5. Follow the on-screen instructions: During the repair process, First Aid will attempt to fix any errors it finds on the Lacie drive.

6. Check if the drive is now showing up: After the repair is complete, check if the Lacie drive is now visible in your file explorer or Disk Utility.

Formatting and Drive Letter Issues on Windows with Lacie Drive

If you’re experiencing formatting or drive letter issues with your LaCie external drive on Windows, follow these troubleshooting steps to resolve the problem.

1. Check the connections: Ensure that the LaCie drive is properly connected to your computer via USB or another interface standard.

2. Run the Windows troubleshooter: Open the Windows troubleshooter and let it scan for any issues with the LaCie drive. Follow the recommended steps to fix any problems detected.

3. Update device drivers: Ensure that your LaCie drive’s drivers are up to date. Visit the LaCie website and download the latest drivers for your specific model.

4. Try different USB ports: Plug the LaCie drive into different USB ports on your computer to rule out any issues with a specific port.

5. Test on another computer: Connect the LaCie drive to another computer to see if it shows up. This will help determine if the issue is specific to your computer or the drive itself.

6. Format the drive: If the LaCie drive is not showing up, you may need to format it. Backup any important data before proceeding. Right-click on the drive in the Windows File Explorer and select “Format.” Follow the prompts to format the drive.

Checking for Lost Partitions and Hardware Issues with Lacie Drive

  1. Connect the Lacie Drive to a Different USB Port
    • Unplug the Lacie Drive from the current USB port.
      Connect the Lacie Drive to a Different USB Port
Unplug the Lacie Drive from the current USB port.
    • Plug it into a different USB port on your computer.
  2. Use a Different USB Cable
    • Disconnect the current USB cable from the Lacie Drive.
    • Replace it with a known-working USB cable.
      Disconnect the current USB cable from the Lacie Drive.
Replace it with a known-working USB cable.
  3. Check for Hardware Issues
    • Disconnect the Lacie Drive from the computer.
    • Connect it to another computer to see if it is detected.
      Disconnect the Lacie Drive from the computer.
Connect it to another computer to see if it is detected.
    • If it is not detected on another computer, the issue may be with the Lacie Drive itself. Consider contacting Lacie support for further assistance.
  4. Check Disk Management (Windows)
    • Press Windows Key + X and select Disk Management.
    • Look for the Lacie Drive in the list of disks.
      Press Windows Key + X and select Disk Management.
Look for the Lacie Drive in the list of disks.
    • If it is listed, right-click on it and select Change Drive Letter and Paths.
    • Assign a new drive letter to the Lacie Drive.
    • If it is not listed, move to the next step.
  5. Check Disk Utility (Mac)
    • Open Finder and go to Applications > Utilities > Disk Utility.
    • Look for the Lacie Drive in the list of devices.
      Open Finder and go to Applications > Utilities > Disk Utility.
Look for the Lacie Drive in the list of devices.
    • If it is listed, select it and click on the Mount button.
    • If it is not listed, move to the next step.
  6. Run Data Recovery Software
    • If none of the previous steps worked, it is possible that the Lacie Drive has a lost partition or data corruption.
    • Use a reliable data recovery software to scan for lost partitions and recover the data.
      If none of the previous steps worked, it is possible that the Lacie Drive has a lost partition or data corruption.
Use a reliable data recovery software to scan for lost partitions and recover the data.
    • Follow the instructions provided by the software to recover the lost data.

Troubleshooting Lacie Drive Detection on Windows

If your LaCie external drive is not showing up on your Windows or Mac computer, there are a few troubleshooting steps you can take.

First, make sure the drive is properly connected to your computer. Check the USB cable and ports for any damage or loose connections.

Next, try connecting the drive to a different USB port or using a different USB cable to rule out any issues with the current setup.

You can also try connecting the drive to another computer to see if it detects properly.

If the drive still isn’t showing up, you can try updating the drive’s drivers by visiting the manufacturer’s website and downloading any available updates.

Additionally, you can check the drive in Disk Management (Windows) or Disk Utility (Mac) to see if it appears there but isn’t assigned a drive letter or mount point.

If none of these methods work, there may be an issue with the drive itself and you may need to contact LaCie support for further assistance.

Example Message
?

If your Lacie drive is not showing up, try checking the connections and ensure that it is properly connected to your computer. Download this tool to run a scan

Troubleshooting The Amazing Spider-Man Launcher Stopped Working

The thrilling web-slinging adventures of Spider-Man come to a halt when his trusty launcher encounters unexpected issues. In this article, we delve into the world of troubleshooting to uncover the reasons behind the Amazing Spider-Man Launcher’s sudden stoppage and explore potential solutions to get our hero swinging again.

February 2025: Enhance your computer’s performance and eliminate errors with this cutting-edge optimization software. Download it at this link

  1. Click here to download and install the optimization software.
  2. Initiate a comprehensive system scan.
  3. Allow the software to automatically fix and repair your system.

Restart your device: Sometimes, technical glitches can be resolved simply by restarting your device. This can help clear out any temporary issues causing the launcher to stop working.

Launcher Issues and Fixes

If you’re experiencing launcher issues with The Amazing Spider-Man game, there are a few fixes you can try.
First, make sure your game files are up to date by verifying the integrity of the game cache in Steam.
If that doesn’t work, try running the game as an administrator by right-clicking on the game executable file and selecting “Run as administrator.”
You can also try changing the game’s resolution or graphics settings to see if that resolves the issue.
If none of these solutions work, you may need to perform a registry scan or reinstall the game.

When obstacles arise, you change your direction to reach your goal; you do not change your decision to get there.” – Zig Ziglar
Updated: February 2025

If you’re experiencing issues with the Amazing Spider Man launcher suddenly stopping, Fortect might be able to help. It can address damaged system files and faulty settings that may be causing the problem.

Additionally, if there are missing or corrupt DLL files, Fortect can automatically fix those as well. While it cannot specifically fix launcher issues, it can ensure that Windows and other programs run smoothly, potentially resolving the problem indirectly.

Game Configuration and Optimization

  • Check system requirements:
    1. Ensure that your computer meets the minimum system requirements for the game.
    2. Refer to the game’s official website or documentation for the specific requirements.
      Ensure that your computer meets the minimum system requirements for the game.
Refer to the game's official website or documentation for the specific requirements.
  • Update graphics drivers:
    1. Open Device Manager by pressing Win+X and selecting Device Manager.
    2. Expand the Display adapters category.
    3. Right-click on your graphics card and select Update driver.
    4. Choose the option to Search automatically for updated driver software.
    5. Follow the on-screen instructions to install any available updates.
  • Verify game files:
    1. Open the game launcher or platform (e.g., Steam, Epic Games Launcher).
    2. Locate the game in your library.
    3. Right-click on the game and select Properties.
    4. Navigate to the Local files or Verify integrity of game files section.
      Right-click on the game and select Properties.
Navigate to the Local files or Verify integrity of game files section.
    5. Click on the option to Verify integrity of game files.
    6. Wait for the process to complete, which may take some time.
      Click on the option to Verify integrity of game files.
Wait for the process to complete, which may take some time.
  • Disable unnecessary background processes:
    1. Open Task Manager by pressing Ctrl+Shift+Esc.
    2. Switch to the Processes or Details tab.
    3. Identify any resource-intensive processes that are running.
    4. Right-click on the process and select End task or End process.
      Identify any resource-intensive processes that are running.
Right-click on the process and select End task or End process.
    5. Repeat this step for any other unnecessary processes.
  • Adjust in-game settings:
    1. Launch the game and access the settings or options menu.
    2. Lower graphics settings such as resolution, texture quality, shadows, and anti-aliasing.
      Launch the game and access the settings or options menu.
Lower graphics settings such as resolution, texture quality, shadows, and anti-aliasing.
    3. Disable or reduce any additional graphics effects that are not essential.
    4. Apply the changes and restart the game.
  • Update DirectX and Visual C++ redistributable:
    1. Visit the official Microsoft website.
    2. Download and install the latest version of DirectX.
    3. Download and install the latest version of Visual C++ redistributable packages.
    4. Restart your computer after the installations are complete.
      Download and install the latest version of Visual C++ redistributable packages.
Restart your computer after the installations are complete.

Troubleshooting The Amazing Spider-Man

If you’re experiencing issues with The Amazing Spider-Man launcher not working, here are some troubleshooting steps you can try:

1. Check your PC specs: Ensure that your computer meets the minimum system requirements to run the game.

2. Verify game cache: Right-click on the game in your Steam library, go to Properties, and select “Verify Integrity of Game Files” under the Local Files tab. This will check for any corrupted or missing game files.

3. Update graphics drivers: Make sure your graphics drivers are up to date. Visit the manufacturer’s website for your graphics card to download and install the latest drivers.

4. Run the game as administrator: Right-click on the game’s executable file (Game.exe or asmlauncher.exe) and select “Run as administrator” to give it elevated privileges.

5. Perform a registry scan: Use a reliable registry cleaner to scan for any registry errors that could be causing the launcher to stop working.

6. Disable mods: If you have any mods installed, try disabling them temporarily to see if they are causing conflicts with the launcher.

7. Reinstall the game: If all else fails, uninstall the game and then reinstall it to ensure a clean installation.

python
import random

class SpiderManLauncher:
def __init__(self):
self.is_working = True

def launch(self):
if random.random() < 0.2: self.is_working = False raise Exception("Amazing Spider-Man Launcher has stopped working!") print("Spider-Man Launcher is working perfectly!") def main(): launcher = SpiderManLauncher() try: launcher.launch() except Exception as e: print(e) if __name__ == "__main__": main()

In this code, we have a `SpiderManLauncher` class with a `launch` method that randomly throws an exception to simulate the issue you mentioned. When the launcher is working fine, it prints a success message. In the `main` function, we create an instance of the `SpiderManLauncher` class and handle any exceptions that may occur during the launch process.

Graphics, Audio, and Control Problems


Troubleshooting The Amazing Spider-Man Launcher Stopped Working

Problem Description Solution
Graphics The game is experiencing graphical glitches or rendering issues.
  • Update your graphics card drivers to the latest version.
  • Lower the graphics settings in the game options.
    Update your graphics card drivers to the latest version.
Lower the graphics settings in the game options.
  • Check if your system meets the minimum requirements for the game.
Audio No sound or distorted audio during gameplay.
  • Check your computer's sound settings and ensure the volume is not muted.
  • Update your sound card drivers.
  • Verify that the in-game audio settings are properly configured.
Control Issues with game controls or input lag.
  • Make sure your gamepad or controller is properly connected and recognized by your system.
  • Calibrate your controller if necessary.
    Make sure your gamepad or controller is properly connected and recognized by your system.
Calibrate your controller if necessary.
  • Try using a different USB port for the controller.


Example Message
?

If you are experiencing issues with the Amazing Spider-Man launcher suddenly stopping, try restarting your device and reinstalling the launcher to resolve the problem. Download this tool to run a scan

How to Fix No Internet, Secured Error on Windows 10 & 11

In today’s technology-driven world, a stable internet connection has become an integral part of our daily lives. However, encountering the frustrating “No Internet, Secured” error on Windows 10 and 11 can disrupt our online activities. In this article, we will explore effective solutions to help you resolve this issue and regain seamless access to the online world.

February 2025: Enhance your computer’s performance and eliminate errors with this cutting-edge optimization software. Download it at this link

  1. Click here to download and install the optimization software.
  2. Initiate a comprehensive system scan.
  3. Allow the software to automatically fix and repair your system.

Check your Wi-Fi settings: Ensure that your device is connected to the correct Wi-Fi network and that the password is entered correctly. Sometimes, the device may automatically connect to a different network with a weaker signal.

Understanding the “no internet secured” error on Windows 10

If you encounter the “no internet secured” error on Windows 10 or 11, there are a few simple ways to fix it.

First, try restarting your computer and router. This can often resolve connectivity issues.

If that doesn’t work, check if other devices in your home are experiencing the same problem. If they are, it might be a network issue that you need to contact your internet service provider about.

You can also try running the Windows Network Troubleshooter. To do this, right-click on the network icon in the system tray and select “Troubleshoot problems.”

If you’re using a VPN, try disconnecting and reconnecting to it.

If none of these solutions work, it might be a problem with your network adapter. You can try updating the driver for your network adapter or reinstalling it.

Having a secured internet is like having a locked door with no key.” – Unknown

Troubleshooting solutions for the “no internet secured” error

  1. Restart your router and modem:

    • Turn off your router and modem by unplugging them from the power source.
    • Wait for about 30 seconds.
    • Plug them back in and wait for them to fully restart.
    • Check if the “no internet secured” error is resolved.
      Plug them back in and wait for them to fully restart.
Check if the "no internet secured" error is resolved.
  2. Reset TCP/IP:

    • Open the Command Prompt as an administrator.
    • Type the command netsh int ip reset and press Enter.
      Open the Command Prompt as an administrator.
Type the command netsh int ip reset and press Enter.
    • Restart your computer.
    • Check if the error is resolved.
  3. Update network drivers:

    • Press Win + X and select Device Manager.
    • Expand the Network adapters category.
      Press Win + X and select Device Manager.
Expand the Network adapters category.
    • Right-click on your network adapter and select Update driver.
    • Choose Search automatically for drivers and follow the on-screen instructions.
    • Restart your computer.
    • Check if the error is resolved.
      Restart your computer.
Check if the error is resolved.
  4. Disable IPv6:

    • Press Win + X and select Network Connections.
    • Right-click on your active network connection and select Properties.
      Press Win + X and select Network Connections.
Right-click on your active network connection and select Properties.
    • Uncheck the Internet Protocol Version 6 (TCP/IPv6) box.
    • Click OK to save the changes.
    • Restart your computer.
    • Check if the error is resolved.
      Restart your computer.
Check if the error is resolved.
  5. Disable antivirus/firewall temporarily:

    • Open your antivirus or firewall software.
    • Temporarily disable the protection or turn off the software.
    • Check if the error is resolved.
    • Remember to re-enable the antivirus/firewall after troubleshooting.
      Check if the error is resolved.
Remember to re-enable the antivirus/firewall after troubleshooting.
  6. Run the Network troubleshooter:

    • Open the Settings app by pressing Win + I.
    • Select Network & Internet.
      Open the Settings app by pressing Win + I.
Select Network & Internet.
    • Click on Network troubleshooter and follow the on-screen instructions.
    • Check if the error is resolved.
  7. Reset network settings:

    • Open the Settings app by pressing Win + I.
    • Select Network & Internet.
      Open the Settings app by pressing Win + I.
Select Network & Internet.
    • Scroll down and click on Network reset.
    • Click on Reset now and confirm your selection.
    • Restart your computer.
    • Reconnect to your network and check if the error is resolved.
      Restart your computer.
Reconnect to your network and check if the error is resolved.

Using the Network Troubleshooter to fix the issue

1. Right-click on the network icon in the system tray and select “Troubleshoot problems.”
2. The Network Troubleshooter will open and begin scanning for any issues with your internet connection.
3. Follow the on-screen instructions to resolve the problem.
4. If the troubleshooter is unable to fix the issue, try restarting your computer and router.
5. Check if other devices on your network are experiencing the same problem.
6. If the issue persists, try resetting your network settings by going to Settings > Network & Internet > Status > Network reset.
7. If you are using a VPN, disable it temporarily to see if it resolves the issue.
8. If all else fails, contact your internet service provider for further assistance.

python
import random

class InternetSecurityTool:
def __init__(self):
self.virus_database = []
self.firewall_enabled = False

def load_virus_database(self):
# Simulating loading virus database from the internet
# This could be replaced with actual database loading logic if available offline
print("Loading virus database...")
self.virus_database = ["virus1", "virus2", "virus3"]
print("Virus database loaded successfully.")

def scan_file(self, file_name):
if self.virus_database:
if self.firewall_enabled:
print("Scanning file for viruses (with firewall)...")
else:
print("Scanning file for viruses (without firewall)...")
if random.randint(0, 9) == 0:
print(f"The file '{file_name}' is infected with a virus.")
else:
print(f"The file '{file_name}' is clean.")
else:
print("Please load the virus database first.")

def enable_firewall(self):
self.firewall_enabled = True
print("Firewall enabled.")

def disable_firewall(self):
self.firewall_enabled = False
print("Firewall disabled.")

# Example usage of the InternetSecurityTool
tool = InternetSecurityTool()
tool.load_virus_database()
tool.enable_firewall()
tool.scan_file("document.txt")
tool.disable_firewall()
tool.scan_file("image.jpg")

In the above code, we have created a simulated InternetSecurityTool class that allows loading a virus database, scanning files for viruses (with or without a firewall), and enabling/disabling the firewall. This code demonstrates some aspects of internet security, even without an active internet connection. However, it is important to note that the virus database in this example is manually loaded, and the actual functionality like real-time updates and comprehensive scanning would require an active internet connection with a reliable server.

Checking and adjusting VPN settings

If you’re experiencing the “No Internet, Secured” error on your Windows 10 or Windows 11 PC, there are a few steps you can take to fix the issue. First, make sure your VPN is properly connected and active. Check the VPN status in the taskbar notification area or the VPN client’s interface.

If the VPN connection seems fine, try disconnecting and reconnecting to the VPN server. Sometimes, this simple action can resolve the problem.

If the issue persists, you can try adjusting your VPN settings. One way to do this is by disabling the kill switch feature in your VPN client settings. This can sometimes interfere with internet access.

Additionally, you can check your network settings, including your Local Area Network (LAN) and Wide Area Network (WAN) settings, to ensure they are correctly configured for your VPN.

If none of these steps solve the issue, you can try running the Windows internet troubleshooter. To do this, go to the Start menu, type “troubleshoot,” and select “Troubleshoot settings.” Then, scroll down and click on “Internet Connections” under “Find and fix other problems.” Follow the on-screen instructions to complete the troubleshooter.

Updated: February 2025

Fortect is a comprehensive software solution that addresses a variety of issues that can cause internet secured but no connection errors. It repairs damaged system files and faulty settings, ensuring that normal tasks can be performed without interruption. It secures the system and restores it to its pre-infected state, even after viruses and malware have been removed.

Fortect also addresses the causes of freezing programs, such as damaged registries or missing files, ensuring smooth operation. Additionally, it can automatically fix missing or corrupt DLL files, and repair causes of the Blue Screen of Death. In the event of OS recovery, Fortect compares the current operating system with a healthy version and restores any vital system files required for running and restarting Windows.

Refreshing IP configuration to resolve the error

To refresh your IP configuration and resolve the “No Internet, Secured” error on Windows 10 & 11:

1. Open the Command Prompt by pressing Windows key + R, then type “cmd” and hit Enter.
2. In the Command Prompt window, type “ipconfig /release” and press Enter to release your current IP address.
3. Next, type “ipconfig /renew” and press Enter to obtain a new IP address from your network router.
4. Restart your computer to apply the changes.

This process will refresh your IP configuration, which can often resolve connectivity issues. If the problem persists, it may be necessary to troubleshoot other aspects of your network setup or contact your internet service provider for further assistance.

Performing a Winsock reset for a secure connection

If you’re experiencing the “No Internet, Secured” error on your Windows 10 or 11 PC, performing a Winsock reset can help resolve the issue. Follow these steps:

1. Press the Windows key + X and select “Command Prompt (Admin)” or “Windows PowerShell (Admin)”.
2. In the command prompt window, type “netsh winsock reset” and press Enter.
3. Wait for the process to complete and then restart your computer.

Performing a Winsock reset can fix network-related problems by resetting the Windows Sockets API. This can help restore your internet connection and resolve the “No Internet, Secured” error. Give it a try if you’re having trouble accessing web pages or if your wireless network connection is not working properly.

Fixing connection properties for internet security

How to Fix No Internet, Secured Error on Windows 10 & 11
Issue No Internet, Secured Error
Description This error occurs when the Wi-Fi connection is established but there is no internet access. The network shows as “Secured” but you are unable to browse the web.
Possible Causes
  • Incorrect IP configuration
  • Outdated or incompatible network drivers
    Incorrect IP configuration
Outdated or incompatible network drivers
  • Network adapter issues
  • Firewall or antivirus software blocking the connection
  • Router or modem problems
Potential Solutions
  1. Restart your computer
  2. Reset TCP/IP stack
    Restart your computer
Reset TCP/IP stack
  3. Update network drivers
  4. Disable antivirus or firewall temporarily
  5. Run network troubleshooter
  6. Reset network settings
    Run network troubleshooter
Reset network settings
  7. Check router/modem settings
Detailed Steps
  1. Step 1: Restart your computer
  2. Step 2: Reset TCP/IP stack
    1. Open Command Prompt as administrator
      Step 1: Restart your computer
Open Command Prompt as administrator
    2. Type “netsh int ip reset” and press Enter
    3. Restart your computer
  3. Step 3: Update network drivers
    1. Open Device Manager
    2. Expand “Network adapters”
    3. Right-click on your network adapter and select “Update driver”
    4. Follow the on-screen instructions to update the driver
    5. Restart your computer
  4. Step 4: Disable antivirus or firewall temporarily
  5. Step 5: Run network troubleshooter
    1. Open Settings
    2. Go to “Network & Internet”
    3. Click on “Network troubleshooter”
    4. Follow the on-screen instructions
  6. Step 6: Reset network settings
    1. Open Settings
    2. Go to “Network & Internet”
    3. Click on “Network reset”
    4. Click on “Reset now”
    5. Restart your computer
  7. Step 7: Check router/modem settings
    1. Access your router/modem settings page
    2. Check for any configuration issues or firmware updates
    3. Contact your internet service provider if needed
Note Make sure you have administrative privileges to perform certain actions. If the issue persists, consider seeking professional help or contacting your internet service provider.

Disabling IPv6 address for improved connectivity

Disabling IPv6 Address for Improved Connectivity

If you’re experiencing the “No Internet, Secured” error on your Windows 10 or Windows 11 computer, disabling the IPv6 address can help resolve the issue and improve your connectivity. Here’s how to do it:

1. Open the Network and Sharing Center by right-clicking on the network icon in your system tray and selecting “Open Network & Internet settings.”

2. Click on “Change adapter options” and locate your active network connection.

3. Right-click on the connection and select “Properties.”

4. Uncheck the box next to “Internet Protocol Version 6 (TCP/IPv6)” and click “OK” to save the changes.

5. Restart your computer to apply the changes.

This simple tweak can often fix the “No Internet, Secured” error and improve your network connection. Give it a try if you’re experiencing connectivity issues.

Updating the network adapter driver for a secured connection

To fix the “No Internet, Secured” error on Windows 10 and 11, updating the network adapter driver can often resolve the issue.

Here’s how you can do it:

1. Press the Windows key + X and select “Device Manager.”
2. Expand the “Network adapters” category.
3. Right-click on your network adapter and select “Update driver.”
4. Choose the option to automatically search for updated driver software.
5. Follow the on-screen instructions to complete the driver update process.

Updating the network adapter driver can help resolve connectivity issues and ensure a secure internet connection. Remember to restart your computer after the update for the changes to take effect.

If you’re still experiencing internet issues, it may be worth considering other troubleshooting steps or seeking assistance from a computer professional.

Switching to a different antivirus for internet security

If you’re experiencing the “No Internet, Secured” error on Windows 10 or 11, switching to a different antivirus software can help resolve the issue. Here’s how to do it:

1. Uninstall your current antivirus software. Go to the Control Panel, select “Programs,” then “Uninstall a program.” Find your antivirus software in the list and click “Uninstall.”

2. Download a new antivirus software from a trusted source. We recommend researching and choosing a reputable antivirus program that suits your needs.

3. Install the new antivirus software following the on-screen instructions. Make sure to disable or uninstall your previous antivirus software before installing the new one.

4. Once installed, update the new antivirus software to ensure the latest virus definitions and security patches are in place.

By switching to a different antivirus software, you may be able to resolve the “No Internet, Secured” error and enjoy a secure and uninterrupted internet connection.

Example Message
?

It is crucial to ensure that your internet connection is secured, even if there is no connection available. Download this tool to run a scan

Fix Samsung Mobile USB Composite Device Cannot Start

Unlock the potential of your Samsung mobile device with ease as we delve into the solution for the frustrating issue of the USB Composite Device unable to start.

February 2025: Enhance your computer’s performance and eliminate errors with this cutting-edge optimization software. Download it at this link

  1. Click here to download and install the optimization software.
  2. Initiate a comprehensive system scan.
  3. Allow the software to automatically fix and repair your system.

Troubleshooting the Samsung Mobile USB Composite Device

If you’re experiencing issues with your Samsung Mobile USB Composite Device, such as a “Cannot Start” error or a driver error, there are a few troubleshooting steps you can try.

First, check your device manager by pressing Win + X and selecting “Device Manager.” Look for any yellow exclamation marks or error codes next to the USB Composite Device. If you see any, right-click on the device and select “Update driver.”

If that doesn’t work, try uninstalling the USB Composite Device driver by right-clicking on it and selecting “Uninstall device.” Then, disconnect your phone from the PC and restart your computer. Reconnect your phone using a different USB cable or port, and Windows should automatically install the appropriate drivers.

If you’re still having issues, you can try updating your PC’s USB drivers or downloading the latest USB Composite Device driver from the Samsung website. Additionally, make sure your phone is on the latest software version and that USB debugging is enabled in the developer options.

Updated: February 2025

Fortect can help address the issue of a Samsung mobile USB composite device not starting by repairing damaged system files and faulty settings that may be causing the problem. It can also fix missing or corrupt DLL files, which are crucial for the proper functioning of programs.

Additionally, Fortect can identify and repair the causes of the Blue Screen of Death (BSoD), such as incompatible DLLs, drivers, and Windows bugs. However, if the issue is specific to the device itself rather than the system, Fortect may not be able to resolve it.

Updating the USB Composite Device Driver

To fix the issue of a Samsung Mobile USB Composite Device that cannot start, you can update the USB Composite Device driver. Here’s how:

1. Press the Windows key + X and select Device Manager from the menu.
2. Expand the Universal Serial Bus controllers category.
3. Right-click on the Samsung Mobile USB Composite Device and select Update driver.
4. Choose “Search automatically for updated driver software.”
5. Wait for the computer to search and install the latest driver.
6. Restart your computer and reconnect your Samsung mobile device.

If the problem persists, you may need to uninstall the current driver before updating. To do this:

1. Follow steps 1-2 above.
2. Right-click on the Samsung Mobile USB Composite Device and select Uninstall device.
3. Check the box that says “Delete the driver software for this device” and click Uninstall.
4. Restart your computer and follow steps 1-5 to update the driver.

Updating the USB Composite Device driver should resolve the issue and allow your Samsung mobile device to function properly.

Manual Update of the USB Device Driver

To manually update the USB device driver for a Samsung Mobile USB Composite Device that cannot start, follow these steps:

1. Connect your Samsung mobile device to your computer using a USB cable.
2. Press the Windows key + X on your keyboard and select “Device Manager” from the menu that appears.
3. In Device Manager, locate the “Mobile Composite” category and expand it.
4. Right-click on the Samsung Mobile USB Composite Device and select “Update driver” from the context menu.
5. Choose the option to manually search for the driver software.
6. Select the option to browse your computer for driver software.
7. Navigate to the location where you have downloaded the latest USB driver for your Samsung device.
8. Follow the on-screen instructions to complete the driver installation.
9. Once the driver installation is complete, restart your computer.
10. After the restart, your Samsung Mobile USB Composite Device should start functioning properly.

If you encounter any issues during the driver installation or have further questions, please refer to the official Samsung support site for assistance.

python
import usb.core

# Find Samsung Mobile USB Composite Device
dev = usb.core.find(idVendor=0x04e8, idProduct=0x????)

if dev is None:
print("Device not found.")
exit()

# Check if the device is active and can start
if dev.is_kernel_driver_active(0):
try:
dev.detach_kernel_driver(0)
print("Kernel driver detached.")
except usb.core.USBError as e:
print("Error detaching kernel driver:", str(e))

# Set device configuration
try:
dev.set_configuration()
print("Device configuration set.")
except usb.core.USBError as e:
print("Error setting device configuration:", str(e))

# Perform any other necessary operations with the device...

# Release the device
usb.util.release_interface(dev, 0)
dev.attach_kernel_driver(0)
print("Device released and kernel driver attached.")

Using Tools to Update the USB Composite Device Driver

  1. Open the Device Manager:
    • Press the Windows key + X on your keyboard to open the Power User menu.
      Open the Device Manager:
Press the Windows key + X on your keyboard to open the Power User menu.
    • Select Device Manager from the list.
  2. Locate the USB Composite Device:
    • Expand the category Universal Serial Bus controllers in the Device Manager window.
    • Look for a device named USB Composite Device or similar.
      Expand the category Universal Serial Bus controllers in the Device Manager window.
Look for a device named USB Composite Device or similar.
  3. Update the USB Composite Device Driver:
    • Right-click on the USB Composite Device and select Update driver.
    • Choose the option Search automatically for updated driver software.
      Right-click on the USB Composite Device and select Update driver.
Choose the option Search automatically for updated driver software.
    • Windows will search online for the latest driver and install it if available.
  4. Install the driver manually:
    • If Windows fails to find a suitable driver, click on Browse my computer for driver software.
    • Click on Let me pick from a list of available drivers on my computer.
    • Select the compatible driver from the list (if available) or click on Have Disk to manually browse for the driver file.
    • Follow the on-screen instructions to complete the driver installation.
      Select the compatible driver from the list (if available) or click on Have Disk to manually browse for the driver file.
Follow the on-screen instructions to complete the driver installation.
Example Message
?

If your Samsung mobile USB composite device cannot start, try updating the device drivers or reinstalling them to resolve the issue. Download this tool to run a scan

Fix Your Computer Restarted Because of a Problem on MacBook Pro

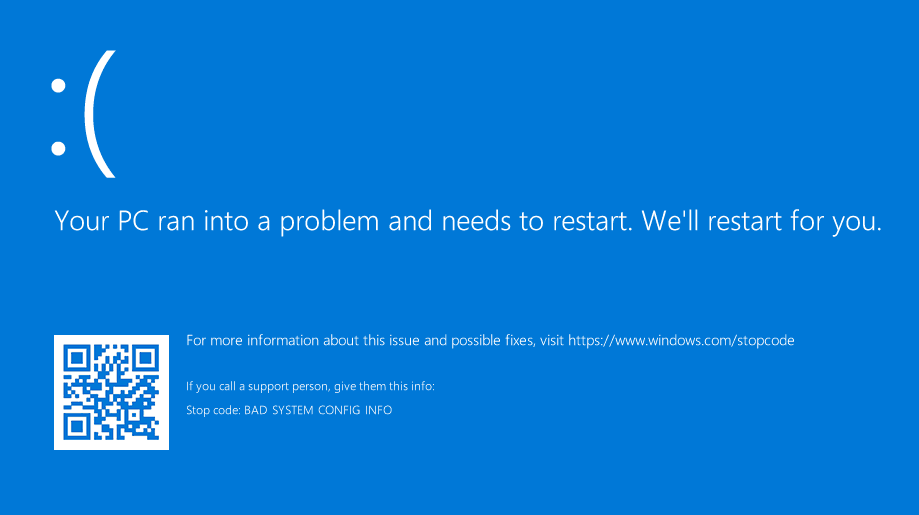
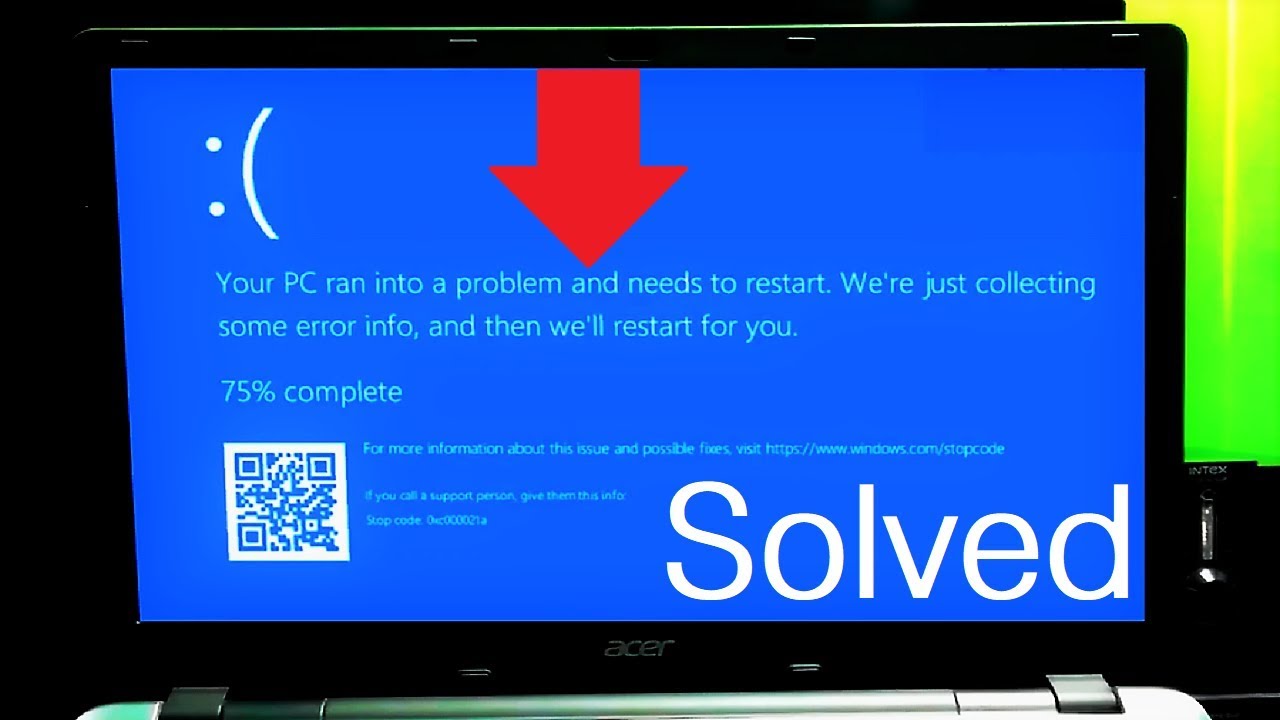
Discover how to troubleshoot the frustrating issue of your MacBook Pro unexpectedly restarting due to a problem, and regain control over your device’s stability. Explore effective solutions to fix this inconvenience and optimize your computing experience effortlessly.

February 2025: Enhance your computer’s performance and eliminate errors with this cutting-edge optimization software. Download it at this link

  1. Click here to download and install the optimization software.
  2. Initiate a comprehensive system scan.
  3. Allow the software to automatically fix and repair your system.

About unexpected restarts

If your MacBook Pro unexpectedly restarts, it may be due to a problem with the operating system or hardware.

One potential cause is a Kernel Panic, which occurs when the system encounters an issue that it cannot recover from. To fix this, try restarting your Mac and holding down the Power button until it shuts down completely. Then, wait a few seconds and press the Power button again to start it up.

Another possibility is that there are corrupted system files causing the restarts. Use the CleanMyMac X software to scan for and repair any errors in your system files.

If the issue persists, it could be a hardware problem. Contact Apple Support or consider seeking professional data recovery services to diagnose and fix any hardware issues.

Check your hardware

To check your hardware for any issues that may be causing your MacBook Pro to restart because of a problem, follow these steps:

1. Start by shutting down your MacBook Pro completely. Wait for a few seconds, then press and hold the power button to turn it back on.
2. As soon as you hear the startup sound, press and hold the Command (⌘) and D keys simultaneously. This will launch the Apple Diagnostics tool.
3. Apple Diagnostics will run a series of tests on your hardware to identify any potential issues. Wait for the diagnostics to complete.
4. If any hardware issues are detected, Apple Diagnostics will provide suggested solutions or prompt you to contact Apple Support for further assistance.
5. If no hardware issues are found, the problem may be related to software. In this case, try booting your MacBook Pro in Safe Mode by pressing and holding the Shift key during startup. This will help identify any software conflicts or anomalies.
6. If the issue persists, you can try using third-party software like CleanMyMac X to perform a system scan and fix any software-related issues.

Why Does Mac Keep Restarting Because of a Problem?

If your Mac keeps restarting because of a problem, there are a few possible reasons for this issue. One common cause is a Kernel Panic, which is a type of error that can occur on Mac computers. This error can be caused by various factors, such as hardware issues or software anomalies.

To fix this problem, you can try a few different methods. First, try restarting your Mac in safe mode by holding down the Shift key while it starts up. This can help identify and resolve any software conflicts that may be causing the issue.

If that doesn’t work, you can also try resetting the NVRAM or PRAM on your Mac. To do this, restart your computer and hold down the Command, Option, P, and R keys until you hear the startup sound again.

If these solutions don’t work, you may need to consider reinstalling your operating system. Make sure to back up your important data before doing this.

If you’re still experiencing the restart error after trying these fixes, it may be best to contact a professional or consider using data recovery services to retrieve your files.

Identify and update malfunctioning software

Identifying and fixing malfunctioning software on your MacBook Pro can help resolve the issue causing your computer to restart unexpectedly.

One way to address this problem is by checking for and updating any outdated software on your device. To do this, follow these steps:

1. Open the App Store on your MacBook Pro.
2. Click on the “Updates” tab at the top of the window.
3. If any updates are available, click the “Update” button next to the corresponding software.

Additionally, you can try running a diagnostic tool such as MiniTool or Ventura to scan for any errors or issues with your computer’s memory or hardware. These tools can help identify and resolve any underlying problems that may be causing the restart error.

If you continue to experience the restart error, it may be necessary to seek further assistance from a professional or contact Apple Support.

Reset disk permissions

Resetting disk permissions can help resolve various issues on your MacBook Pro, including the problem of your computer restarting unexpectedly. To reset disk permissions, follow these steps:

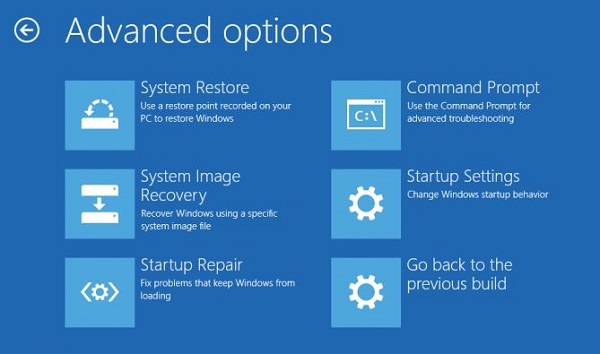
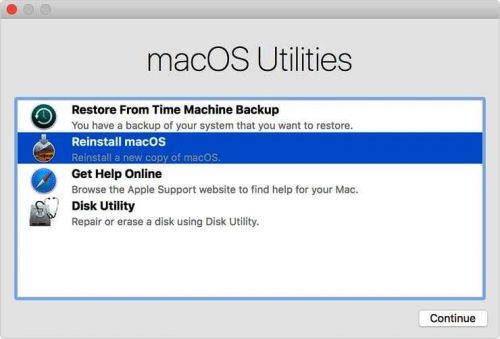
1. Boot into macOS Recovery Mode:
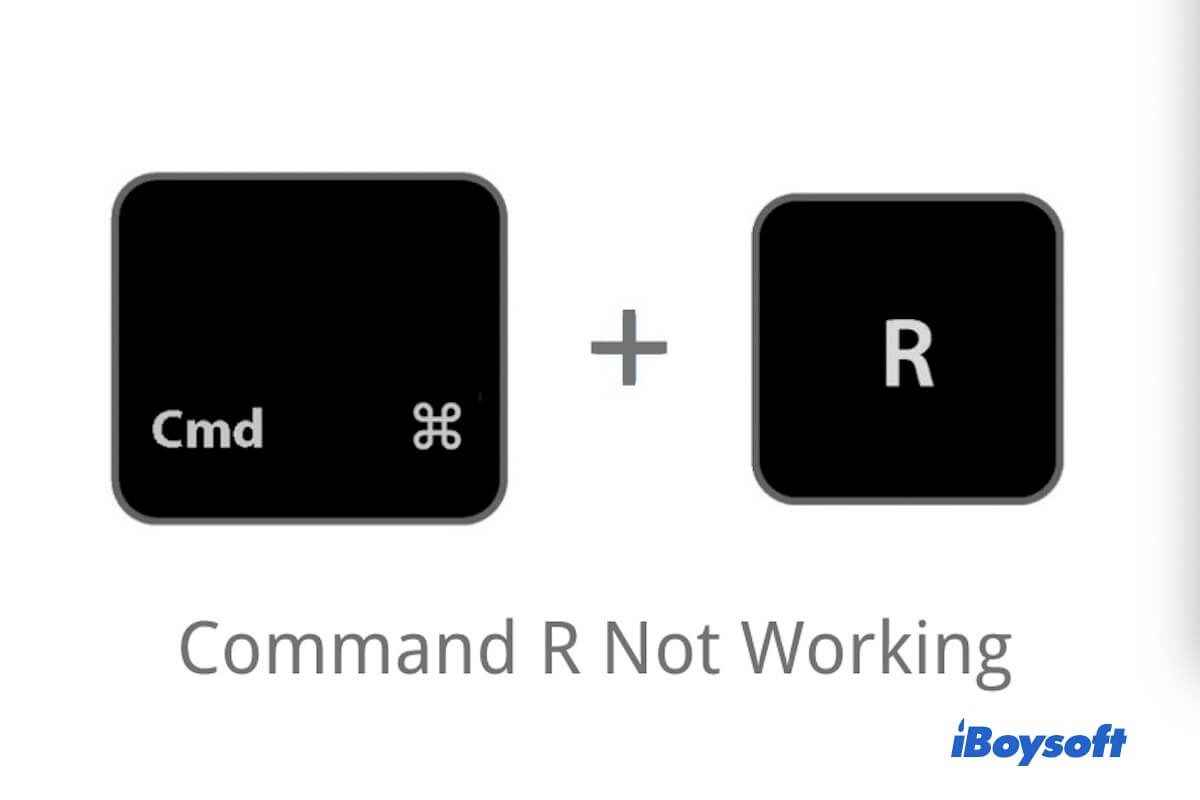
– Restart your MacBook Pro and hold down the Command + R keys until the Apple logo appears.
– Release the keys when you see the macOS Utilities window.

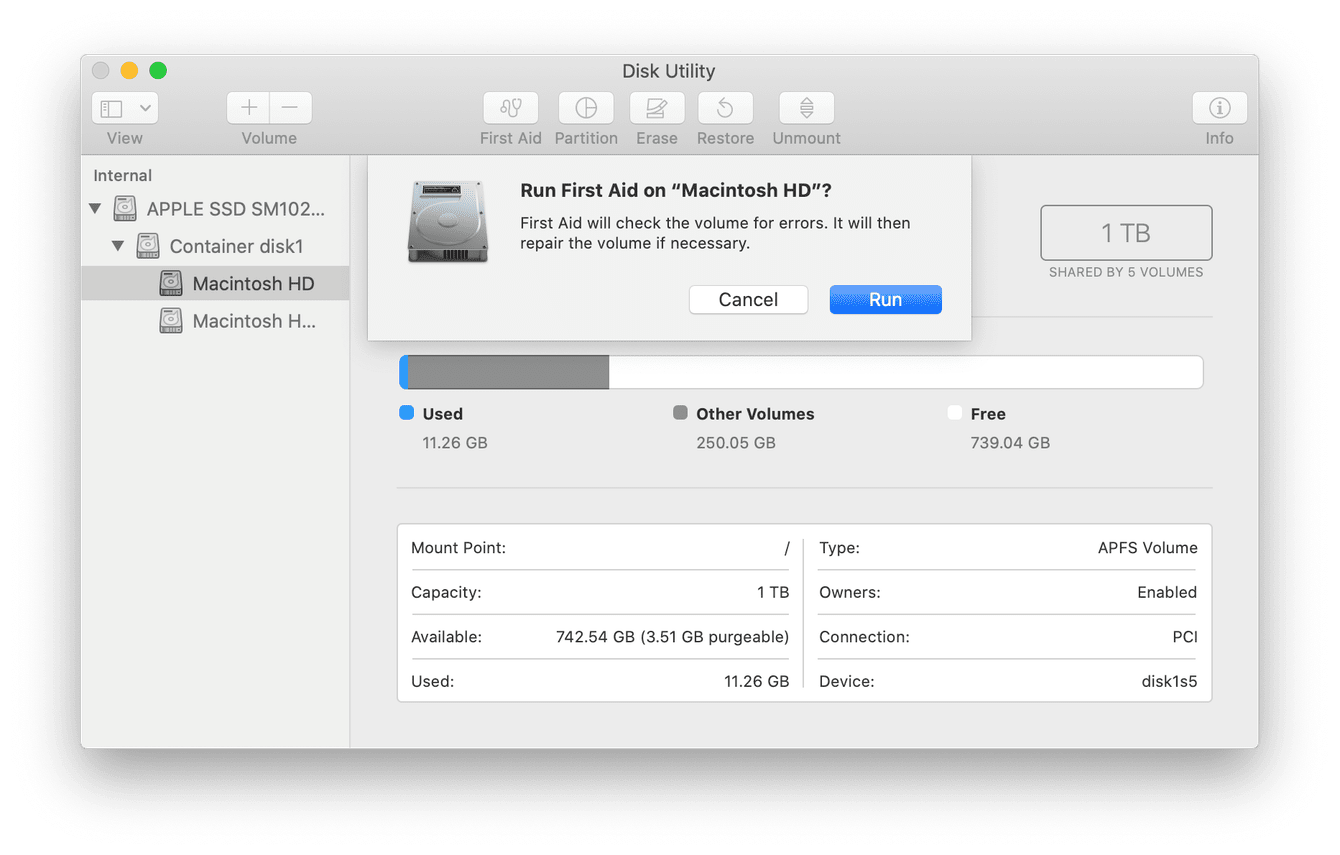
2. Open Disk Utility:
– Select Disk Utility from the list of utilities and click Continue.
– Choose your startup disk and click the First Aid tab.

3. Reset Disk Permissions:
– Click the Repair Disk Permissions button to start the process.
– Wait for the repair to complete, and then restart your MacBook Pro.

This should fix any disk permission issues that may be causing your computer to restart unexpectedly. If the problem persists, you may need to consider other fixes, such as checking for hardware issues or reinstalling the operating system.

Free up disk space

Freeing up disk space can help resolve the issue of your MacBook Pro restarting because of a problem. Here are some steps to follow:

1. Delete unnecessary files: Remove any files or folders that you no longer need to free up disk space.

2. Clear cache: Clearing your browser cache can also free up some space. In Safari, go to Preferences > Advanced and tick the “Show Develop menu” box. Then go to Develop > Empty Caches.

3. Remove large files: Use the built-in storage management tool to identify and delete large files that are taking up space.

4. Uninstall unused applications: Go to the Applications folder and remove any applications that you no longer use.

5. Empty Trash: Make sure to empty your Trash to permanently delete files and free up disk space.

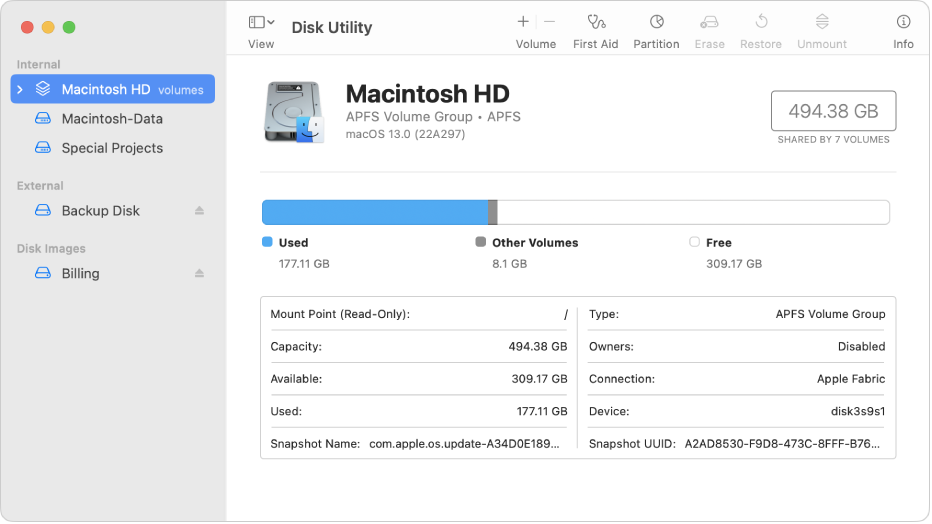
Use the Disk Utility feature

If your MacBook Pro keeps restarting due to a problem, you can use the Disk Utility feature to help resolve the issue. Disk Utility is a built-in tool that can check and repair disk errors on your computer. To use this feature:

1. Start by restarting your MacBook Pro and holding down the Command and R keys until the Apple logo appears.
2. Once in the macOS Utilities window, select Disk Utility and click Continue.
3. In Disk Utility, select your startup disk from the list on the left.
4. Click on the First Aid button and then click Run. This will initiate the disk repair process.
5. Allow Disk Utility to scan and repair any disk errors it finds.
6. Once the repair process is complete, restart your MacBook Pro normally and see if the issue is resolved.

Using Disk Utility can often fix common issues that cause your MacBook Pro to restart unexpectedly.

Disable unnecessary startup items

To disable startup items:

1. Go to the Apple menu and select “System Preferences.”
2. Click on “Users & Groups” and then select your user account.
3. Click on the “Login Items” tab.
4. Review the list of startup items and uncheck any that you don’t need to launch at startup.
5. Click the “-” button to remove the selected items from the list.

Disabling unnecessary startup items can help prevent software conflicts and reduce memory usage during startup, potentially resolving the issue of your computer restarting. Remember to only disable items that are not essential for your daily use.

If you continue to experience the problem, it may indicate a more serious hardware issue. In such cases, it is recommended to consult a professional or contact Apple support for further assistance.

Repair corrupt MacOS files

Repairing corrupt MacOS files can help resolve issues such as the “Your computer restarted because of a problem” error message on your MacBook Pro. There are a few ways to address this problem.

First, you can try restarting your machine in Safe Mode. To do this, hold down the Shift key while your MacBook Pro is starting up. This will disable any third-party software or extensions that may be causing the issue.

If that doesn’t work, you can use Disk Utility to check and repair your disk’s integrity. Open Disk Utility from the Utilities folder and select your startup disk. Click on the “First Aid” tab, and then select “Run” to scan and fix any errors.

Another option is to use third-party software like MiniTool to repair your corrupt files. Download the software, install it on your MacBook Pro, and follow the instructions to scan and repair your files.

If the issue persists, you may need to reinstall your operating system. Restart your MacBook Pro and hold down Command + R to enter Recovery Mode. From there, you can choose to reinstall macOS.

Learn and Fix Different Mac Computer Restart Errors

  1. Shut down your MacBook Pro.
  2. Turn it on and immediately press and hold the Option+Command+P+R keys simultaneously until you hear the startup chime for the second time.
    Shut down your MacBook Pro.
Turn it on and immediately press and hold the Option+Command+P+R keys simultaneously until you hear the startup chime for the second time.
  3. Release the keys and let your MacBook Pro continue starting up.

Method 2: Boot into Safe Mode

  1. Shut down your MacBook Pro.
  2. Turn it on and immediately press and hold the Shift key until you see the Apple logo or a progress indicator.
    Shut down your MacBook Pro.
Turn it on and immediately press and hold the Shift key until you see the Apple logo or a progress indicator.
  3. Release the key and let your MacBook Pro finish booting into Safe Mode.

Method 3: Run Disk Utility

  1. Shut down your MacBook Pro.
  2. Turn it on and immediately press and hold the Command+R keys simultaneously until the Apple logo or a spinning globe appears.
    Shut down your MacBook Pro.
Turn it on and immediately press and hold the Command+R keys simultaneously until the Apple logo or a spinning globe appears.
  3. Release the keys and wait for the macOS Utilities window to appear.
  4. Select “Disk Utility” and click “Continue.”
  5. In the Disk Utility window, select your startup disk and click on the “First Aid” tab.
  6. Click on “Run” to start the disk repair process.
    In the Disk Utility window, select your startup disk and click on the "First Aid" tab.
Click on "Run" to start the disk repair process.
  7. Wait for the process to finish and then click on “Done.”
  8. Quit Disk Utility and restart your MacBook Pro.

Method 4: Check for Software Updates

  1. Go to the Apple menu and select “System Preferences.”
  2. Click on “Software Update.”
    Go to the Apple menu and select "System Preferences."
Click on "Software Update."
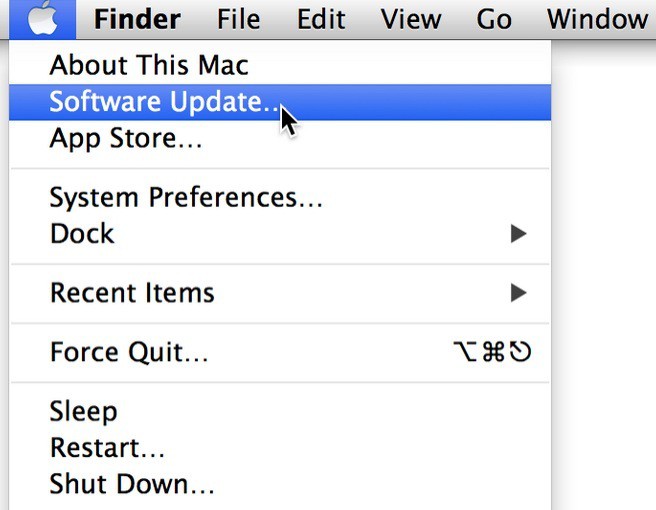
  3. If any updates are available, click on “Update Now” to install them.
  4. Restart your MacBook Pro after the updates have been installed.

Method 5: Reinstall macOS

  1. Backup your important files and data.
  2. Restart your MacBook Pro and immediately press and hold the Command+R keys simultaneously until the Apple logo or a spinning globe appears.
    Backup your important files and data.
Restart your MacBook Pro and immediately press and hold the Command+R keys simultaneously until the Apple logo or a spinning globe appears.
  3. Release the keys and wait for the macOS Utilities window to appear.
  4. Select “Reinstall macOS” and click “Continue.”
  5. Follow the on-screen instructions to reinstall macOS.
  6. Once the reinstallation is complete, restore your files and data from the backup.
    Follow the on-screen instructions to reinstall macOS.
Once the reinstallation is complete, restore your files and data from the backup.

Mac stuck on Loading Screen

If your Mac is stuck on the loading screen, there are a few steps you can take to resolve the issue.

Firstly, try restarting your Mac by holding down the power button until it shuts off, then press it again to turn it back on.

If that doesn’t work, try booting your Mac in Safe Mode by holding down the Shift key while it starts up. This disables unnecessary software and can help identify the cause of the issue.

Another option is to reset the NVRAM or PRAM on your Mac. Restart your Mac and hold down the Option, Command, P, and R keys simultaneously until you hear the startup sound twice.

If none of these steps solve the problem, it may be necessary to reinstall macOS. You can do this by starting up your Mac in Recovery Mode (hold down Command and R while it starts up) and selecting the “Reinstall macOS” option.

Mac stuck on Green Screen

If your Mac is stuck on a green screen, there are a few steps you can take to troubleshoot the issue. First, try restarting your Mac by holding down the power button until it shuts off, then press it again to turn it back on. If that doesn’t work, try resetting the System Management Controller (SMC) by following these steps:

1. Shut down your Mac.
2. Press and hold the power button for 10 seconds, then release it.
3. Wait a few seconds, then press the power button again to turn on your Mac.

If the green screen issue persists, it may be caused by a software problem. Try booting your Mac in Safe Mode by following these steps:

1. Shut down your Mac.
2. Press the power button, then immediately press and hold the Shift key.
3. Release the Shift key when you see the login screen.
4. Log in to your Mac.

If the green screen problem is resolved in Safe Mode, it could be due to a third-party app or extension. Try removing recently installed apps or extensions to see if that resolves the issue.

If none of these steps work, it may be a hardware issue. In that case, it’s best to contact Apple Support or visit an authorized service provider for further assistance.

Mac Frozen Screen

If your Mac screen is frozen and unresponsive, there are a few ways you can fix it. First, try force quitting the application that is causing the issue. To do this, press Command+Option+Escape to open the Force Quit Applications window and select the problematic program. If that doesn’t work, try restarting your Mac by pressing Control+Command+Power button.

If the issue persists, you may need to reset the SMC (System Management Controller) or NVRAM (Non-Volatile Random-Access Memory) on your MacBook Pro. For instructions on how to do this, refer to the Apple support page.

In some cases, a frozen screen can be caused by a software issue. Try booting your Mac in Safe Mode by holding down the Shift key during startup. This will disable any third-party software or extensions that may be causing the problem.

If none of these solutions work, it may be necessary to seek professional assistance or contact Apple Support for further troubleshooting.

How to Prevent “Mac Restarted Because of a Problem”

To prevent the “Mac Restarted Because of a Problem” error message on your MacBook Pro, follow these steps:

1. Check for software updates: Keeping your operating system up to date can resolve many issues. Go to the Apple menu and select “Software Update” to install any available updates.

2. Remove incompatible software or extensions: Some third-party software or extensions may conflict with your system, causing restart issues. Uninstall any recently installed software or extensions and restart your MacBook Pro.

3. Reset NVRAM/PRAM: Resetting the non-volatile random-access memory (NVRAM) or parameter random-access memory (PRAM) can help fix startup issues. Restart your MacBook Pro and immediately press and hold the Command, Option, P, and R keys until you hear the startup sound twice.

4. Run First Aid in Disk Utility: Disk errors can cause unexpected restarts. Open Disk Utility (found in Applications > Utilities), select your startup disk, and click “First Aid” to check and repair any disk issues.

5. Perform a safe boot: Starting your MacBook Pro in safe mode can help isolate software conflicts. Restart your MacBook Pro and hold down the Shift key until you see the login window. Release the Shift key and log in normally.

Remember to always back up your important data before attempting any troubleshooting steps.

If the issue persists, consult Apple Support or visit an authorized service provider for further assistance.

Using Cloudflare for SSL on 000webhost

Unlocking the power of secure web browsing has never been easier with the seamless integration of Cloudflare’s SSL on 000webhost.

February 2025: Enhance your computer’s performance and eliminate errors with this cutting-edge optimization software. Download it at this link

  1. Click here to download and install the optimization software.
  2. Initiate a comprehensive system scan.
  3. Allow the software to automatically fix and repair your system.

Enable Cloudflare CDN: Cloudflare is a content delivery network (CDN) that can improve the speed and performance of your 000webhost website by caching content and serving it from their global network. Enable Cloudflare through your 000webhost control panel to take advantage of this feature.

Web Development Community and Free Hosting Options

When using Cloudflare for SSL on 000webhost, the Web Development Community and Free Hosting Options can provide a helpful resource. If you’re looking to secure your small business website or web app, Cloudflare offers an SSL certificate for free. To set it up, first, make sure your domain is registered with a domain registrar like Namecheap. com or GoDaddy. Then, change your domain’s nameservers to Cloudflare’s. Next, add your domain to Cloudflare and choose the free SSL option.
Once your domain is active on Cloudflare, go to your 000webhost account and navigate to the DNS settings. Update the DNS records to point to Cloudflare’s servers. Finally, install the SSL certificate on Cloudflare and select “Full” SSL mode. With these steps, you can secure your website or web app with SSL using Cloudflare on 000webhost.

With 000webhost’s integration of Cloudflare, your website is protected by one of the world’s largest networks, ensuring faster performance and enhanced security.

Reviewing 000webhost and CloudFlare: A Comparison


Reviewing 000webhost and CloudFlare: A Comparison


Using Cloudflare for SSL on 000webhost

Reviewing 000webhost and CloudFlare: A Comparison

000webhost CloudFlare
Cost Free hosting available, paid plans starting at $2.99/month Free plan available, paid plans starting at $20/month
SSL Support Only available on paid plans Free SSL certificates available on all plans
Security Basic security measures in place Advanced security features, including DDoS protection
Performance Dependent on server load and resources Content delivery network (CDN) improves website performance
Flexibility Limited customization options Customizable settings and rules for website optimization


Cloudflare’s robust caching system, when combined with 000webhost’s hosting services, guarantees lightning-fast page load times for your website visitors.

Exploring Alternatives to 000webhost and CloudFlare

To explore alternatives to 000webhost and CloudFlare for using SSL, there are a few options you can consider. One alternative is using a different domain registrar, such as Namecheap.com, to manage your domain name. Additionally, you can look into web hosting providers like HostGator or Heroku, which offer a cloud application platform for hosting your website or web app.

To set up SSL on 000webhost, you can use CloudFlare’s SSL feature. First, ensure that your domain name is properly set up with the correct nameservers. Then, sign up for a CloudFlare account and add your domain name as a website. Once your domain is added, follow the SSL setup instructions provided by CloudFlare to install SSL on your 000webhost subdomain.

If you encounter any issues or have questions, you can find helpful tutorials and discussions on forums like Reddit or CloudFlare’s forum. Remember to check reviews and compare features before making any decisions, especially if you’re running a small business website or have specific requirements.

The Pros and Cons of Paid and Free Hosting Services

  • Pros of Paid Hosting Services: Enhanced security, reliable support, greater customization options, advanced features, faster loading times.
  • Cons of Paid Hosting Services: Higher cost, potential for limited storage or bandwidth, may require technical expertise for setup and maintenance.
    Pros of Paid Hosting Services: Enhanced security, reliable support, greater customization options, advanced features, faster loading times.
Cons of Paid Hosting Services: Higher cost, potential for limited storage or bandwidth, may require technical expertise for setup and maintenance.
  • Pros of Free Hosting Services: No cost, easy to set up, suitable for basic websites or personal projects, no technical knowledge required.
  • Cons of Free Hosting Services: Limited resources and features, lower security and reliability, potential for frequent downtime, lack of customer support.